How to install SAP BODS - Standalone
This article is a step by step guide on how to install and configure standalone SAP BODS Batch Job Server, Client Components, Web based Administrative Console.
SAP BusinessObjects Data Services Setup Guide
Follow the instructions below on how to setup SAP BusinessObjects Data Services:
- After having the licensed version of SAP BODS XI, Click the installation icon "setup.exe" to launch installer.
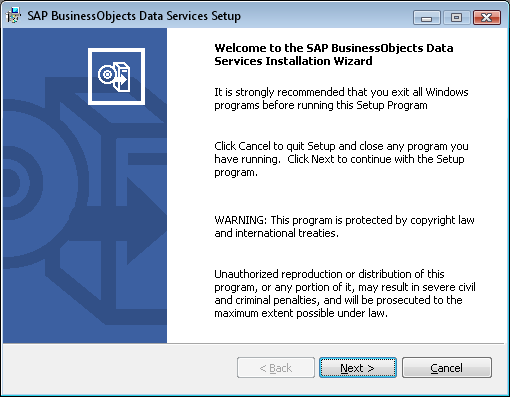
- Click Next
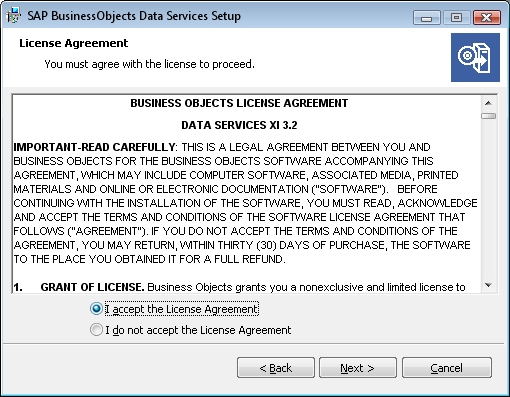
- Check the option "I accept the License Agreement" and Click the Next button.
- Click on the Next button and provide the license information as provided by SAP.
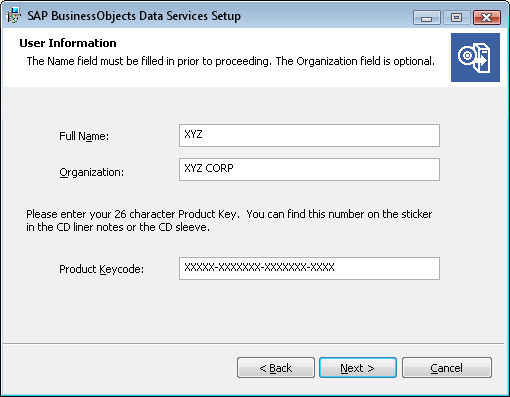
- Full Name: XYZ.
- Organisation: XYZ CORP.
- Product Key: SAP Provided License Information.
- Click Next button to continue.
- Change the software installation directory to D:\Business Objects\BusinessObjects Data Services\
You can install in any local directory of your choice and also on SAN drive.
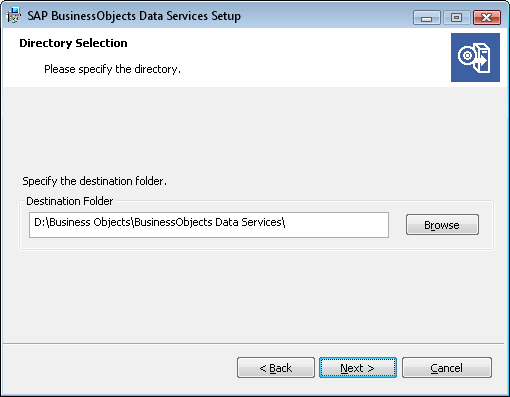
- Click the Next button.
- Select the features to install.
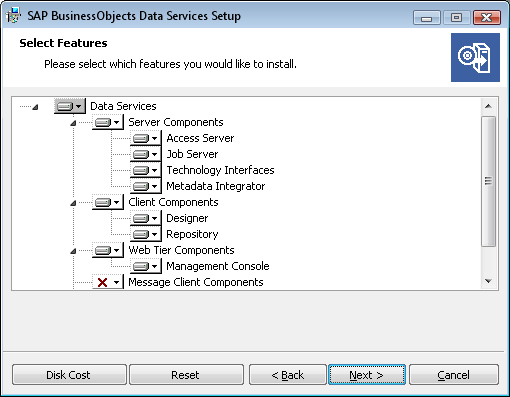
By default the server, client and web components are selected.
Real time services i.e. Message Client Components are not available in this license copy.
- Click the Next button to continue.
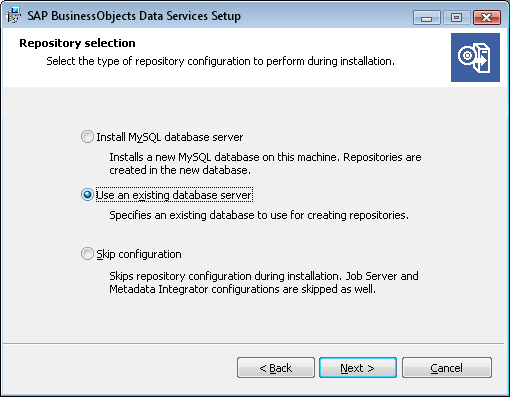
- Select the option Use an existing database server.
- Click the Next button to continue.
- Provide the pre configured database connection information. (MSSQL Server in this case)
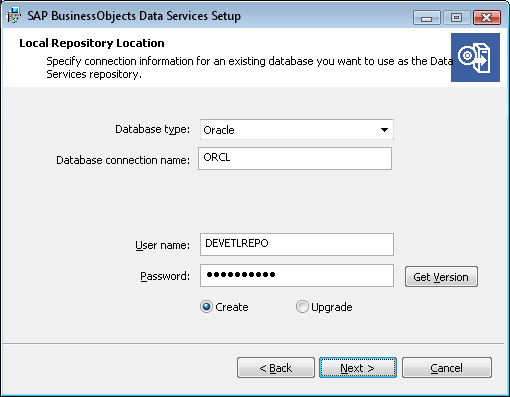
- Database Type: Microsoft SQL Server
- Database Server Name: EDWDEVETL
- Database Name: DEVETLREPO
- User name: DEVETLREPO
- Password:
- Click on the button Get Version to check whether the service can connect to database.
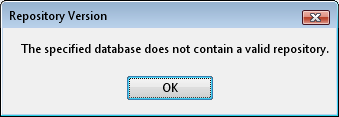
- Click the Ok button.
- Next check the Create option and click the Next button to continue.
This will create local metadata repository of SAP BODS.
- Click the Next button to configure the Job Server.
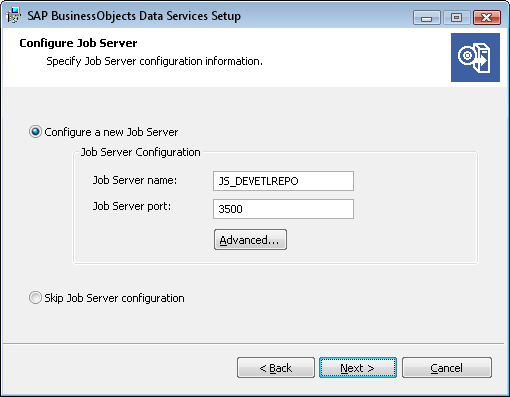
- Check the option - Configure a new Job Server
- Job Server name: JS_DEVETLREPO
- Job Server port: 3500
- Next click on the Advanced button, to change Cache Directory for this job server.
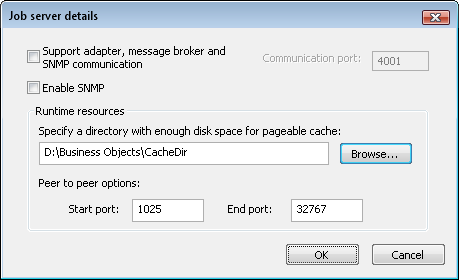
- Change the Cache folder as D:\Business Objects\CacheDir
- Leave the ports as default. Click the OK button.
- Click the Next button to continue with the Service Login Information.
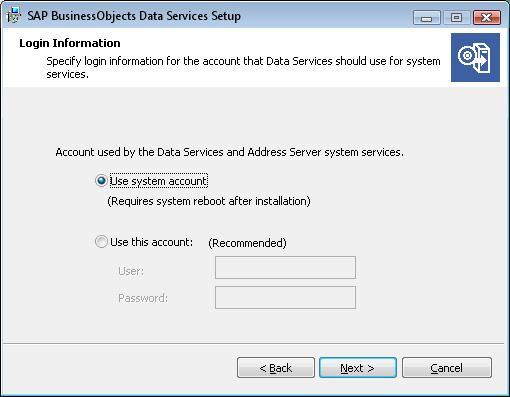
- Check the option Use system account and click the Next button to continue.
BODS services namely BOE120Tomcat, DI_JOBSERVICE and will be created under this system account.
- Click Next to Continue.
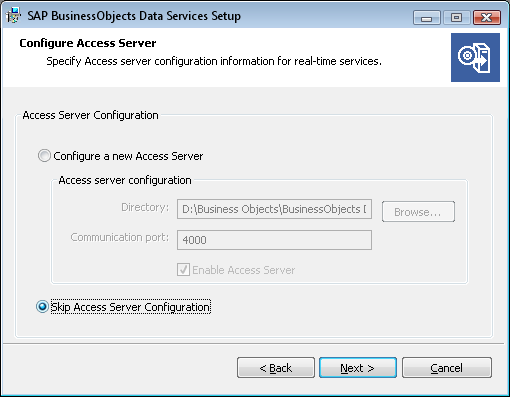
- Next check the option Skip Access Server Configuration and click the Next button to continue. Since we are not using Real Time Data Services we skip this configuration step.
- Click Next to install the web application server.
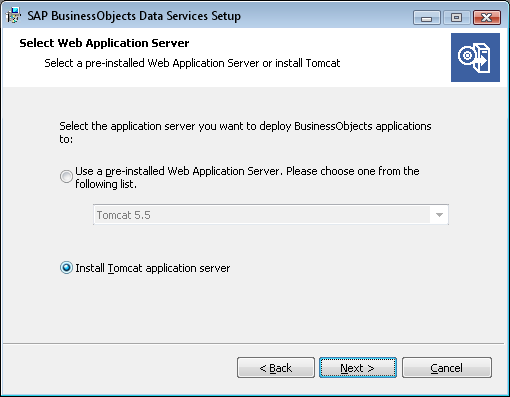
- Check the option Install Tomcat application server and click the Next button to continue.
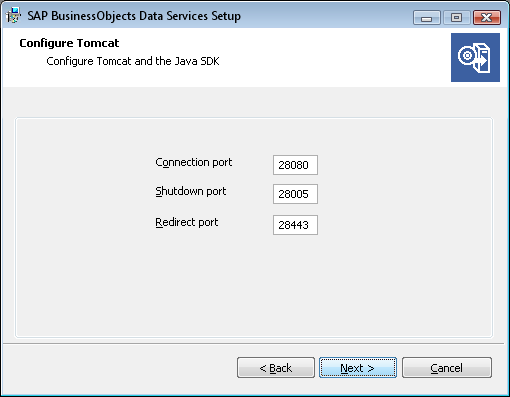
- Leave the ports as default and click the Next button to continue installation.
This tomcat web application server will host the Data Services web based management console.
- Click Next to finalize the installation. The list of programs and services to be installed are displayed.
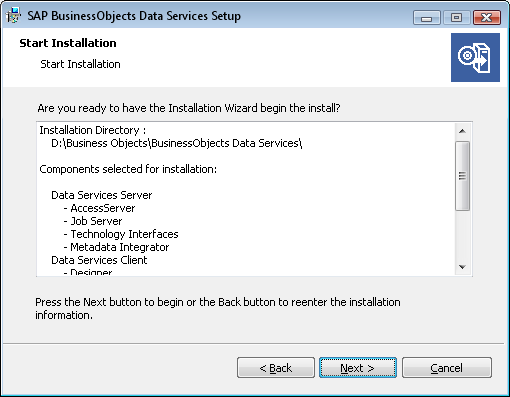
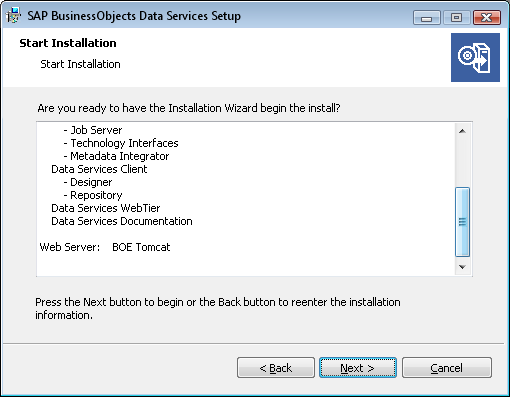
- Click the Next button to start the SAP BODS installation.
After successful installation of SAP Business Objects Data Services reboot to reflect configuration changes.
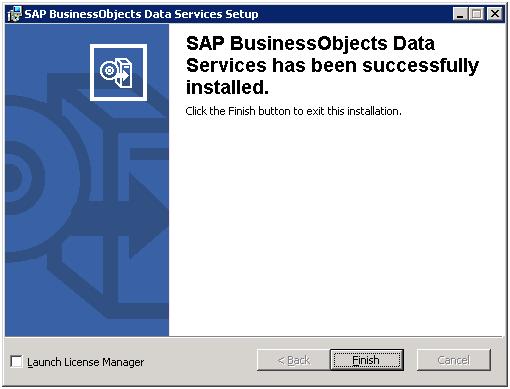
- Click Finish to exit installation.
- Next Restart the System to configure BODS installation.
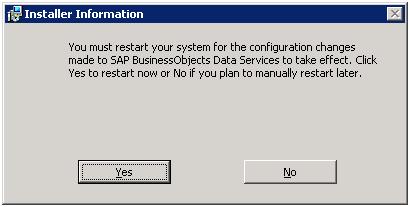
- Click Yes.
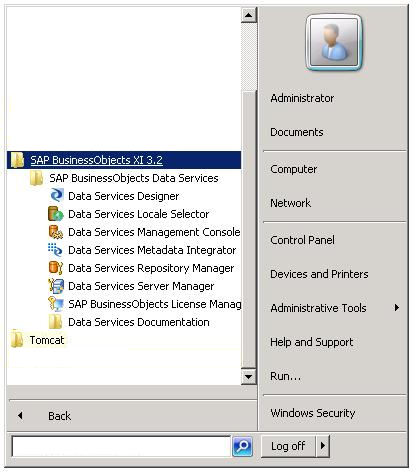
After machine restart do the initial validation to check the SAP BODS Services and Programs installed.
- Click Start then All Programs, next check the SAP BODS Installed programs.
In this part of the article, we will see how to change the default Log file directory of SAP BODS, Create Local, Central (Secured version control for multi-user environment) and Profiler (Data profile) repositories, Configure Job Server, Configuring DS Management Console, Add/Remove license information and Configuring SAP BODS Metadata Integrator with SAP BOXI.
BODS Directory Structure
BODS automatically creates an environment variable, called LINK_DIR which points to the root folder where BODS is installed. In our case, this root folder is:
LINK_DIR="D:\Business Objects\BusinessObjects Data Services"For the sake of future conveniences and logical grouping, we may also create the following directory structure for SAP BODS.
Custom Directory Structure for BODS
Cache: "D:\Business Objects\CacheDir"
Log: "D:\Business Objects\LogDir"
Scripts: "D:\Business Objects\ParamDir"
Target Files: "D:\Business Objects\TgtFiles"
Source Files: "D:\Business Objects\SrcFiles"
Separating the directories in the above fashion, makes it easy for us to quickly access them later.
We need to create the folders in windows and use them for the purpose defined above. For example to point the source or target file to proper directory either enter the directory path in the Root directory option of the File Format or you can also use Substitution Parameters for each environment.
Changing default location of BODS Log Directory
For BODS Log files, the default log directory is :
D:\Business Objects\BusinessObjects Data Services\logBut you may change the default log directory location to some other folder, eg. the below folder for quicker access:
D:\Business Objects\LogDirIn order to do this, Open the file DSConfig.txt in the location:
D:\Business Objects\BusinessObjects Data Services\bin\DSConfig.txt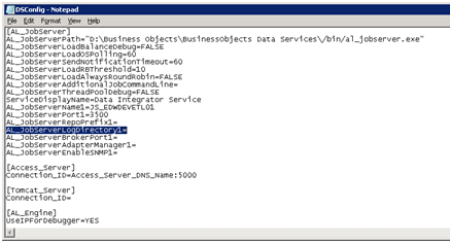
Modify the line
AL_JobServerLogDirectory1=As below
AL_JobServerLogDirectory1=log
AL_JobServerLogReDir1=D:\Business Objects\LogDir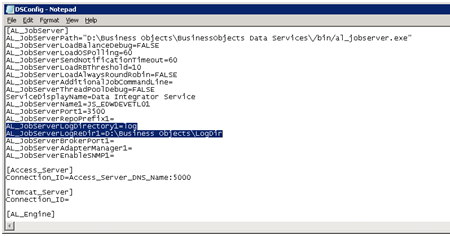
Next Restart the BODS Job Server or BODS Services and you are done.
Create SAP BODS Local Repository
Businessobjects Data Services(SAP BODS) solutions are built over 2 different types of meta-data repositories called central and local repository. While the local repositories can be used by the individual ETL developers to store the metadata pertaining to their ETL codes, the central repository is used to "check in" the individual work and maintain a single version of truth for the configuration items (e.g. ETL code). Without the necessity of installation of the additional modules, it supports the team work in the ETL projects. The central repository allows adding tested scripts and then import them to local repositories or check them out and open them in exclusion mode. Versioning is also fully supported.
Go to SAP BODS Repository Manager and enter the following information to configure the Local Repository:
- Repository type: Local
- Database type: Oracle (or whatever database you are using)
- Database connection name: ORCL
- User name: DEVETLREPO_L1
- Password: (specify password here)
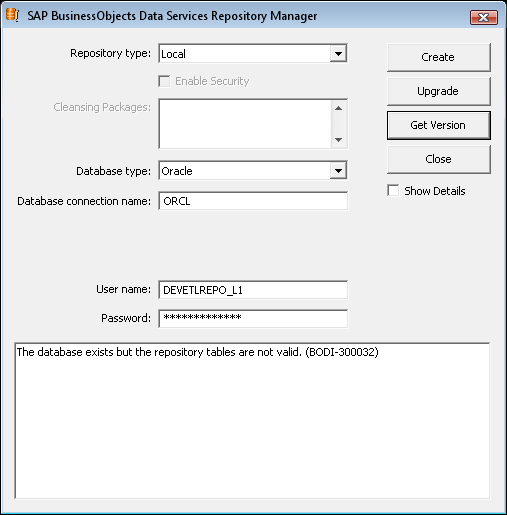
Click on Get Version button, first to check it is able to connect to database.
Next Click on Create button to create the metadata tables.
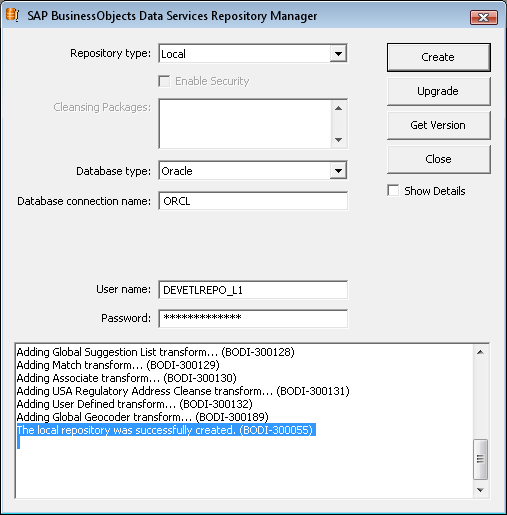
Local Repository was successfully created.
How to Create SAP BODS Secured Central Repository
As discussed in the previous page, Businessobjects Data Services (SAP BODS) solutions are built based on a central repository which is independent from the local repositories of the ETL developers. The central repository, among other things, supports the team work in the ETL projects. Versioning is also supported. Here is how to configure the central repository.
Go to SAP BODS Repository Manager and enter the following information to configure the metadata of the Central Repository:
- Repository type: Central
- Check Enable Security
- Database type: Oracle (or whatever database you are using)
- Database server name: EDWDEVETL
- Database connection name: ORCL
- User name: DEVETLREPO_CENTRAL
- Password: (specify password here)
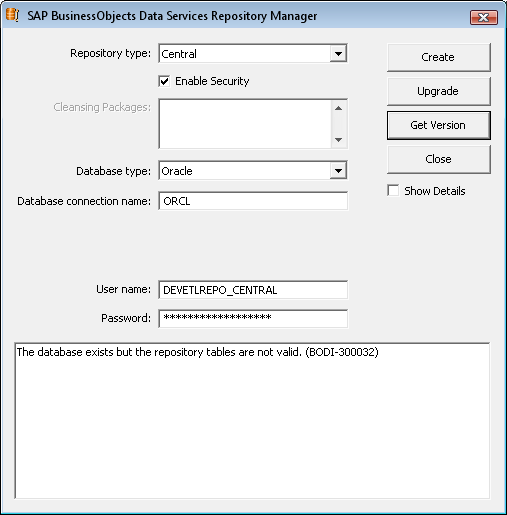
Click on Get Version button, first to check it is able to connect to database.
Next Click on Create button to create the metadata tables.

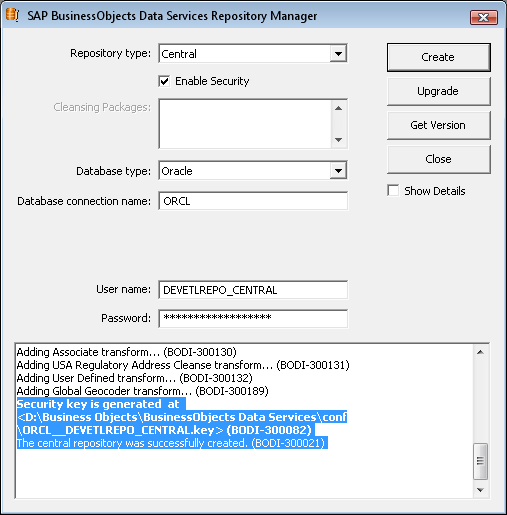
The above message shows that the Central Repository is successfully created.
Purpose of SAP BODS Central Repository
Central repository is used for the sole purpose of version control check-in and check-out functionality ideal for multi-user development environment. You cannot run the jobs or you cannot configure a job server to point to a central repository.
How to create SAP BODS Profiler Repository
A profiler repository is a special repository that contains the profiling information for the objects. Among other things, this repository stores the column level details including cardinality, max, min and Null values etc. A job server needs to be associated with the profiler repository. Next we will see how to configure a profiler repository. Go to SAP BODS Repository Manager and enter the following information to configure the metadata of the Profiler Repository:
- Repository type: Profiler
- Check Enable Security
- Database type: Oracle
- Database server name: EDWDEVETL
- Database connection name: ORCL
- User name: DEVETLREPO_PROFILER
- Password: (your password here)
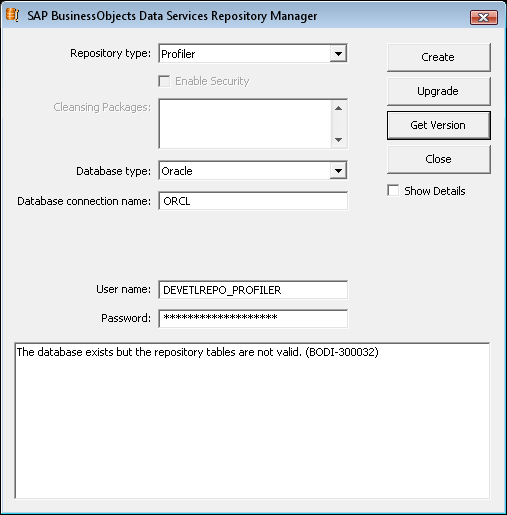
Click on Get Version button, first to check it is able to connect to database.
Next Click on Create button to create the metadata tables.
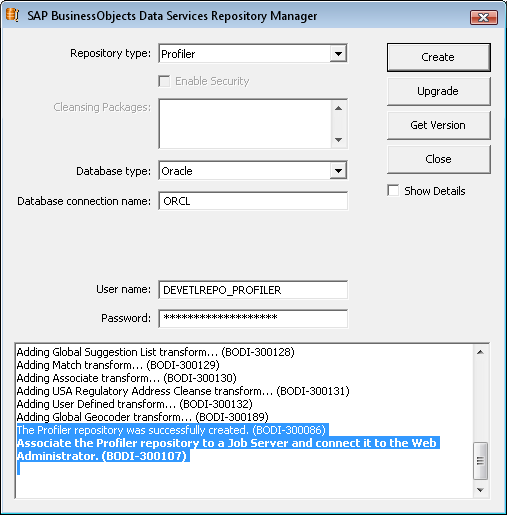
Profiler Repository was successfully created.
Purpose of SAP BODS Profiler Repository
Profile repository is used for the sole purpose of performing column level profiling of the DW tables. You must configure or associate a Job Server with the Profiler Repository.
How to Configure Job Server using DS Server Manager
You need to configure a Job server before you are able to execute data services ETL jobs. Job server needs to be configured on some local repository that you have already created. Here we will see how may we configure a BODS job server. Go to SAP BODS Server Manager.
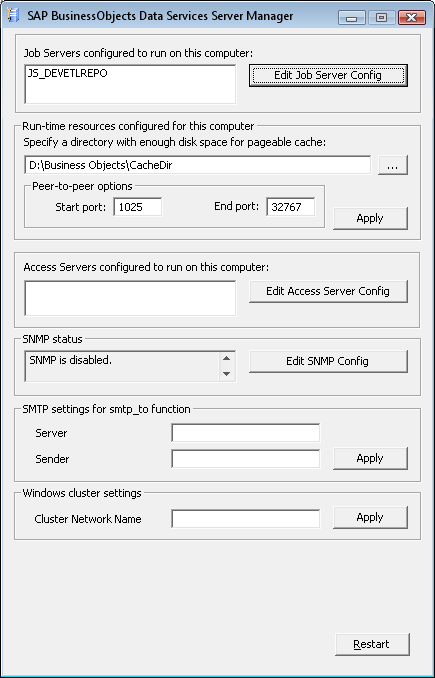
Click the button Edit Job Server Config.
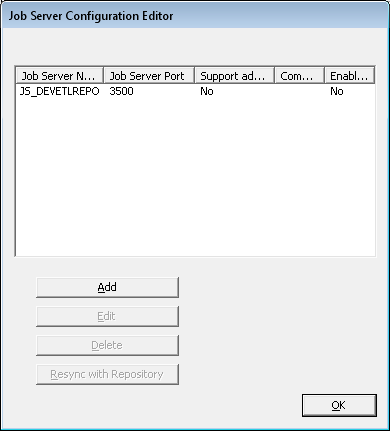
Click Add and enter the Name of the Job Server and associate it with the local repository.
- Job Server name: JS_DEVETLREPO_PROFILER
- Job Server port: 3501
Next click the Add button to associate the repository to the Job Server.
- Database type: Oracle
- Database connection name: ORCL
- Username: DEVETLREPO_PROFILER
- Password: (your password here)
Check the option Default repository.
Click Apply.
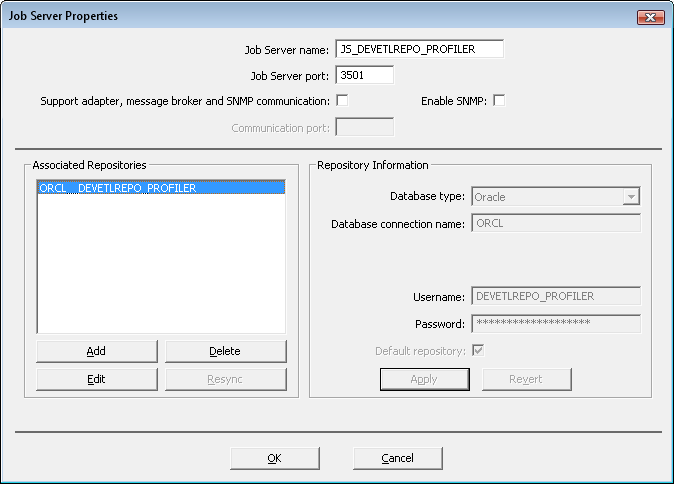
Next Click OK.
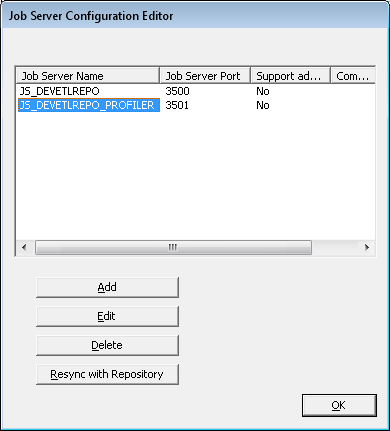
Next Click OK.
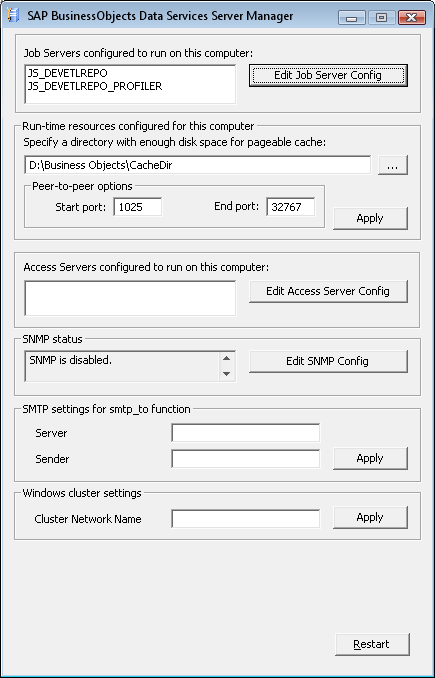
Next click Restart Button to restart BODS Services.
Next we will learn how to CONFIGURE SAP BODS MANAGEMENT CONSOLE.
How to Configure SAP BODS Management Console
Click on the Data Services Management Console. Login as admin/admin.
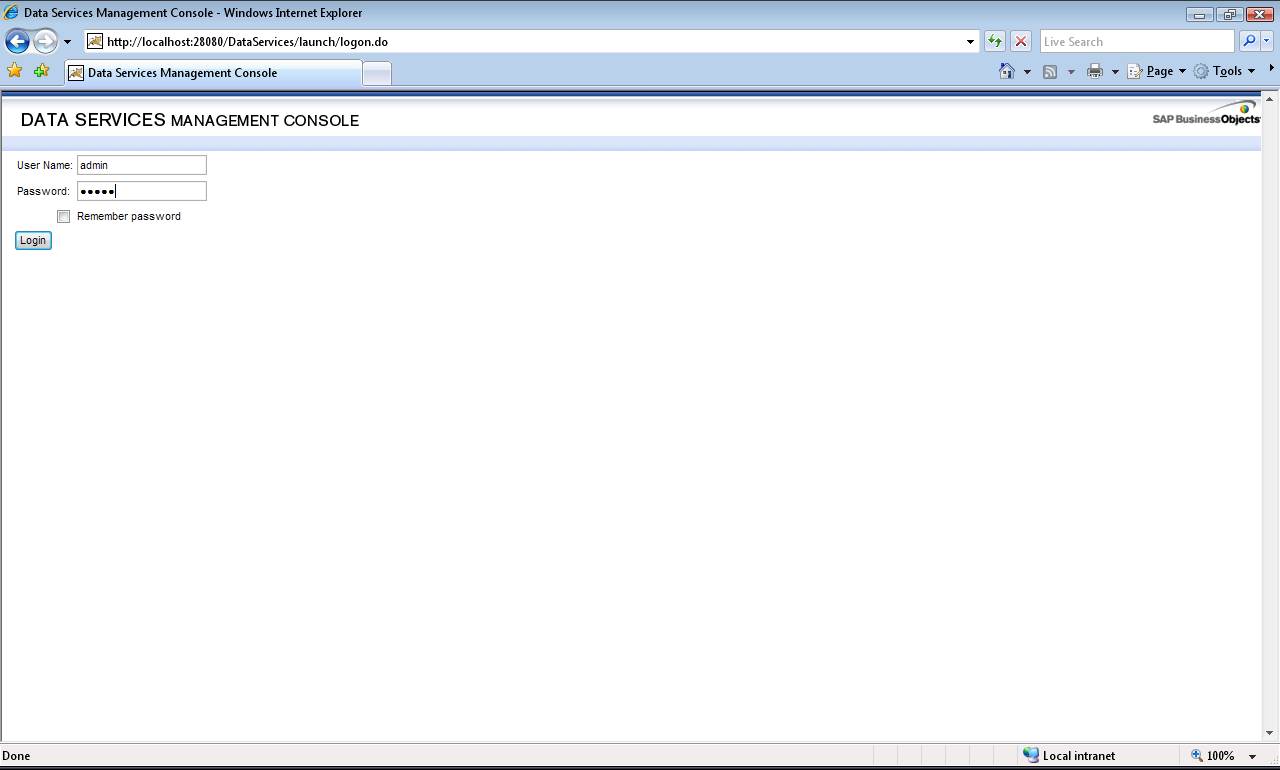
You will be greeted with the below screen once you login.
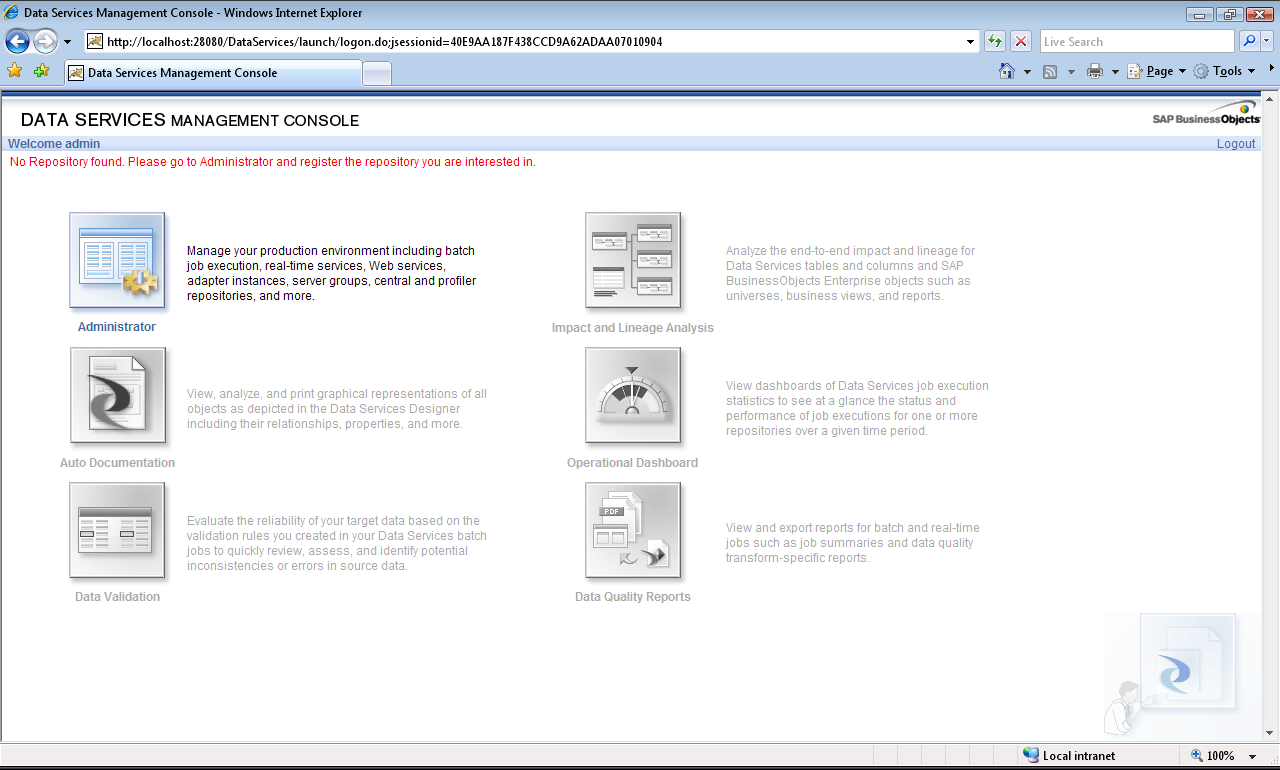
Next Click on Administrator to Register the Repositories. Following screen will appear. You may click on the image below to enlarge the same.
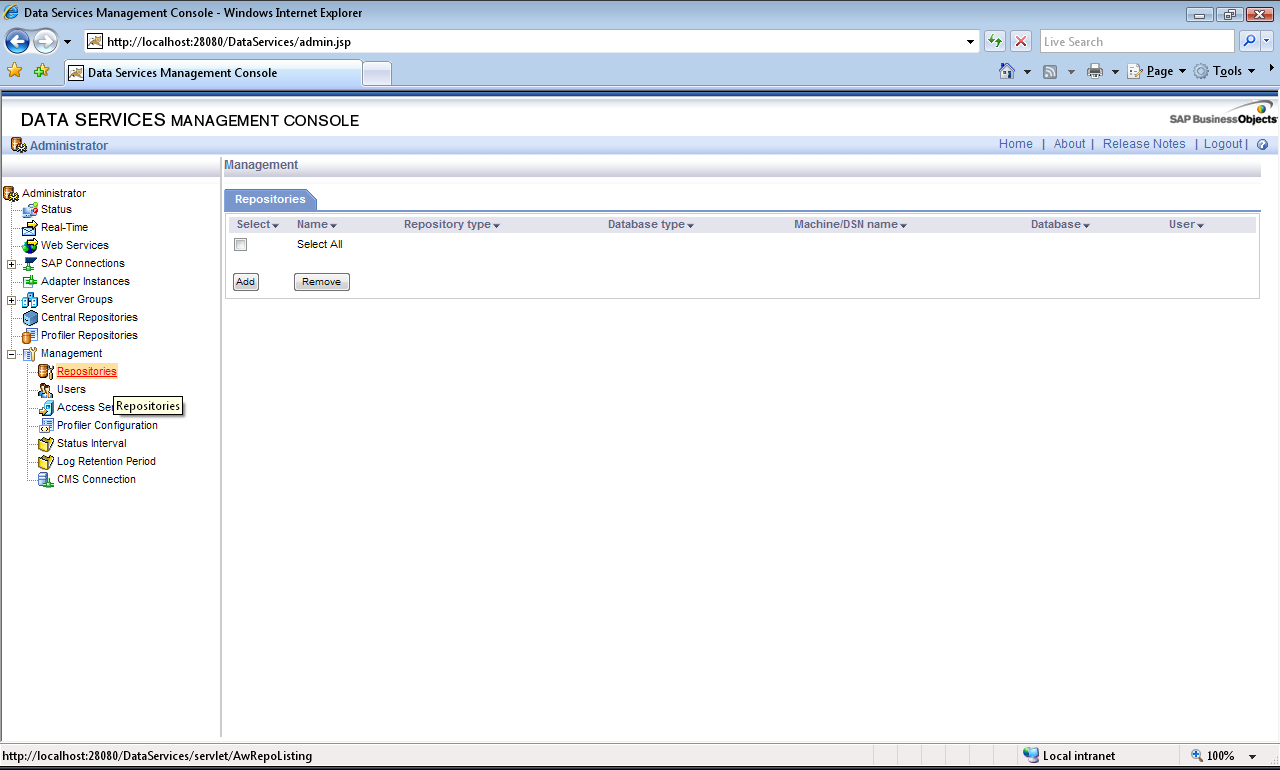
On the left hand pane Click on Management list item and then Click on Repositories.
Next Click the Add button to register a repository in management console.
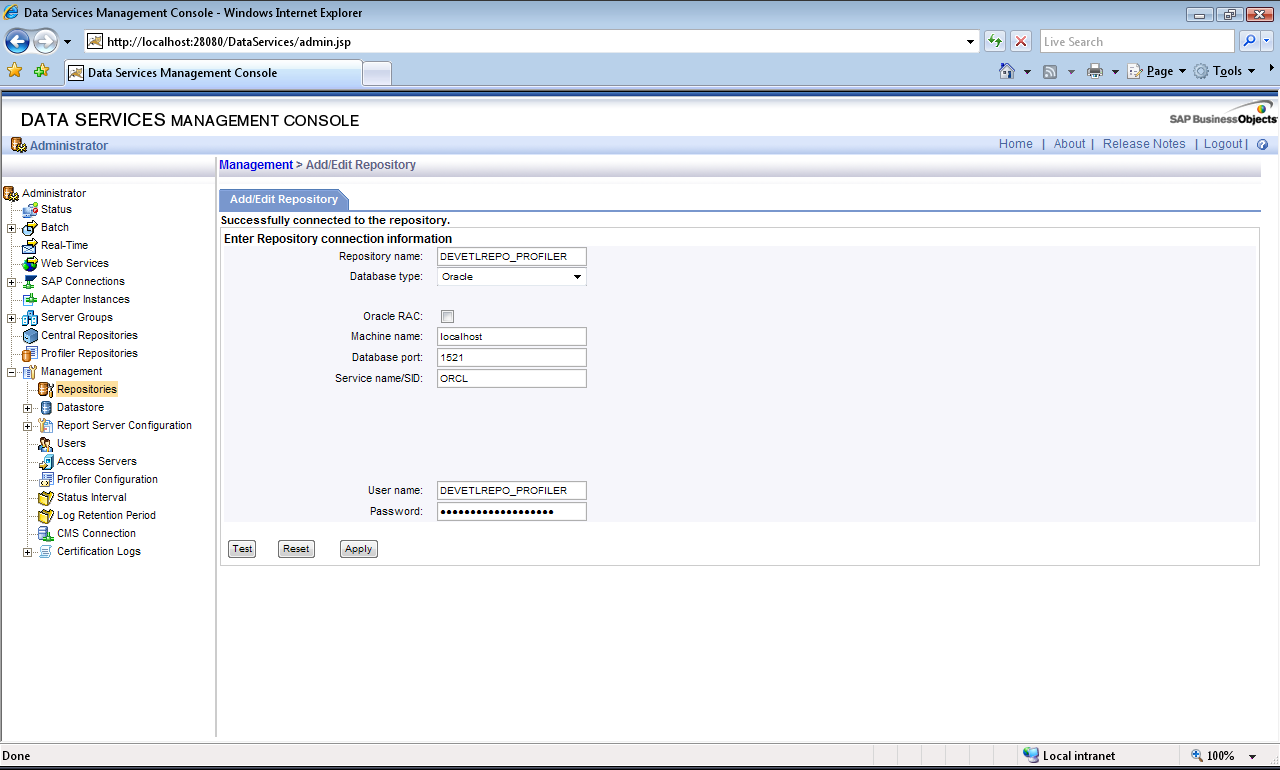
Enter the repository credentials.
- Repository name: DEVETLREPO
- Database type: Oracle
- Machine name: localhost
- Database port: 1521
- Service name/SID: ORCL
- User name: DEVETLREPO
- Password: (your password here)
Click Test.
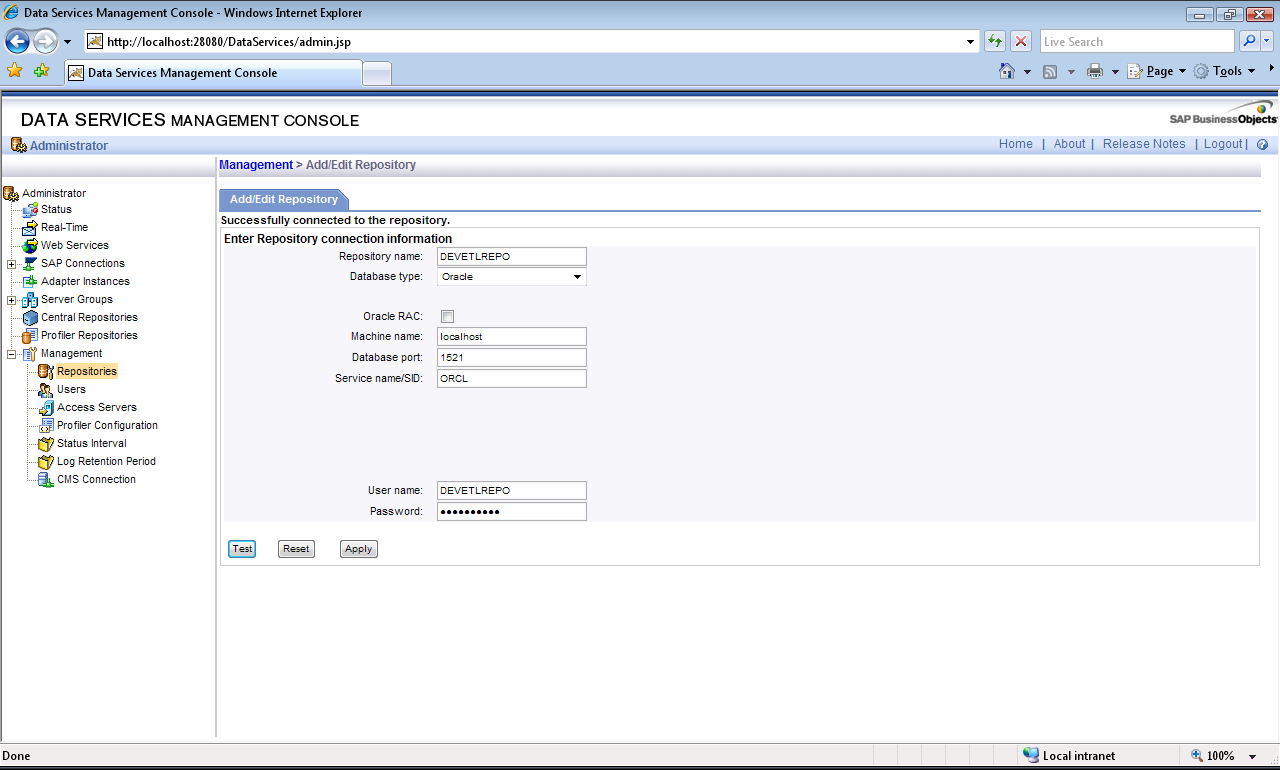
Click Apply.
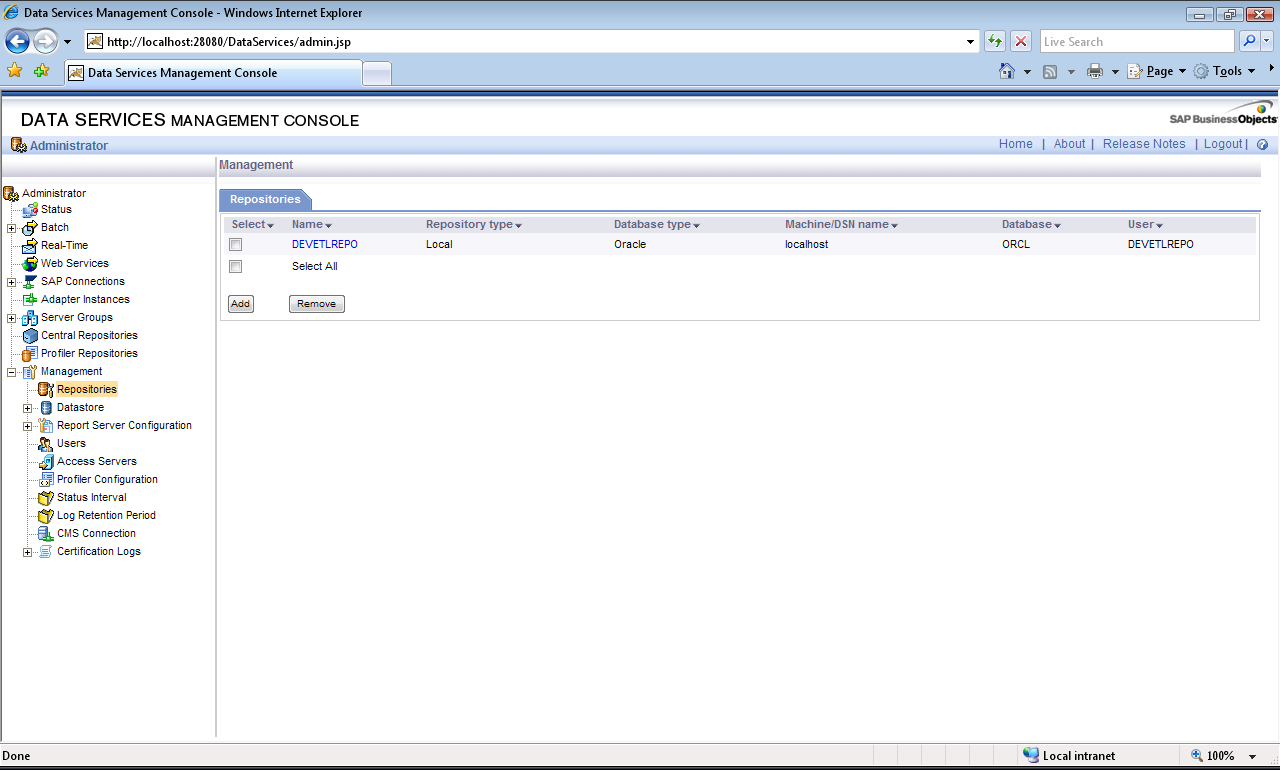
Next register the Profiler Repository as above mentioned steps.
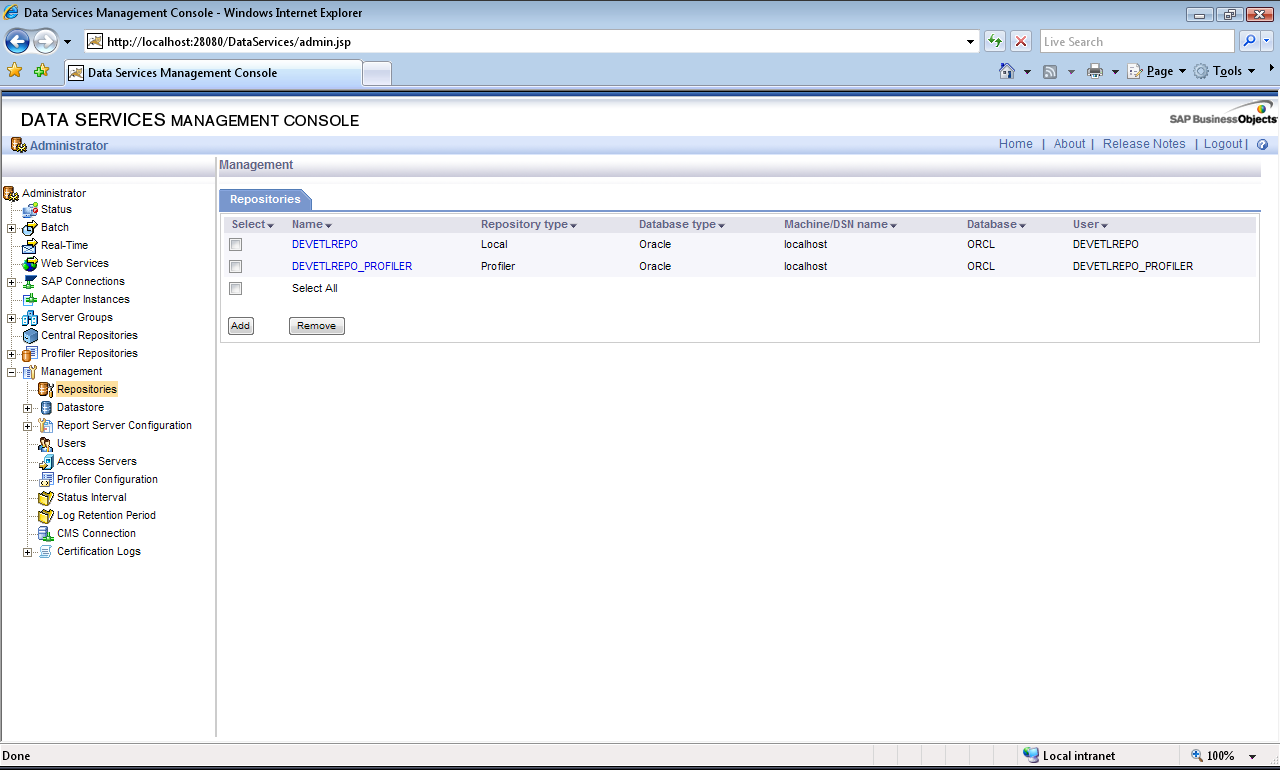
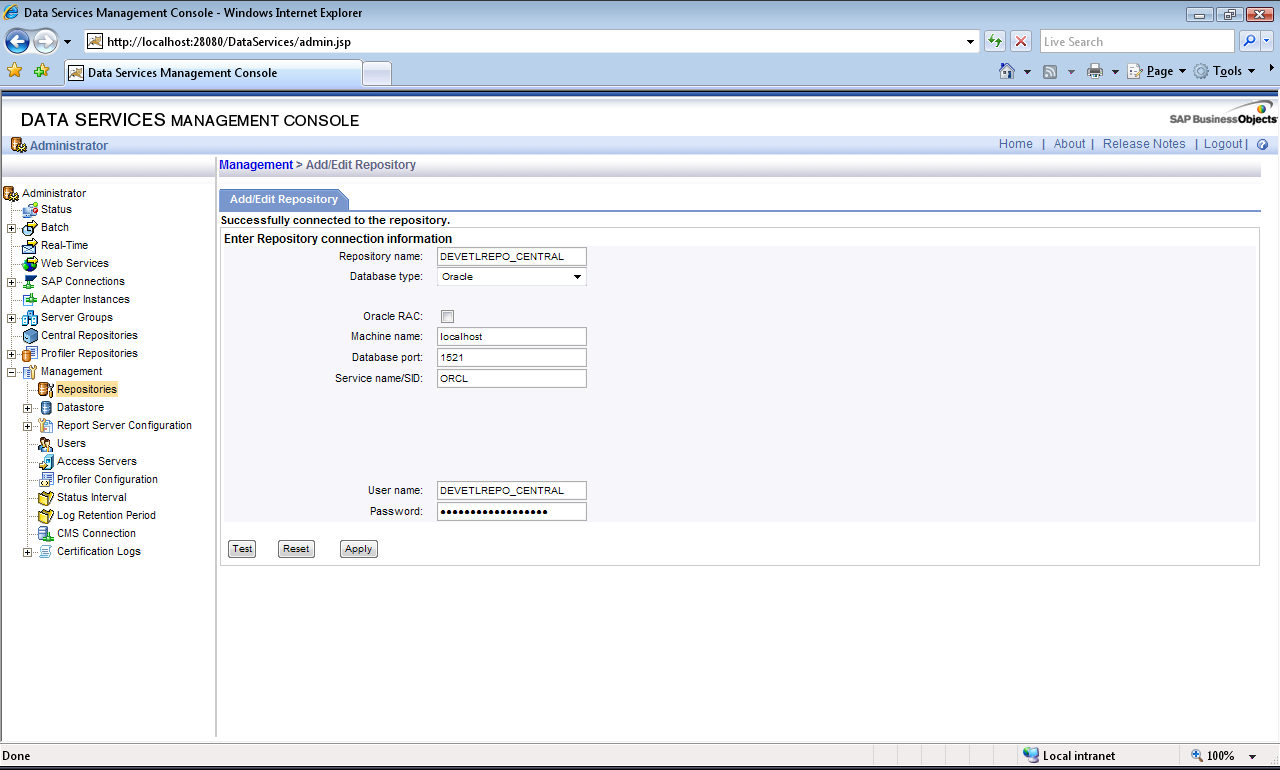
Similiarly add the Central Repository.
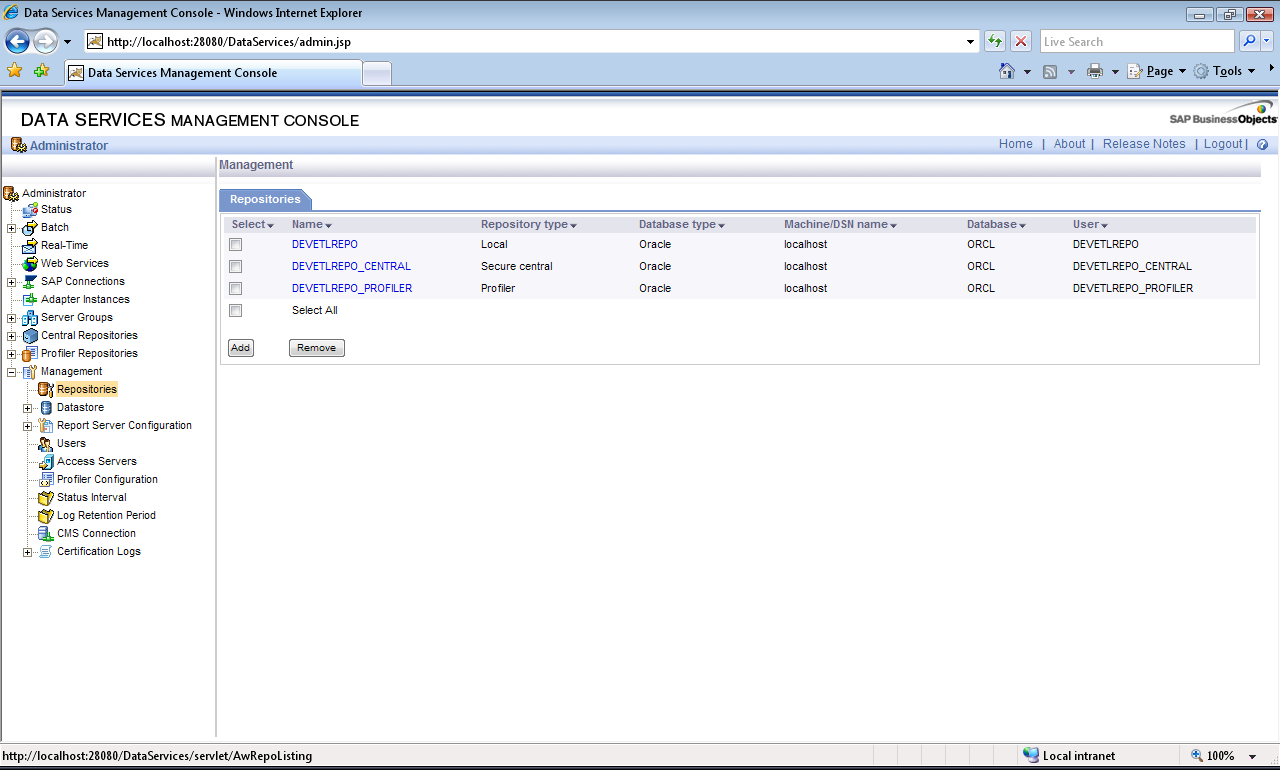
How to add Central Repository Users and Group in BODS
Go to Administrator, Central Repositories, DEVETLREPO_CENTRAL. Click on Users and Groups.
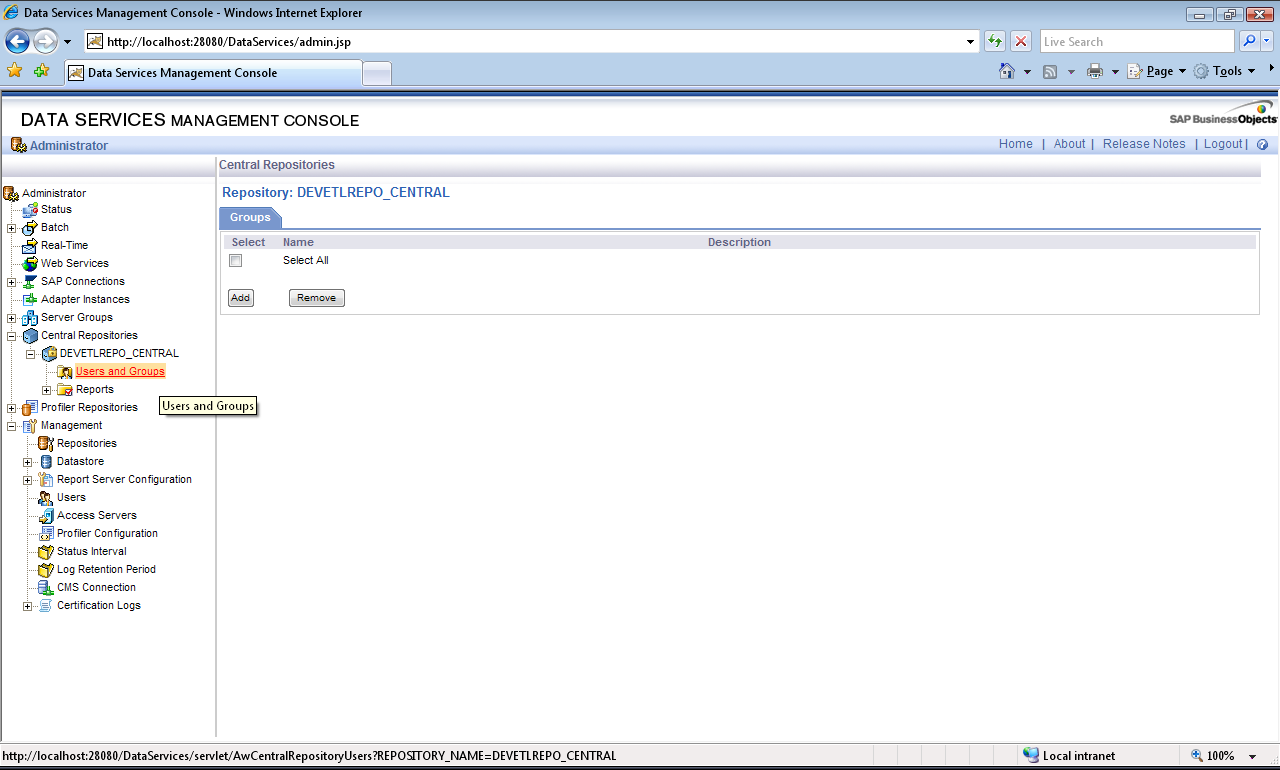
Click Add.
Enter Group Name as Grp_Central_Repo.
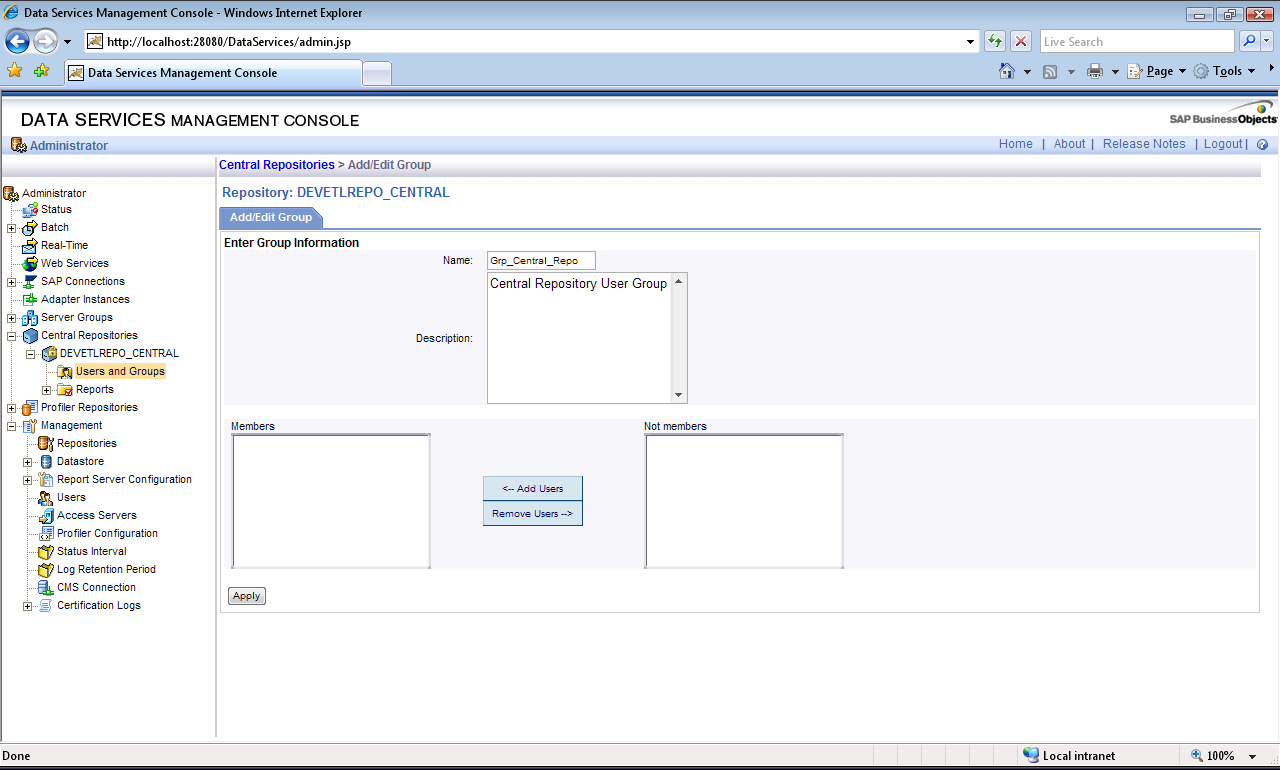
Next Click Apply.
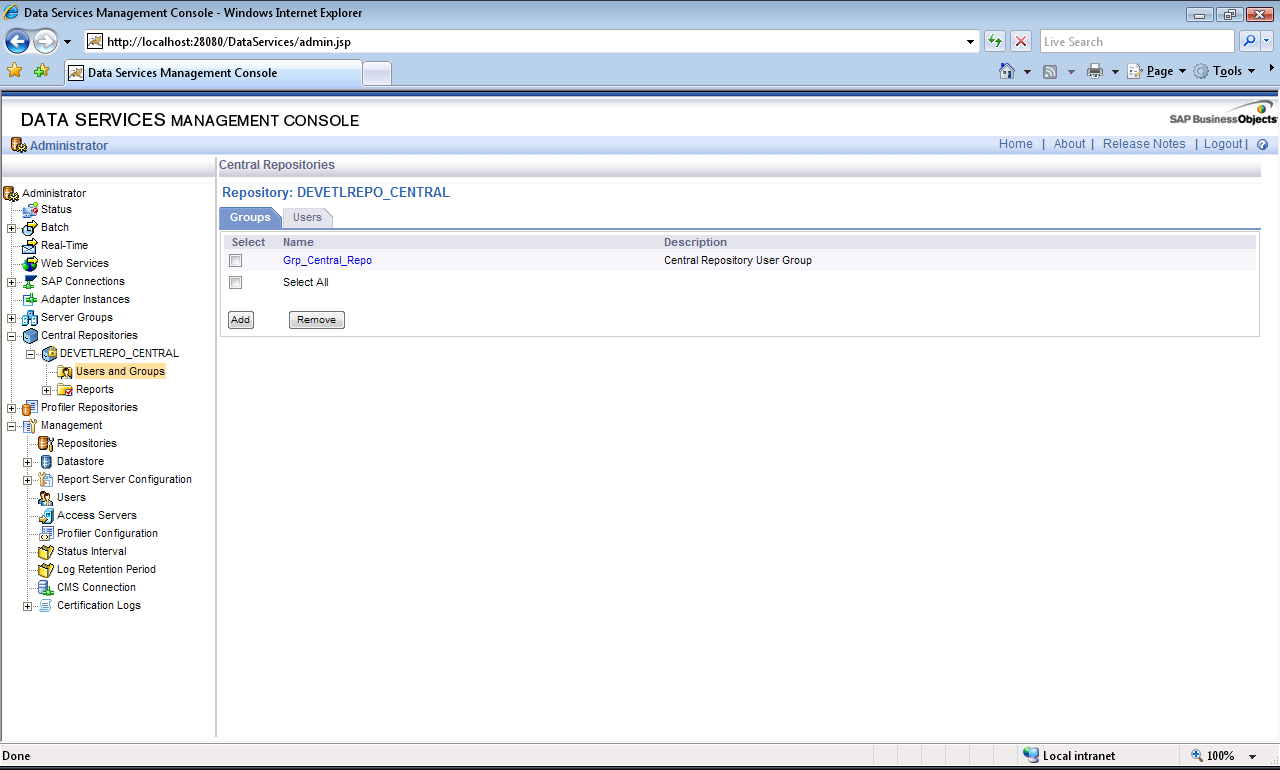
Next Click on the Users tab.
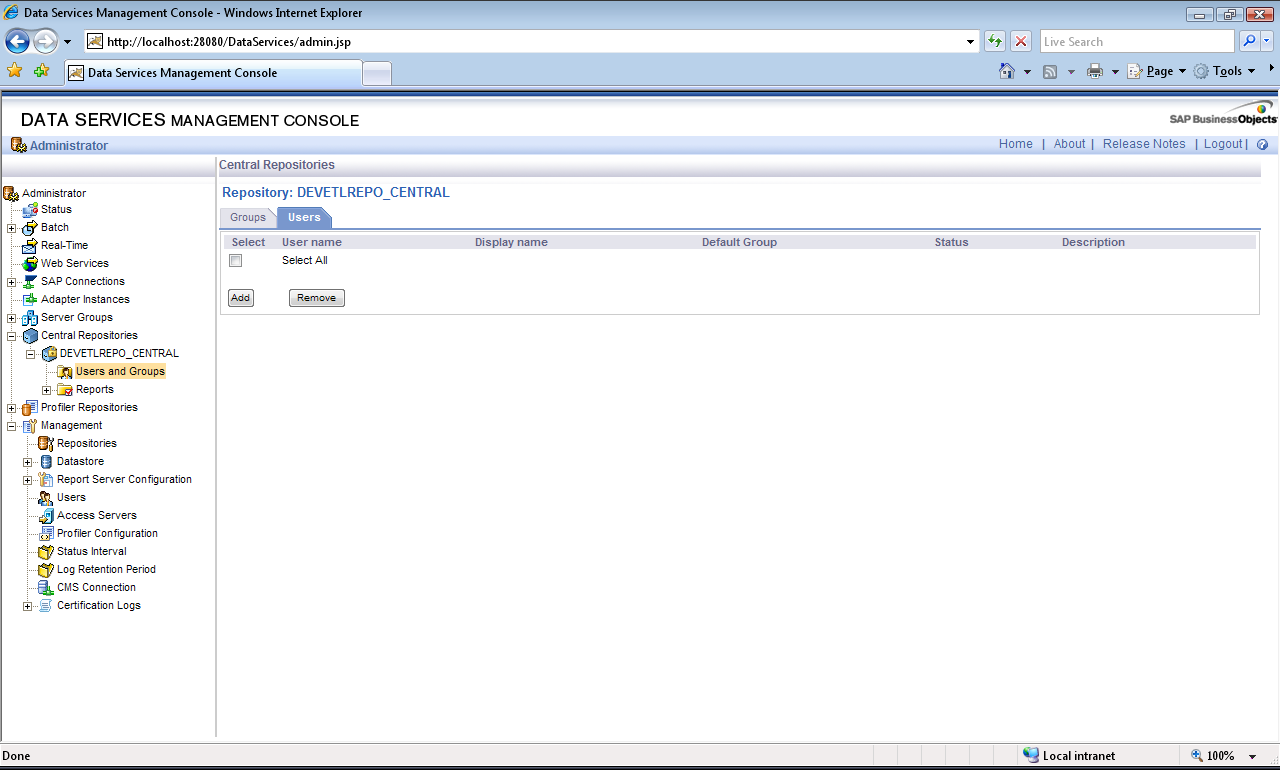
Click Add and then Enter the new user credentials.
- User name: DEVETLREPO_CENTRAL
- Enter Password and confirm password.
- Display name: DEVETLREPO_CENTRAL
- Default Group: Grp_Central_Repo
- Status: Active
- Member of: Grp_Central_Repo
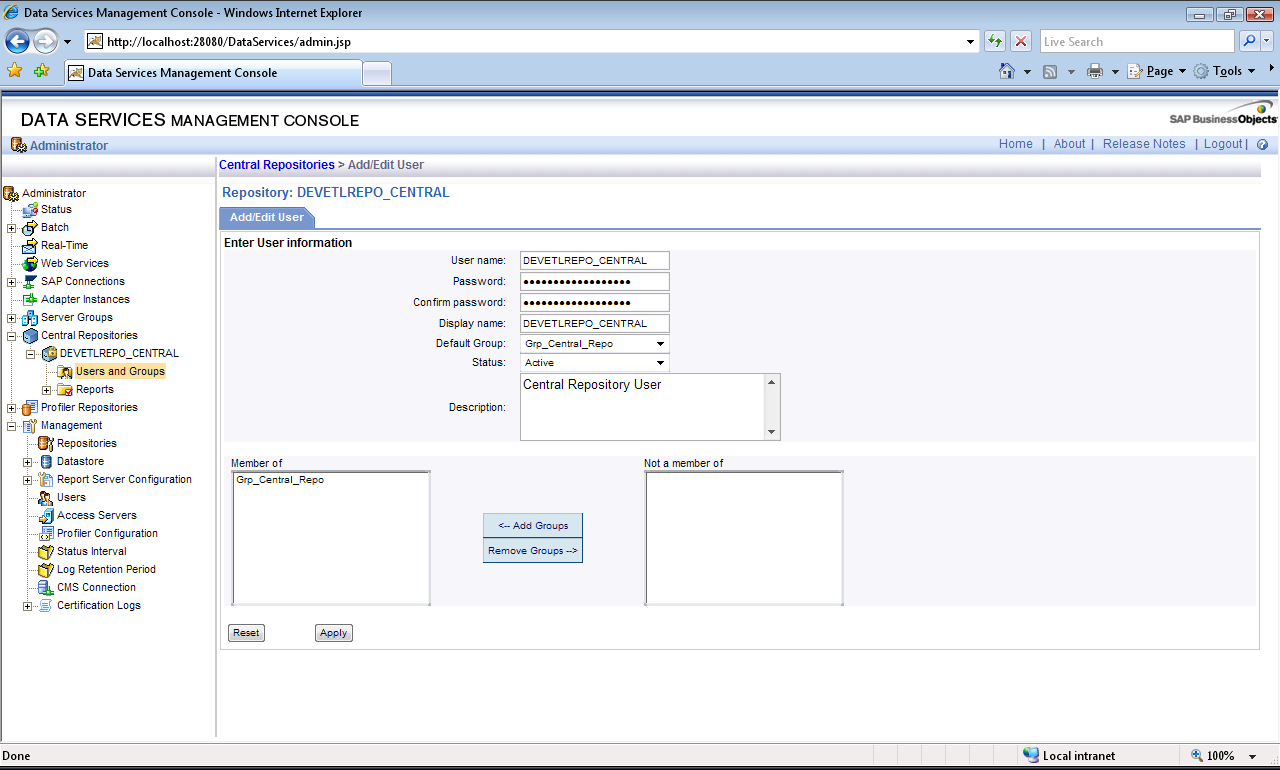
Click Apply.
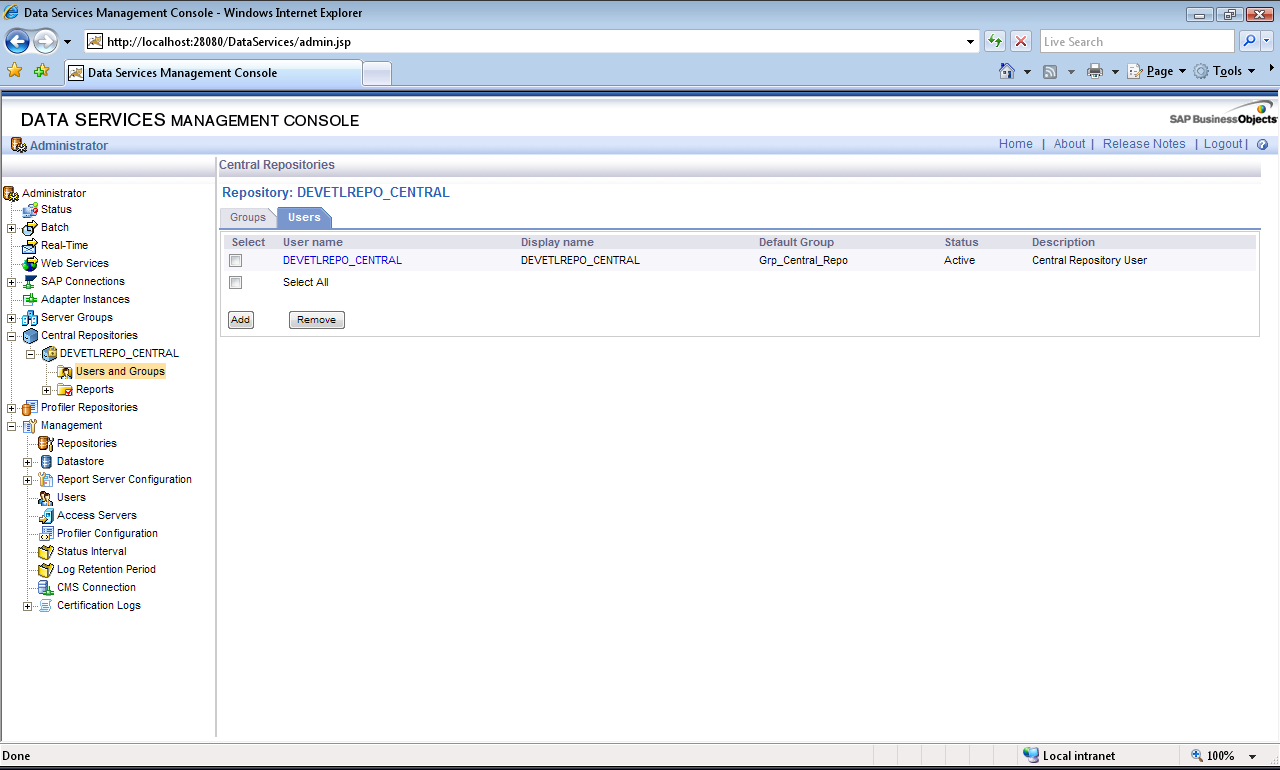
Next we will learn how to ADD PROFILER REPOSITORY USER
Go to Management, Users and Click the add button.
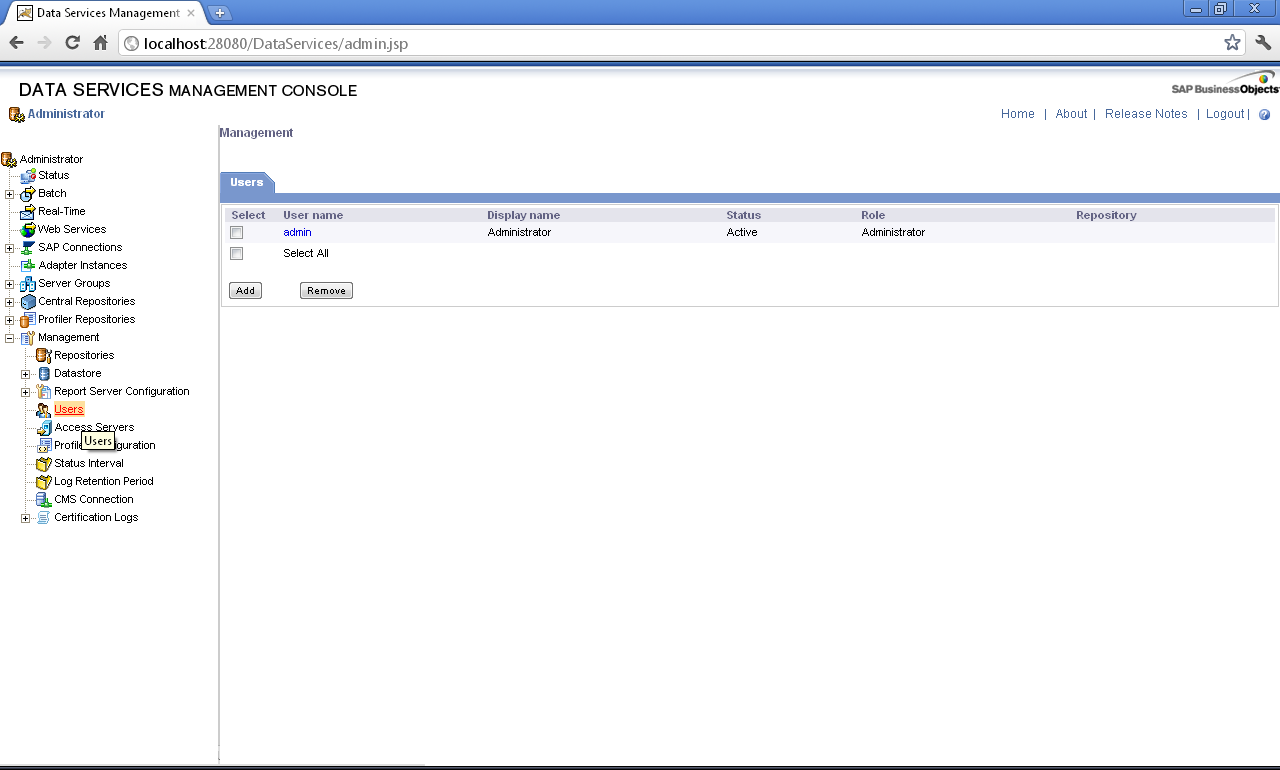
Next enter the Repository user credentials:
- User name: DEVETLREPO_PROFILER
- Enter Password and confirm password.
- Display name: DEVETLREPO_PROFILER
- Role: Profiler Administrator
- Status: Active
- Profiler Repository: DEVETLREPO_PROFILER
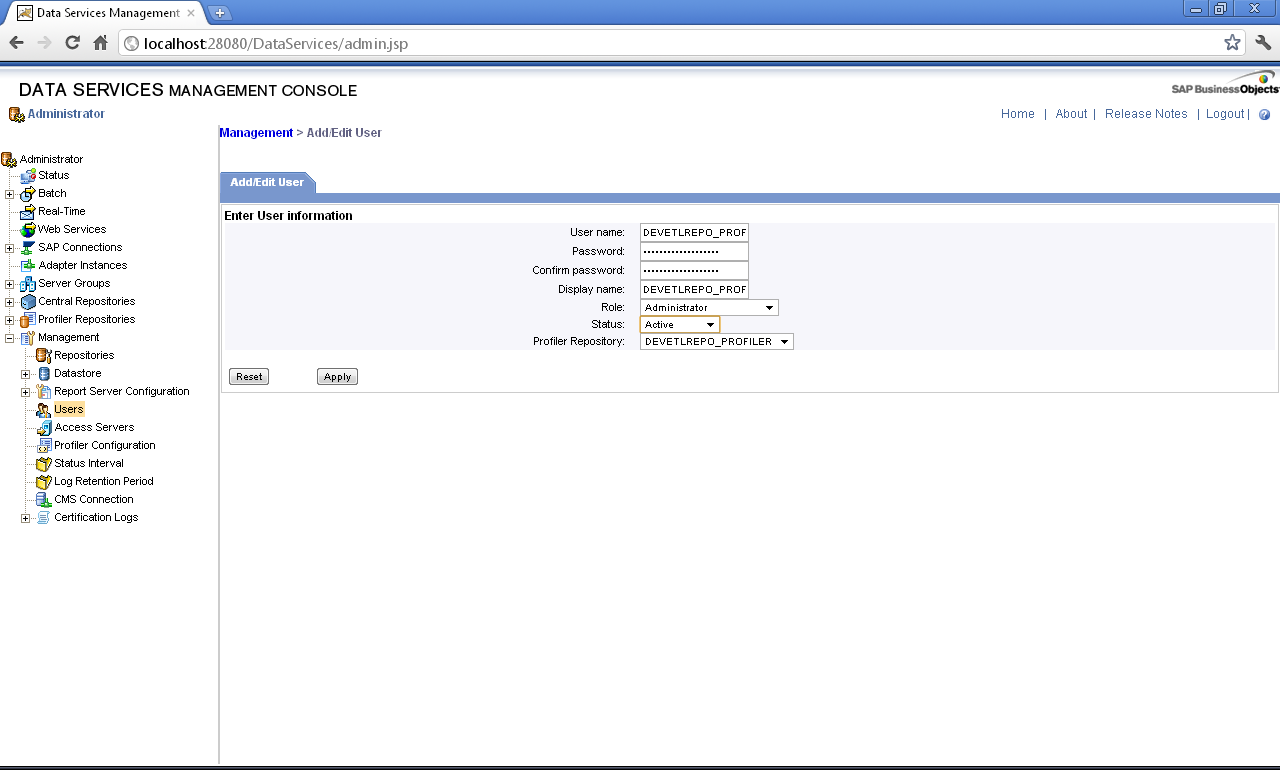
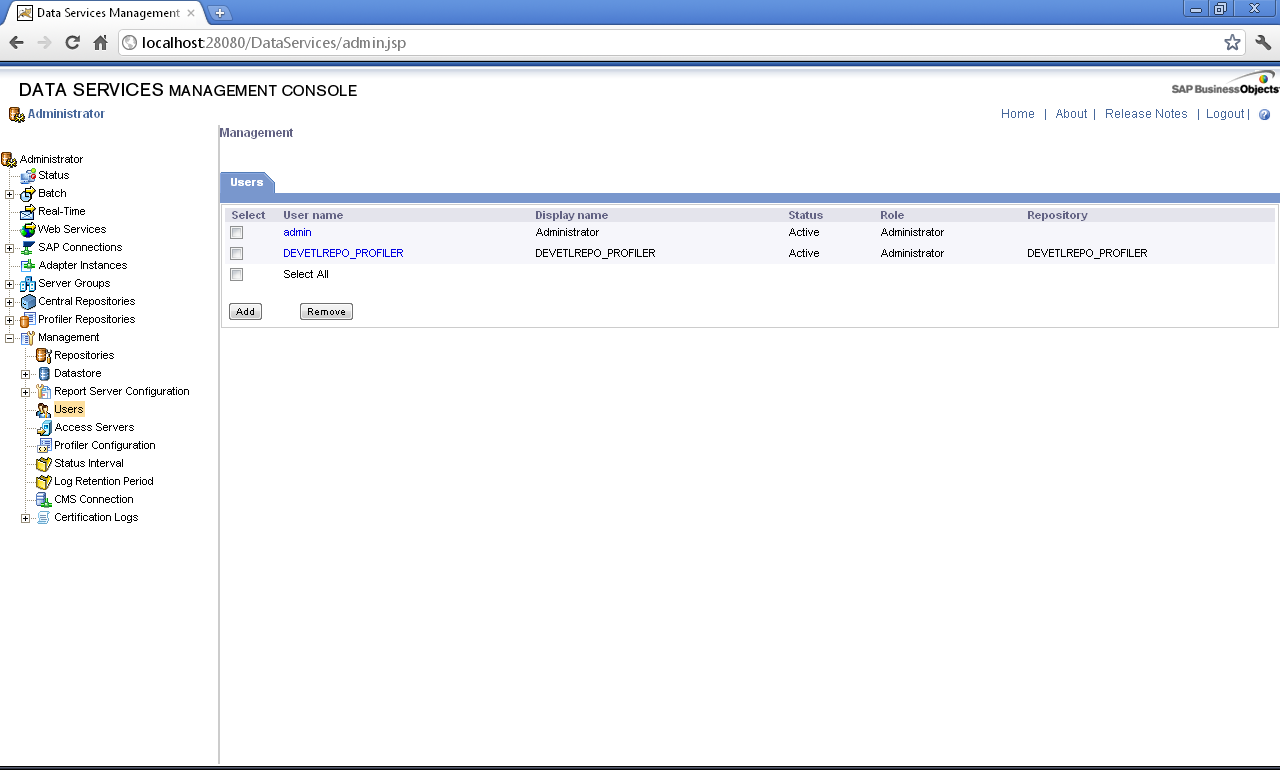
Now you will be able to connect to the Profiler Repository using this User.
BODS Designer
Login to the Local Repository we created earlier:
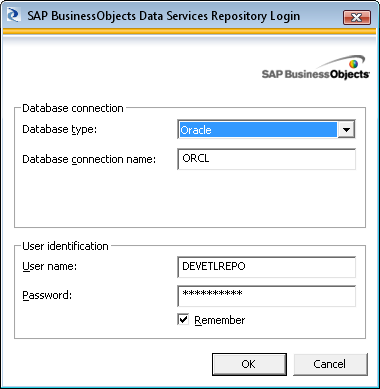
- Database type: Oracle
- Database connection name: ORCL
- User name: DEVETLREPO
- Password: (your password here)
Click OK, to login to local repository.
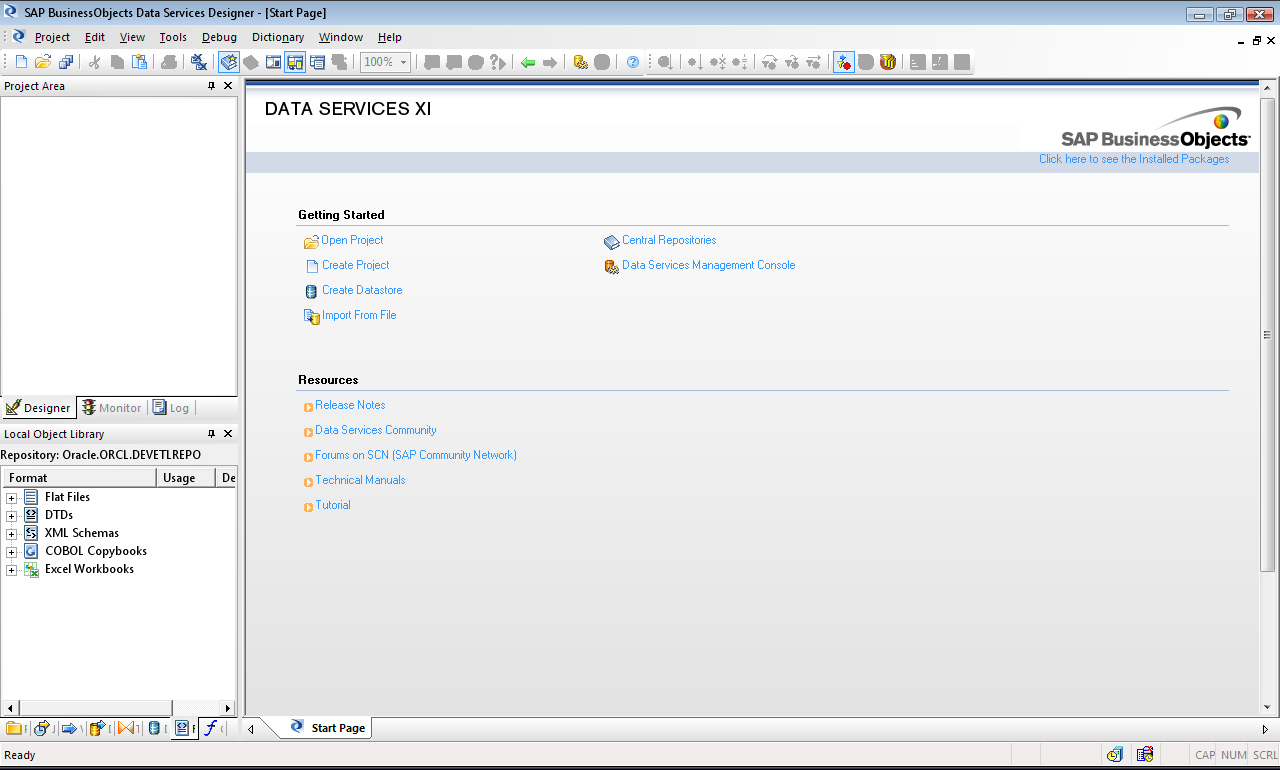
Next Check the JOB SERVER STATUS.
Look at the bottom right hand corner for job server symbol. On pointing the mouse it will show Job server JS_DEVETLREPO is running.
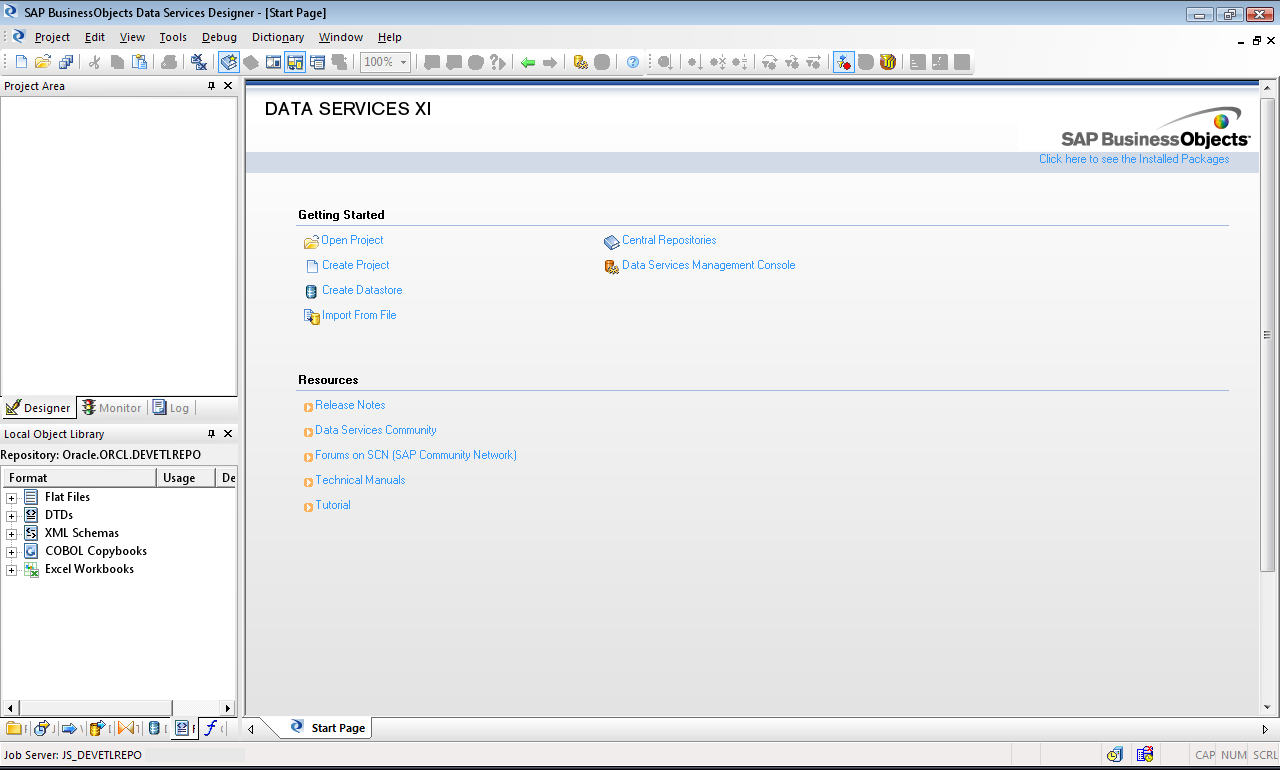
Next CONNECT TO PROFILER SERVER.
Look at the bottom right hand corner for Profiler Server symbol. On pointing the mouse it will show Profiler Server is not running. Double click the Profiler server, or go to Tools and click Profiler Server Login... to enter the login credentials.
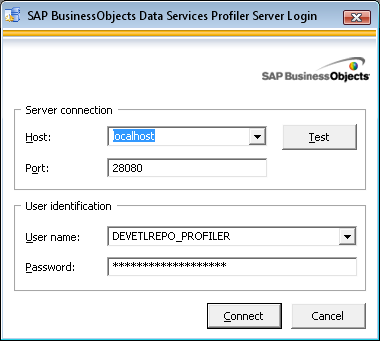
- Host: localhost
- Port: 28080
- User name: DEVETLREPO_PROFILER
- Password: (your password here)
Click on Test button.
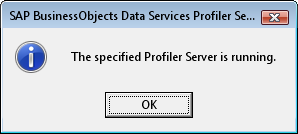
Next Click on Connect button.
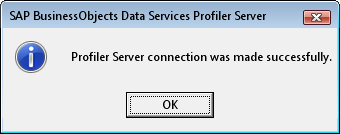
Now, on pointing the mouse to the Profiler Server will show the server running and the user connected.
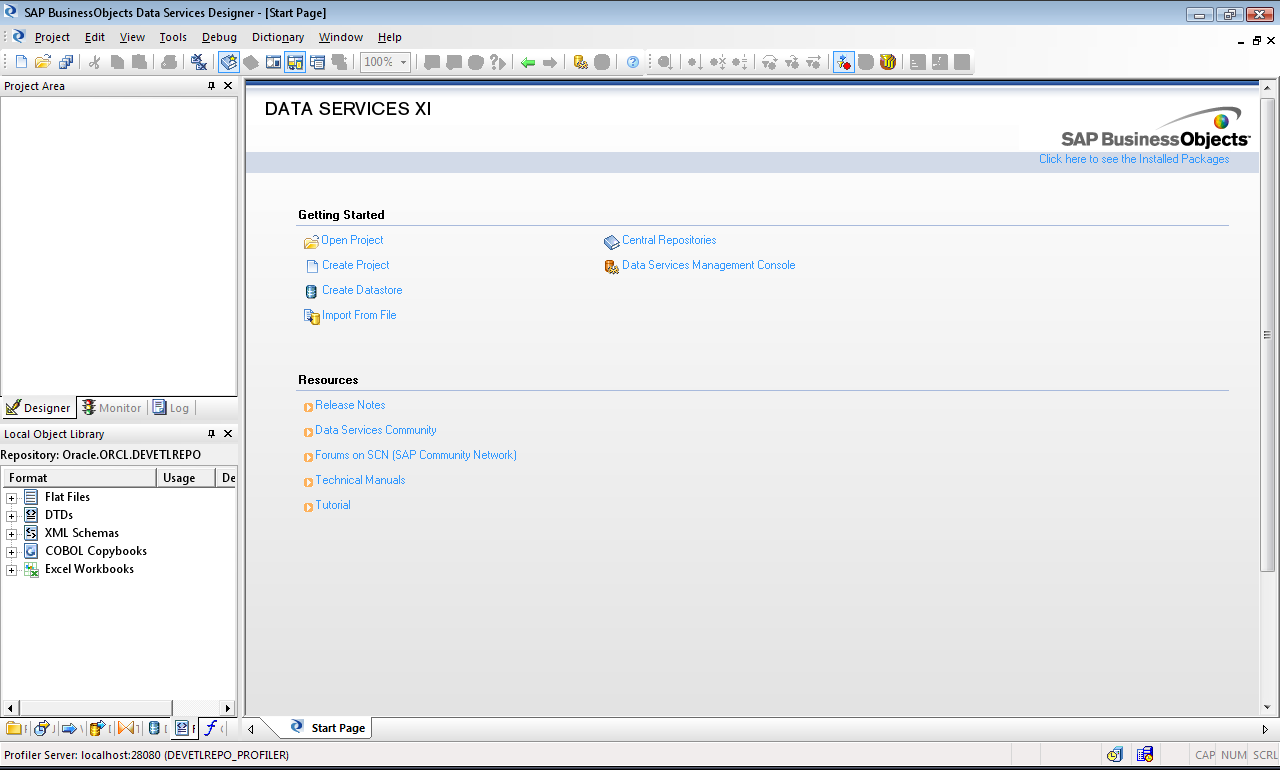
Next CONNECT TO CENTRAL REPOSITORY.
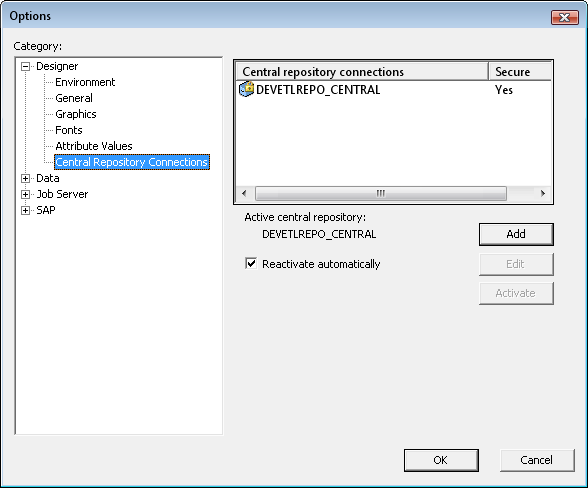
Go to Tools and click on Central Repositories...
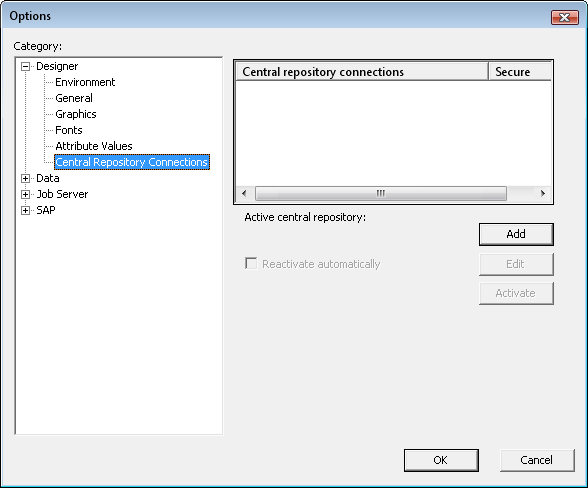
Next click Add button.
Enter the Login Credentials as follows:
- Repository Name: DEVETLREPO_CENTRAL
- Check Secure
- Database type: Oracle
- Database connection name: ORCL
- Next click the button Read Security Key
- Select the default key in the location, which was generated during Central Repository Creation.
- User name: DEVETLREPO_CENTRAL
- Password: (your password here)
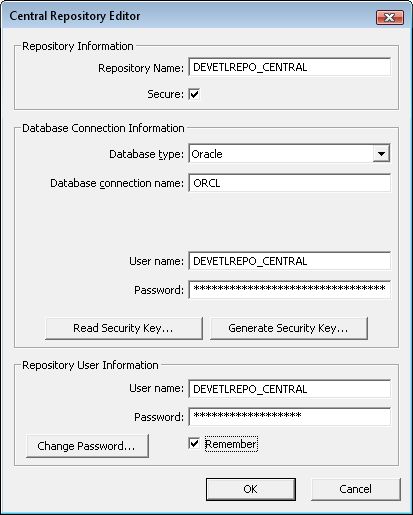
Note: You can create separate Logins to central repository for individual developers from Management Console and provide the same to the developers who will connect to Check-In and Check-Out Objects.
Next click OK.
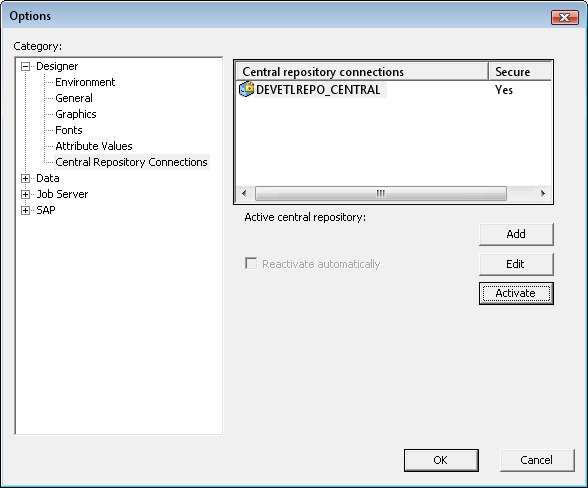
Click the Activate button and enter the password again to activate central repository with this current local repository.
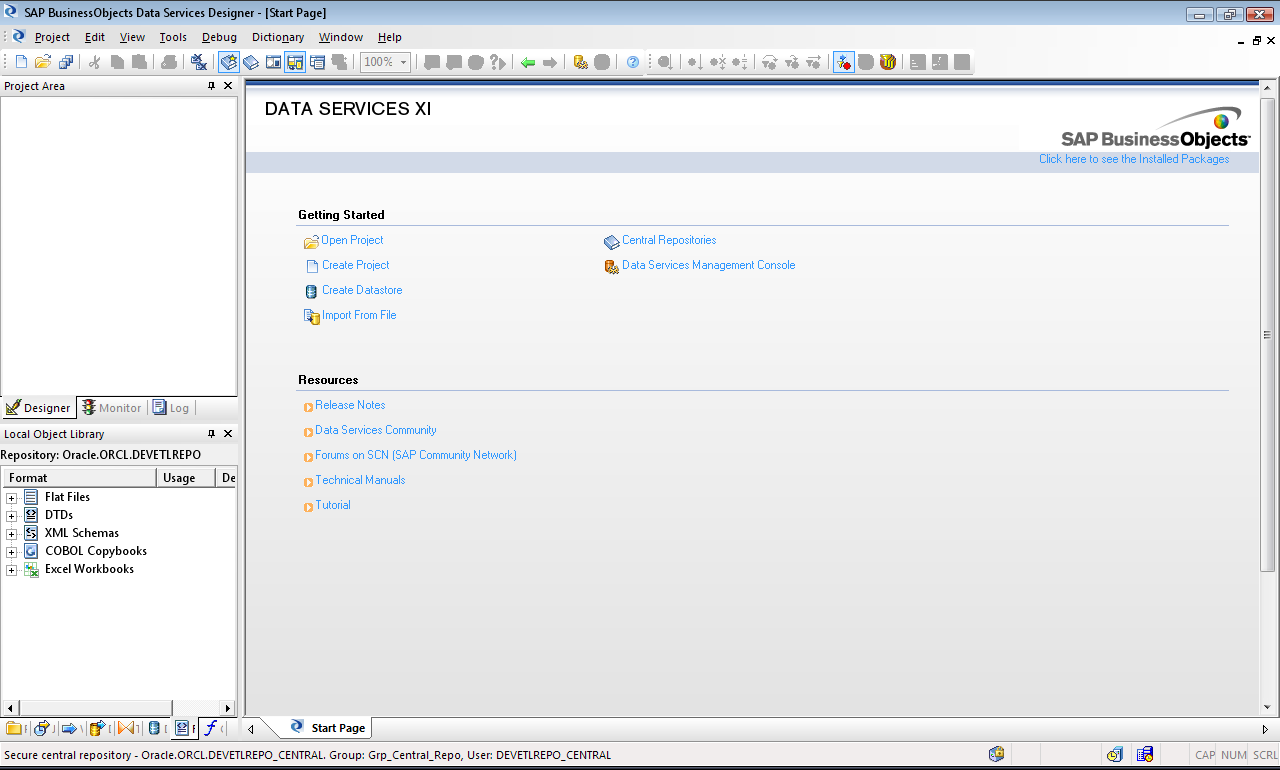
Pointing the mouse over the secure central repository will show the details.
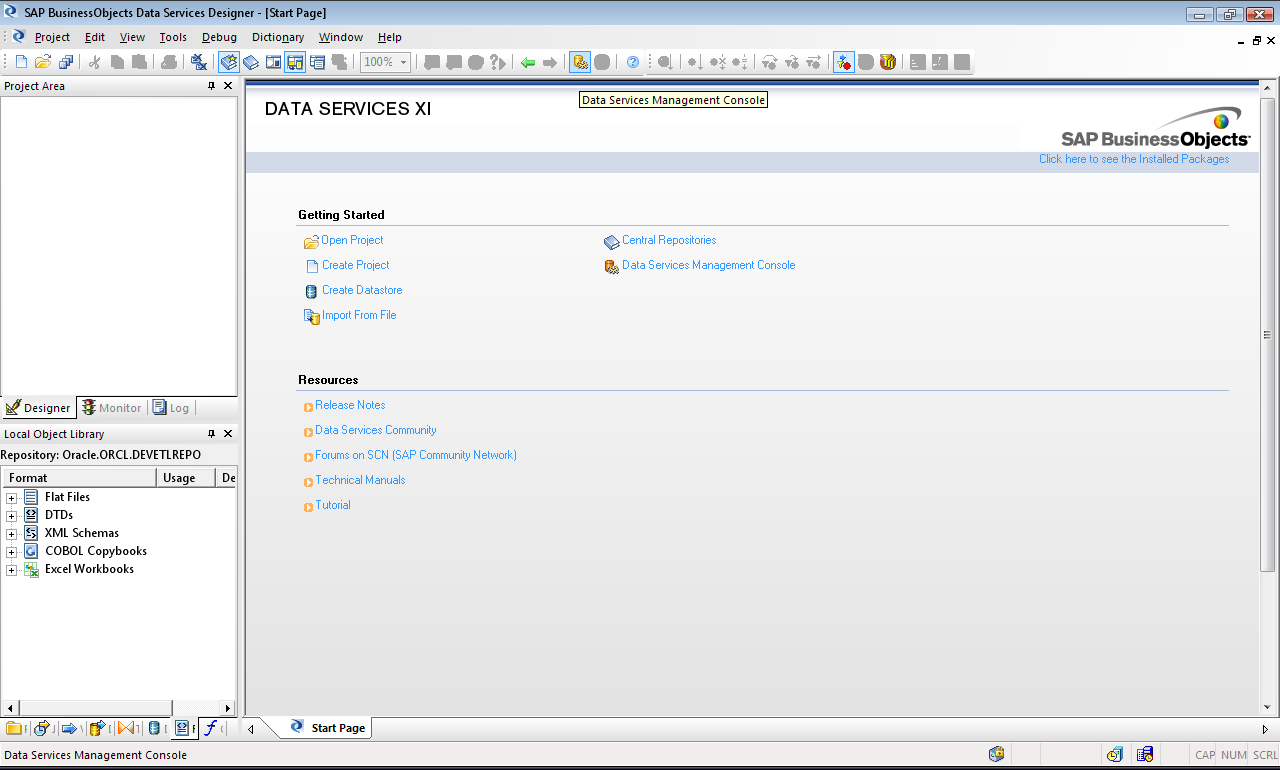
Next CONNECT TO Management Console from Designer.
Click on the Data Services Management Console icon shown above to connect from the designer GUI. Else go to Tools, Data Services Management Console..
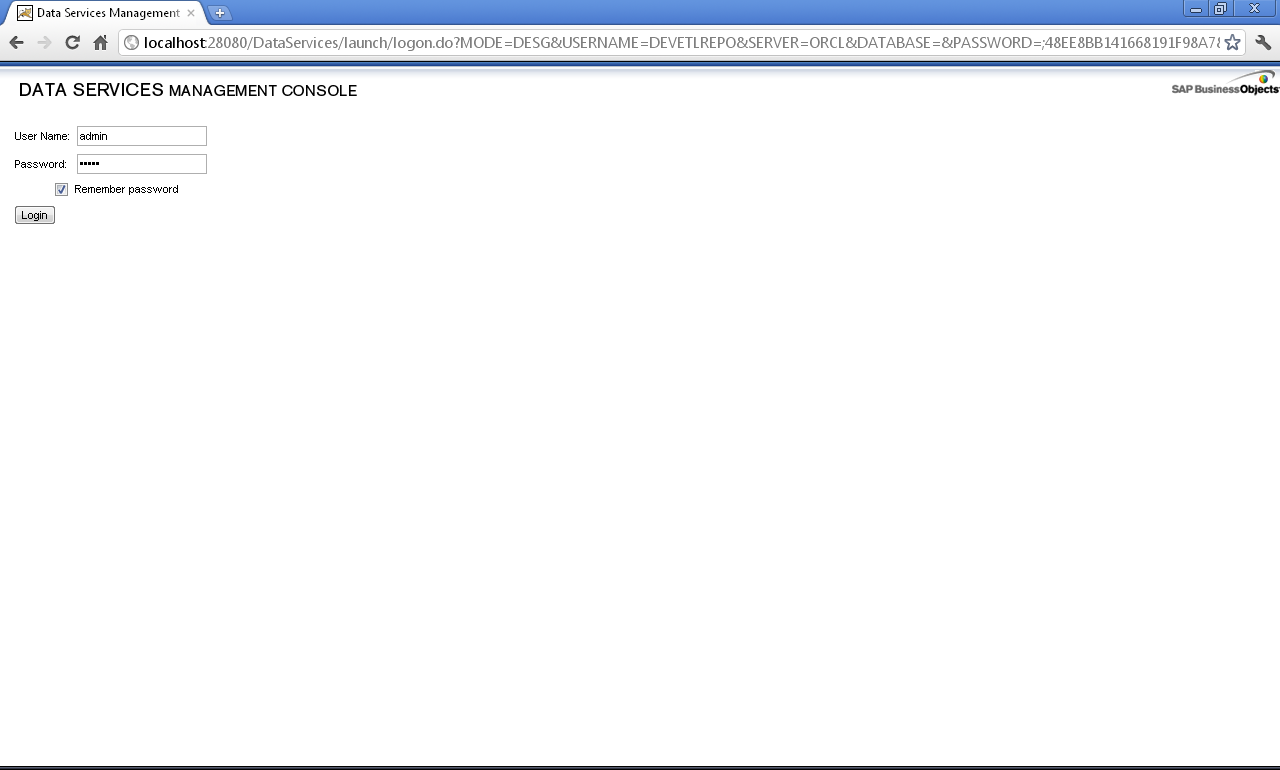
Login to Management Console as
- User Name: admin
- Password: (your password here)
Click Login.
Next use SAP BODS LICENSE MANAGER to Add new license information using the Add button or to remove existing old license information using Remove button.
Regarding installation and configuration of SAP BODS METADATA INTEGRATOR we will discuss in another topic as this particular component need to be installed in BOXI server machine. So both BOXI and BODS can reside in the same machine or in different machine. But the metadata integrator component should be installed and configured at the BOXI server or precisely where the BOXI CMS resides so that we can take the full advantage of lineage and impact analysis of the target report fields with their counterpart source columns.

