Create Amazon Redshift Cluster

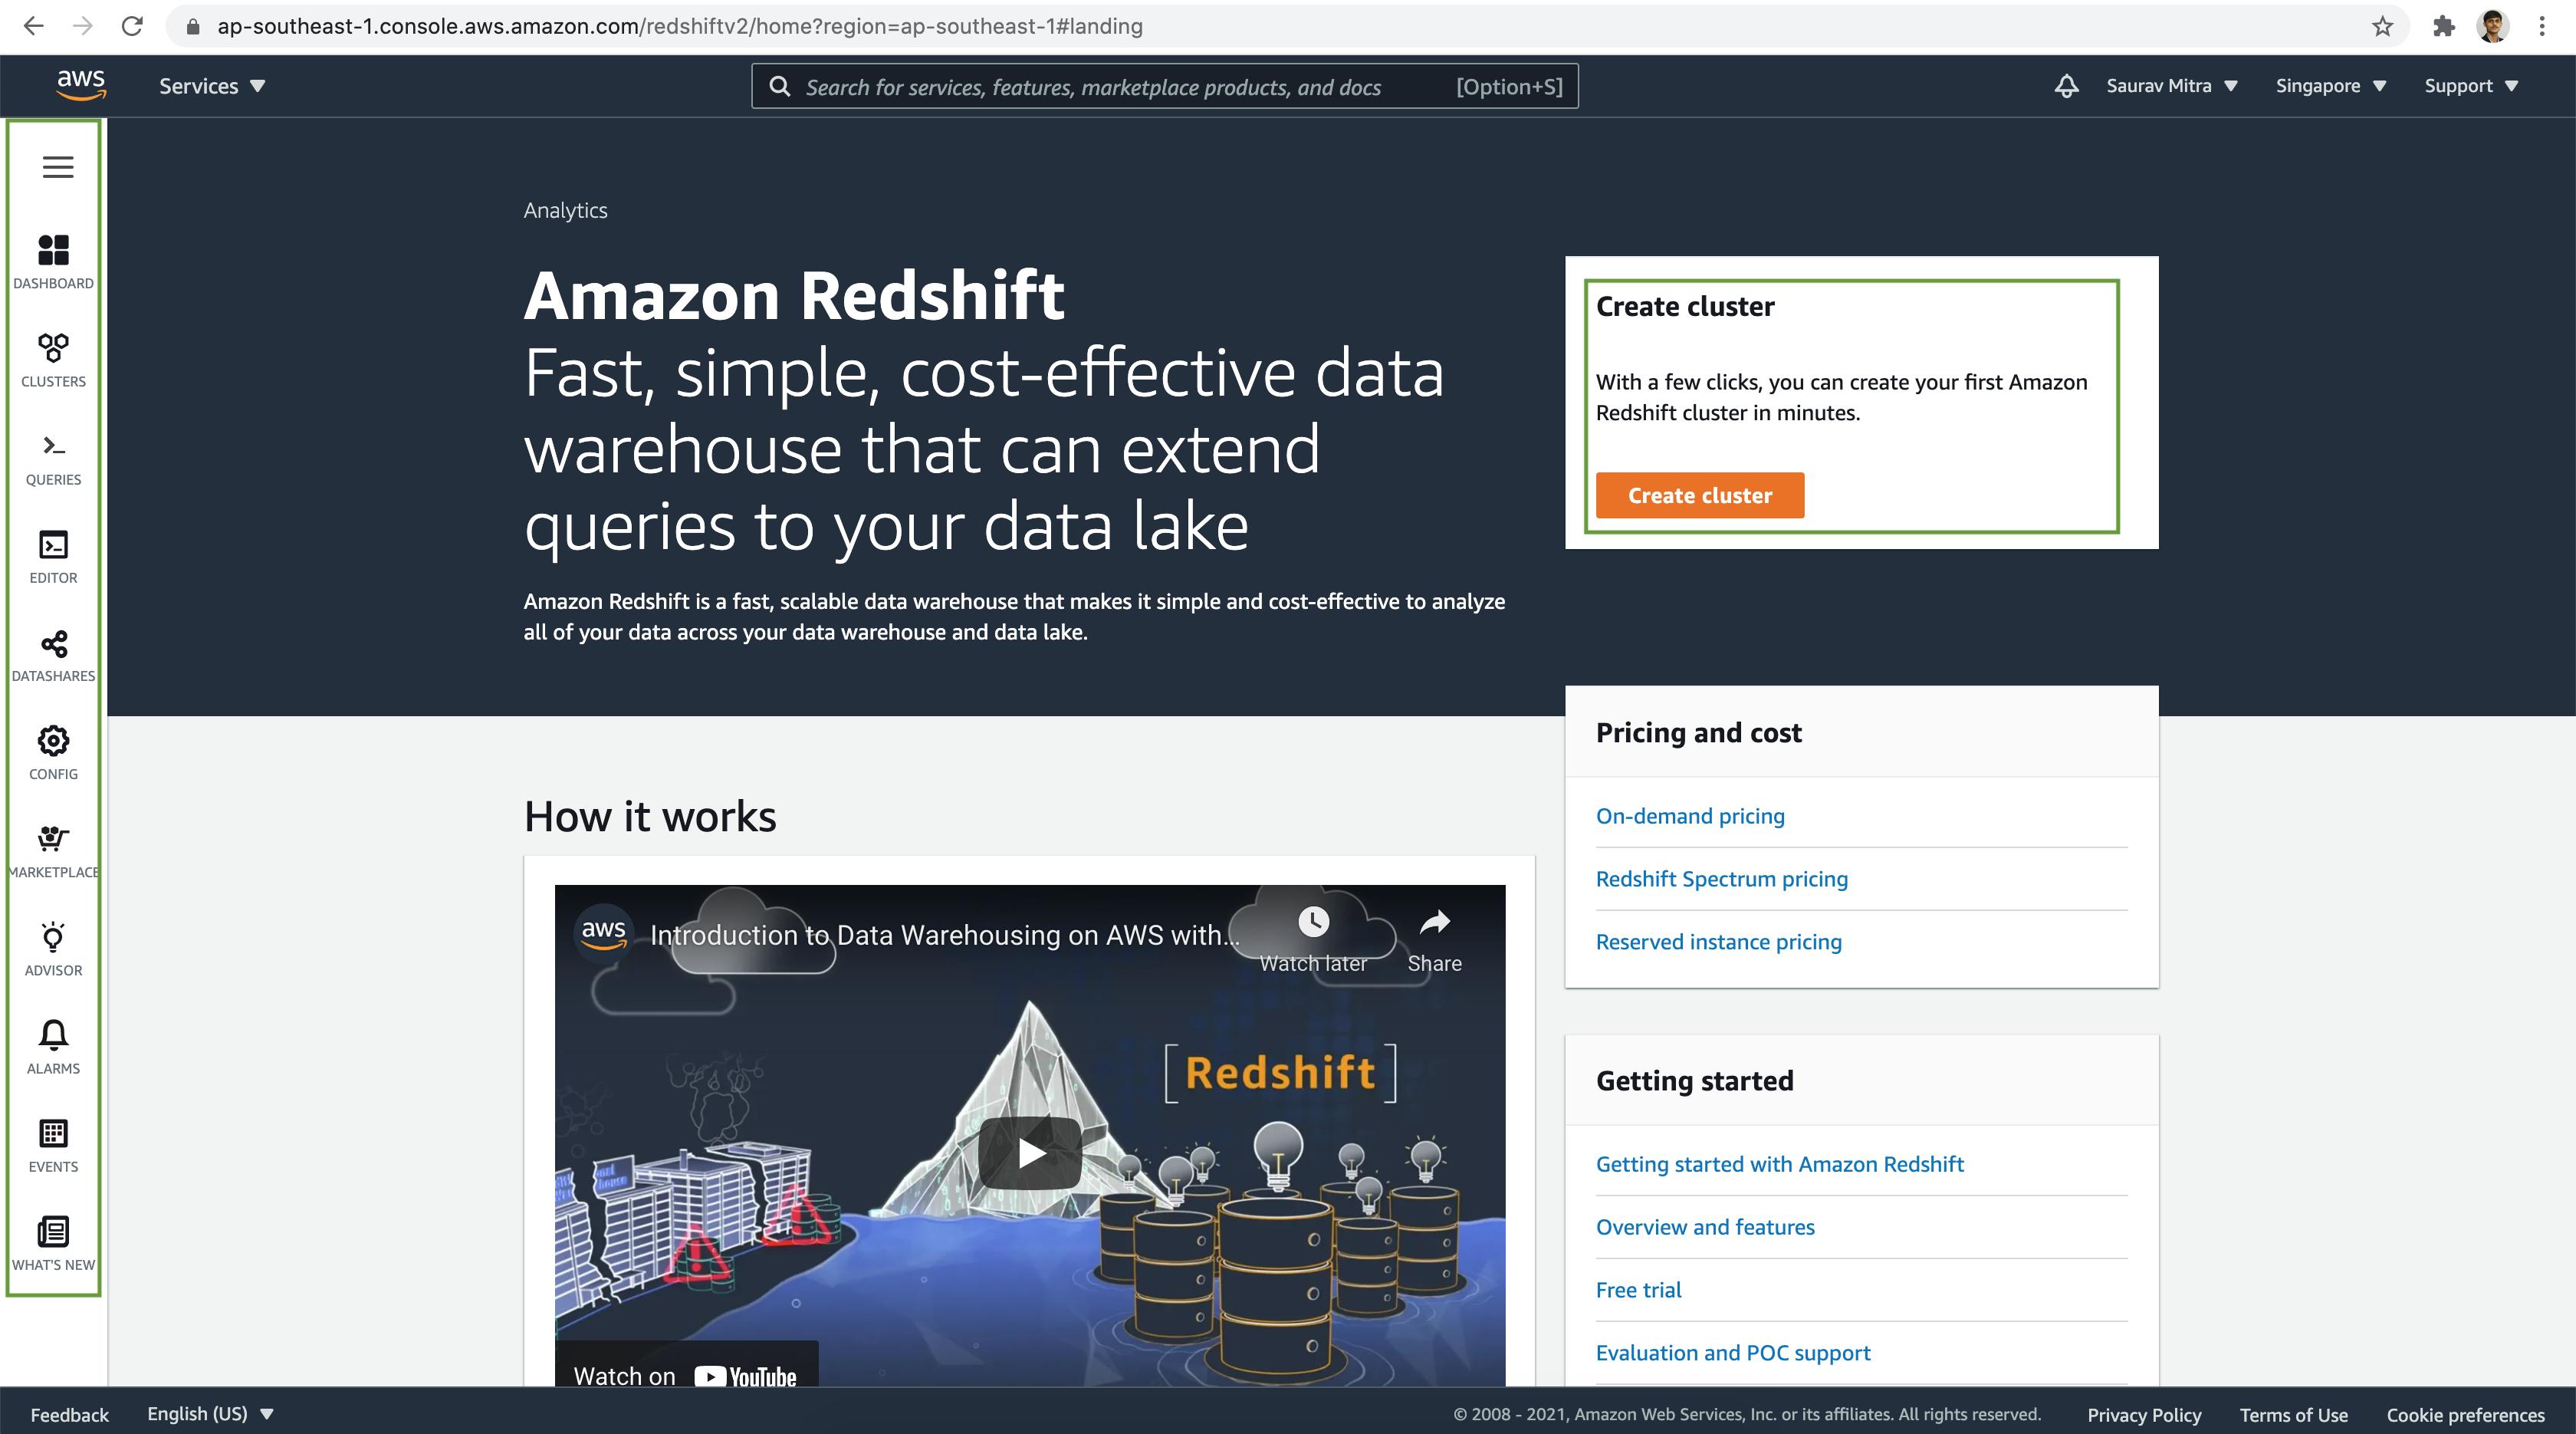
Amazon Redshift is a fast, scalable data warehouse that makes it simple and cost-effective to analyze data across data warehouse and data lake. With a few clicks, we can create a Amazon Redshift cluster in minutes.
In this article we are going to setup & deploy an Amazon Redshift Cluster.
We can deploy a new data warehouse in minutes and save time with automated administrative tasks that manage, monitor, and scale data warehouse. Amazon Redshift is fast, simple, cost-effective data warehouse that can extend queries to data lake as well.
Before we start to deploy our first Redshift cluster, as a prerequisite let us setup few resources like Security Group, IAM Policies & Roles.
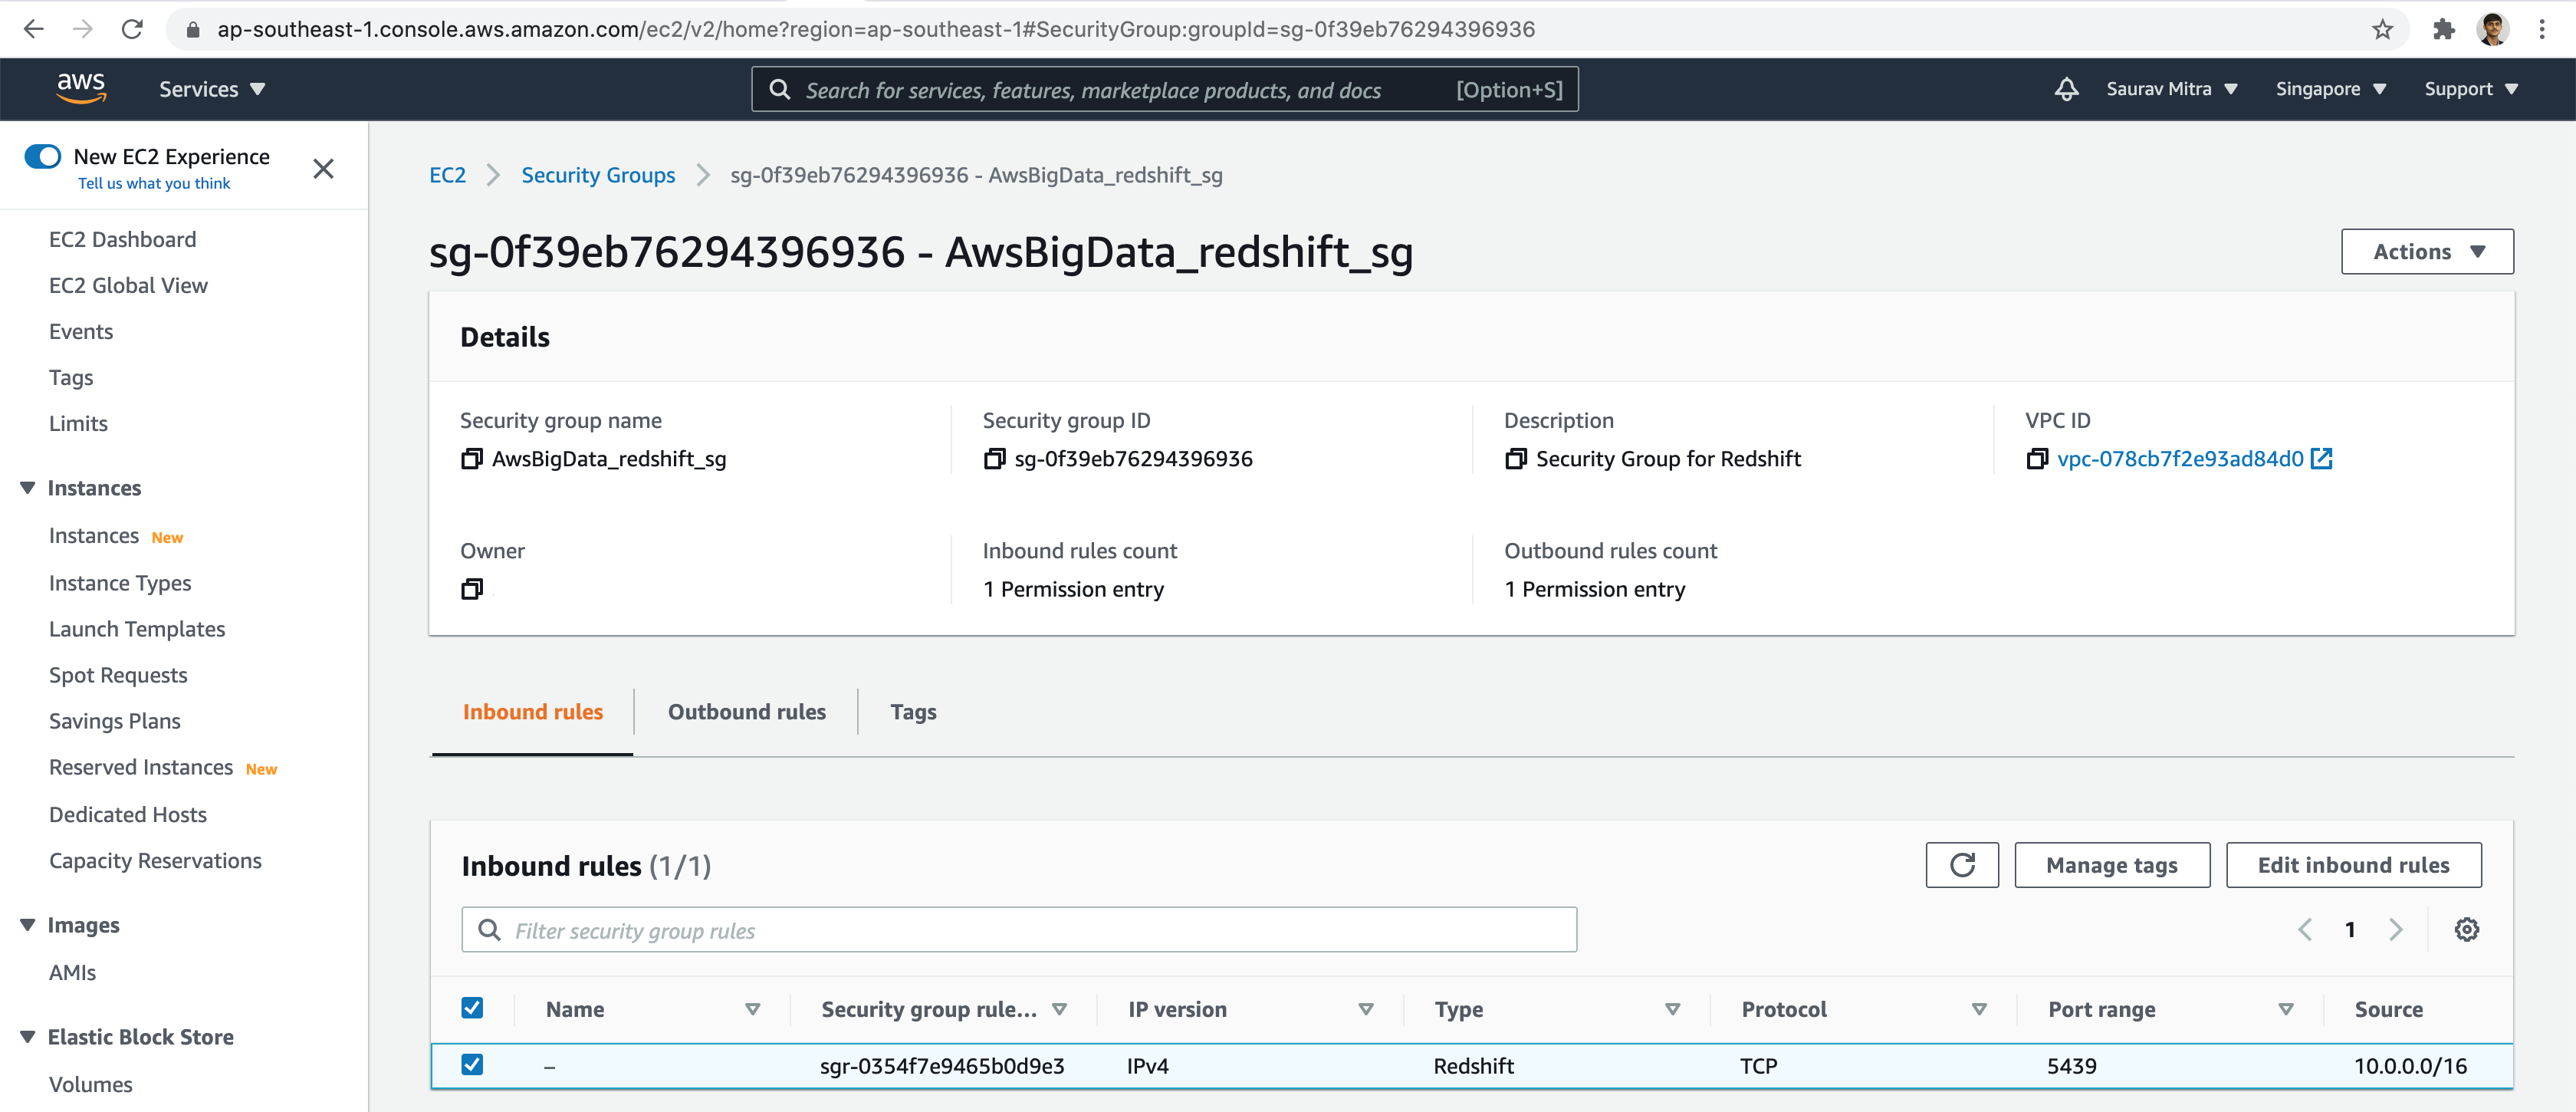
First we create a Security Group with access to Redshift on port 5439 restricted from our VPC.
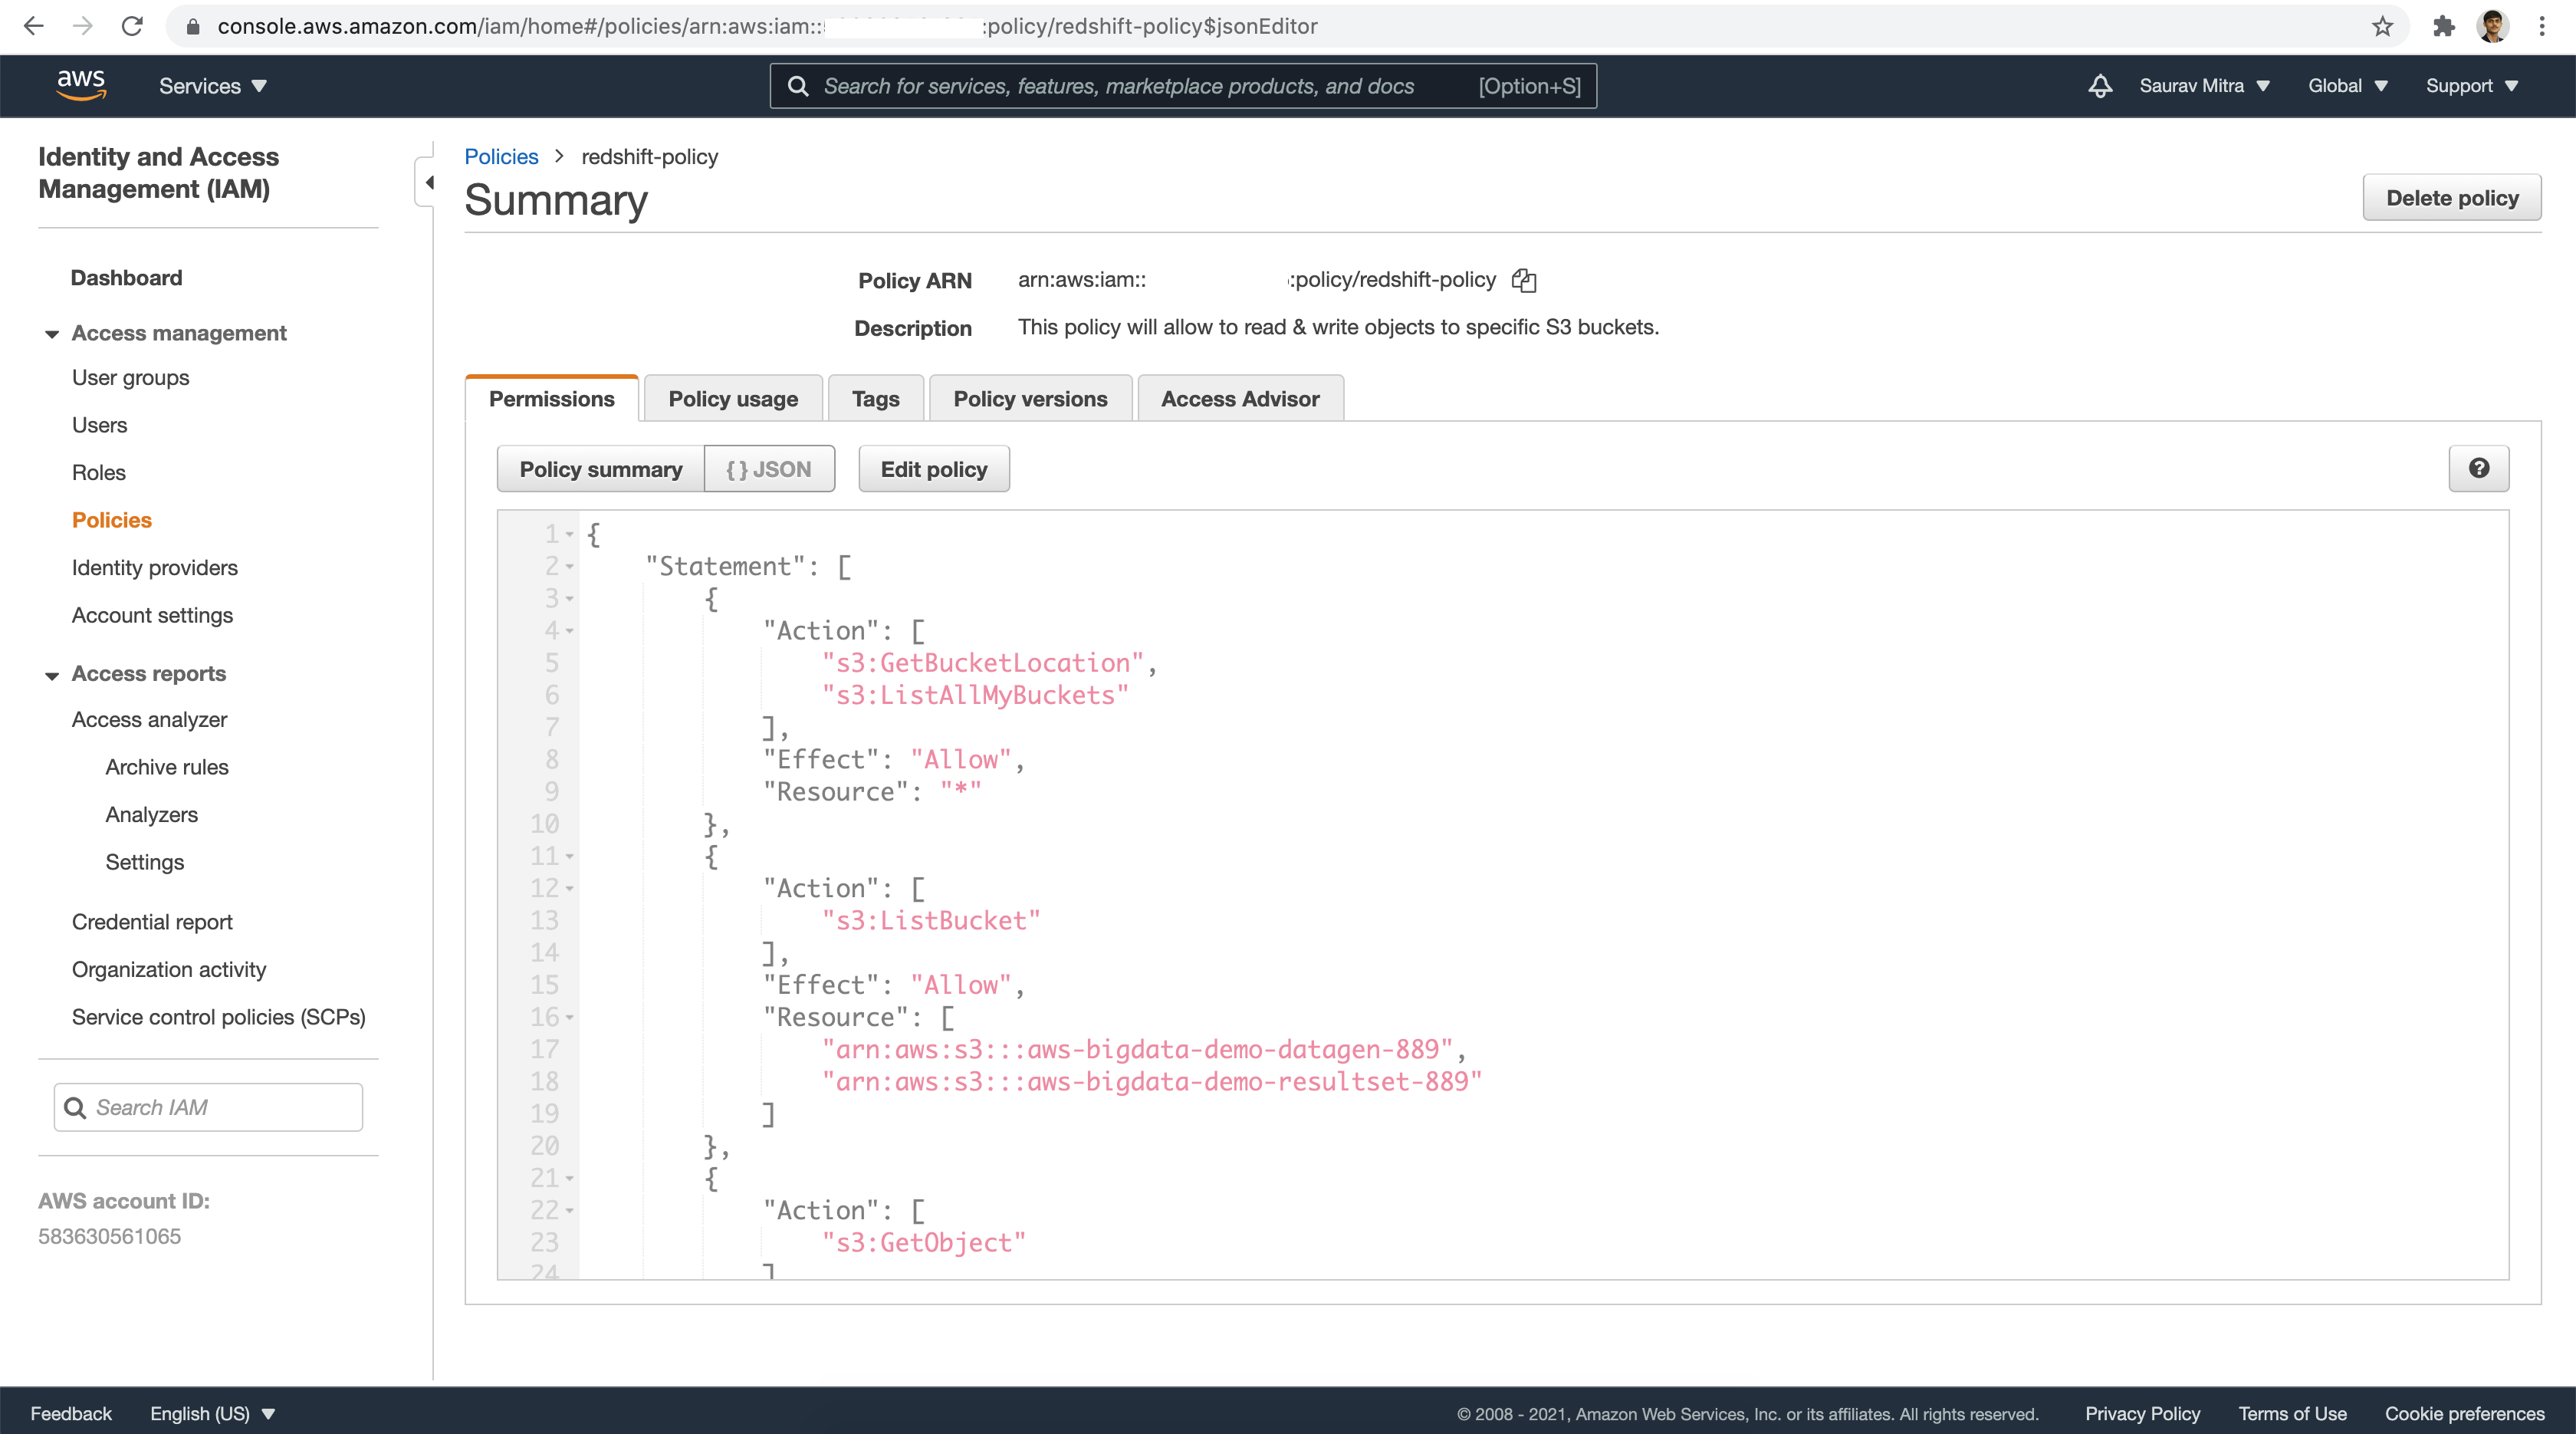
Next we will create an IAM Policy to access our S3 buckets to read & write datasets from Redshift.
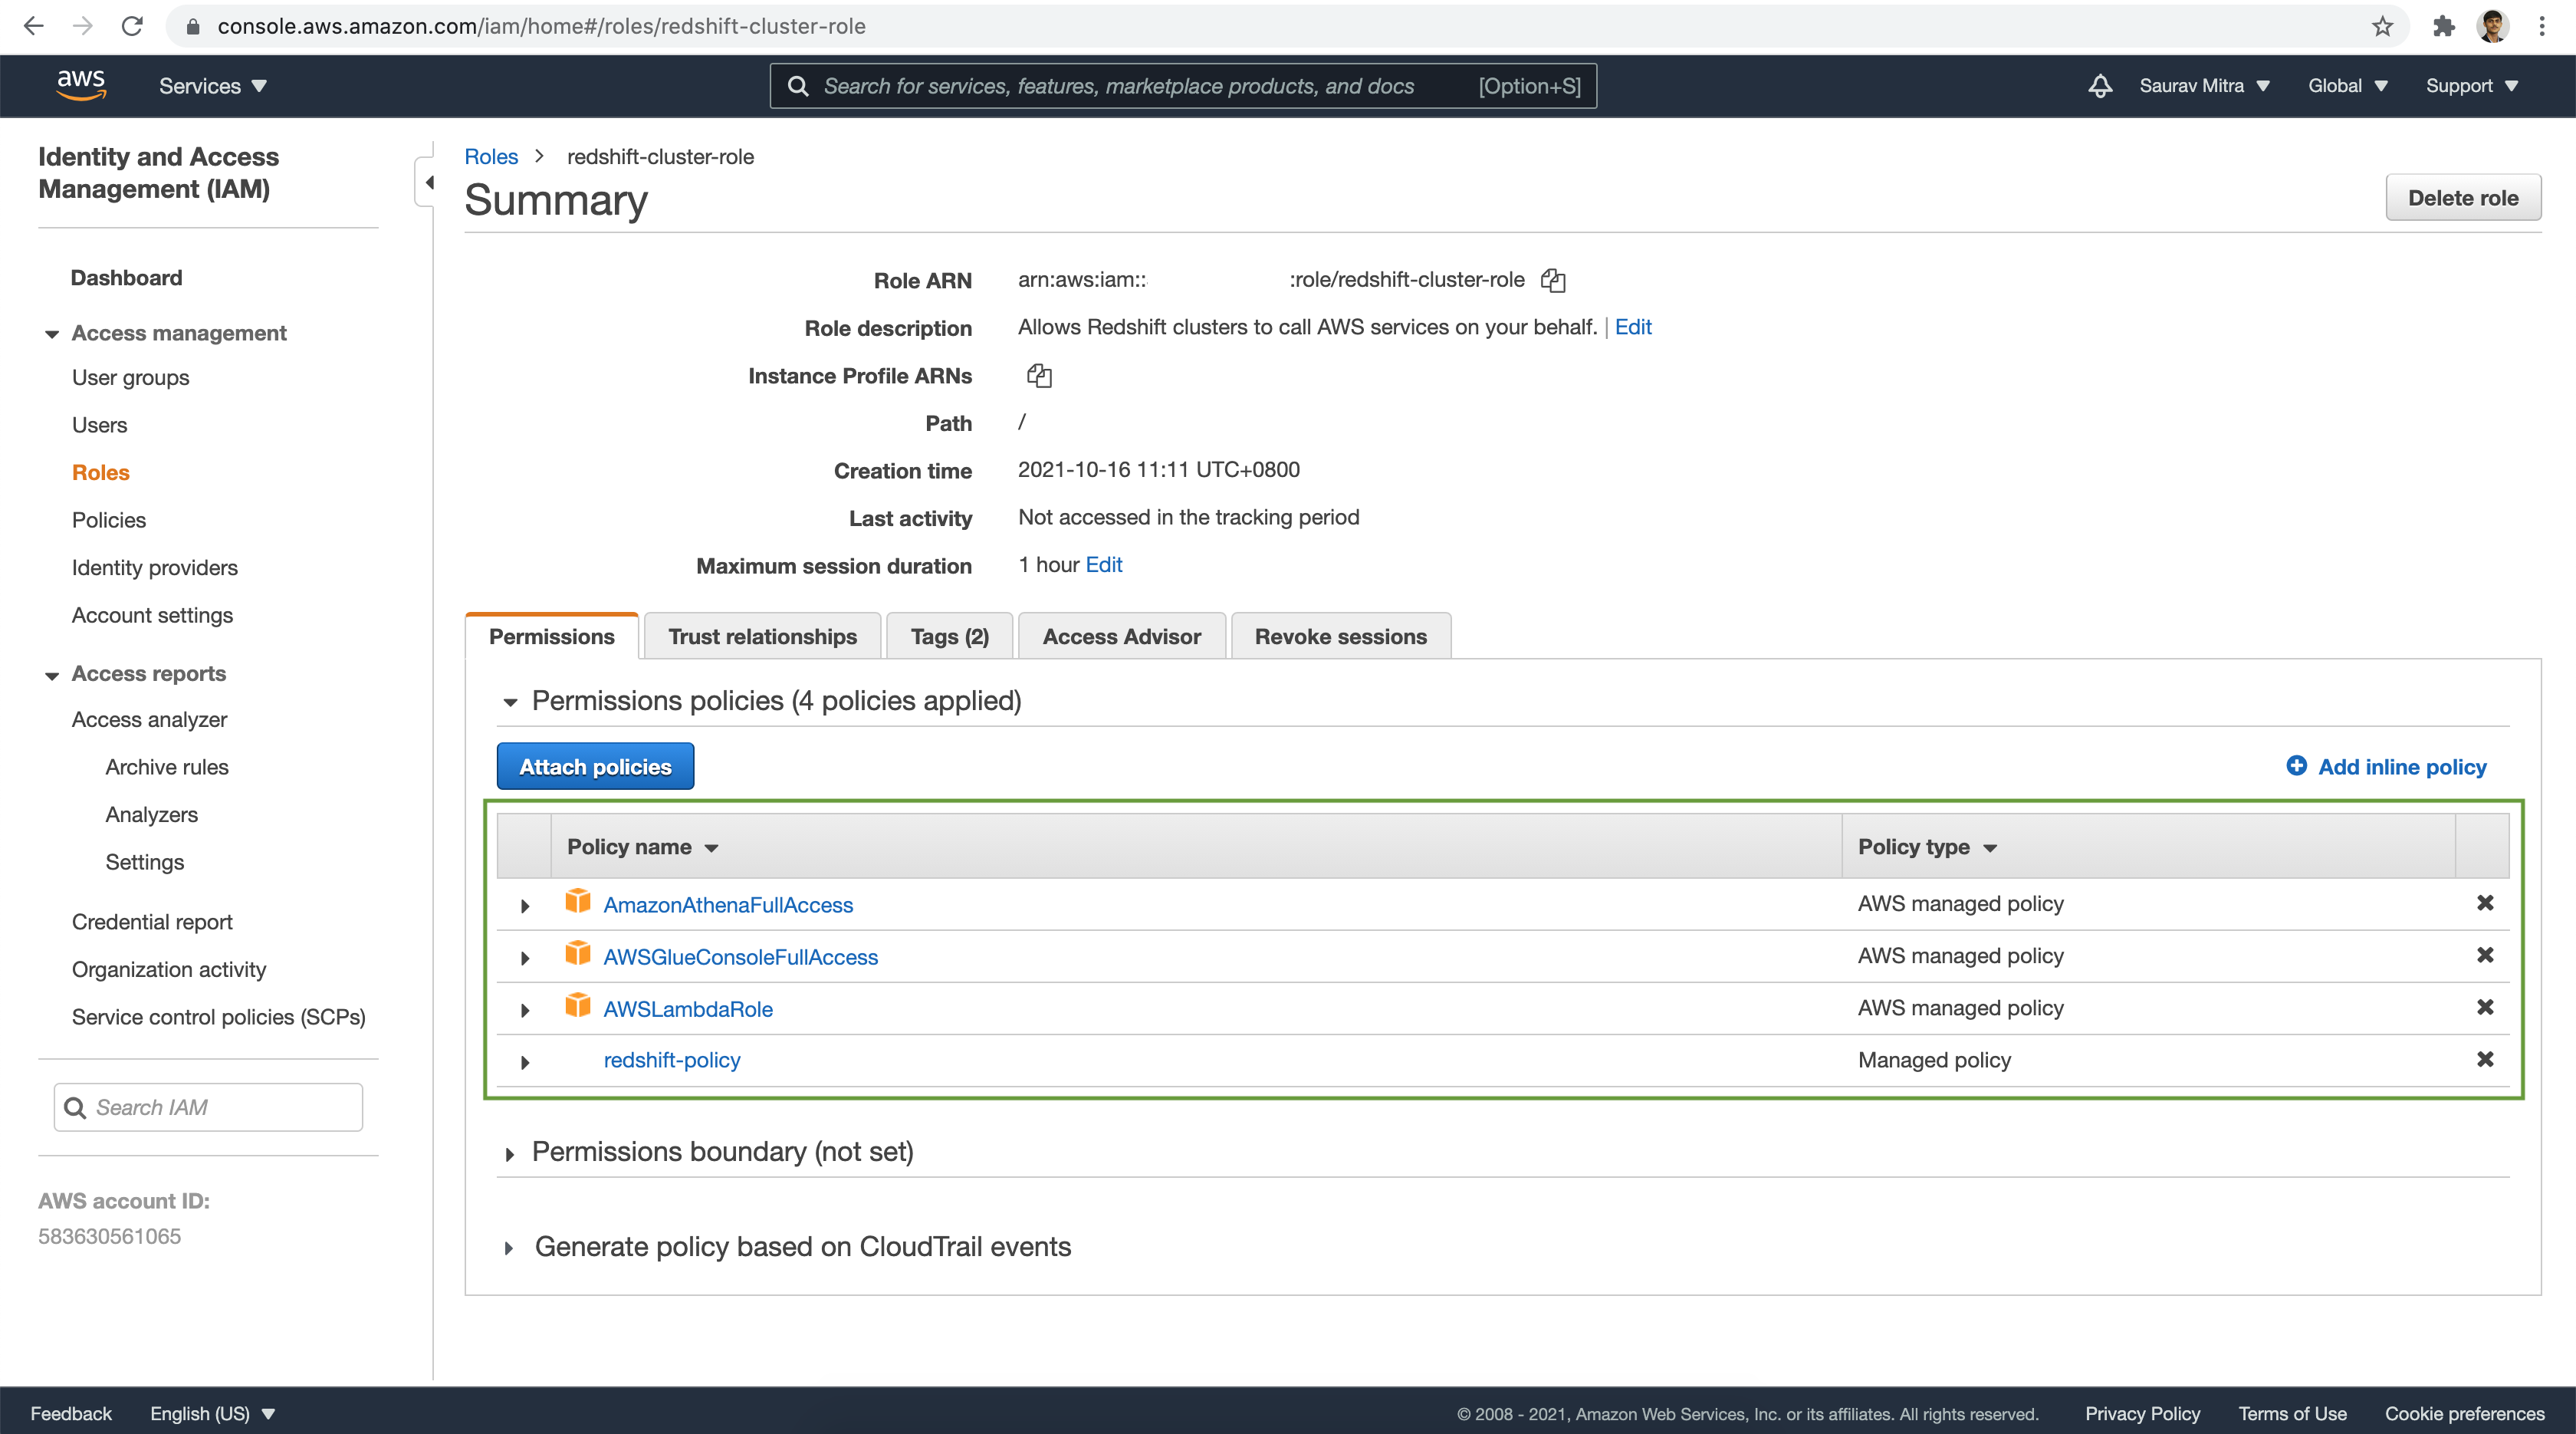
Next we will create an IAM Role to allow Redshift to access other AWS services on our behalf.
Trust Relationship entities that can assume the role and the access conditions for the role redshift.amazonaws.com
{
"Version": "2012-10-17",
"Statement": [
{
"Sid": "",
"Effect": "Allow",
"Principal": {
"Service": "redshift.amazonaws.com"
},
"Action": "sts:AssumeRole"
}
]
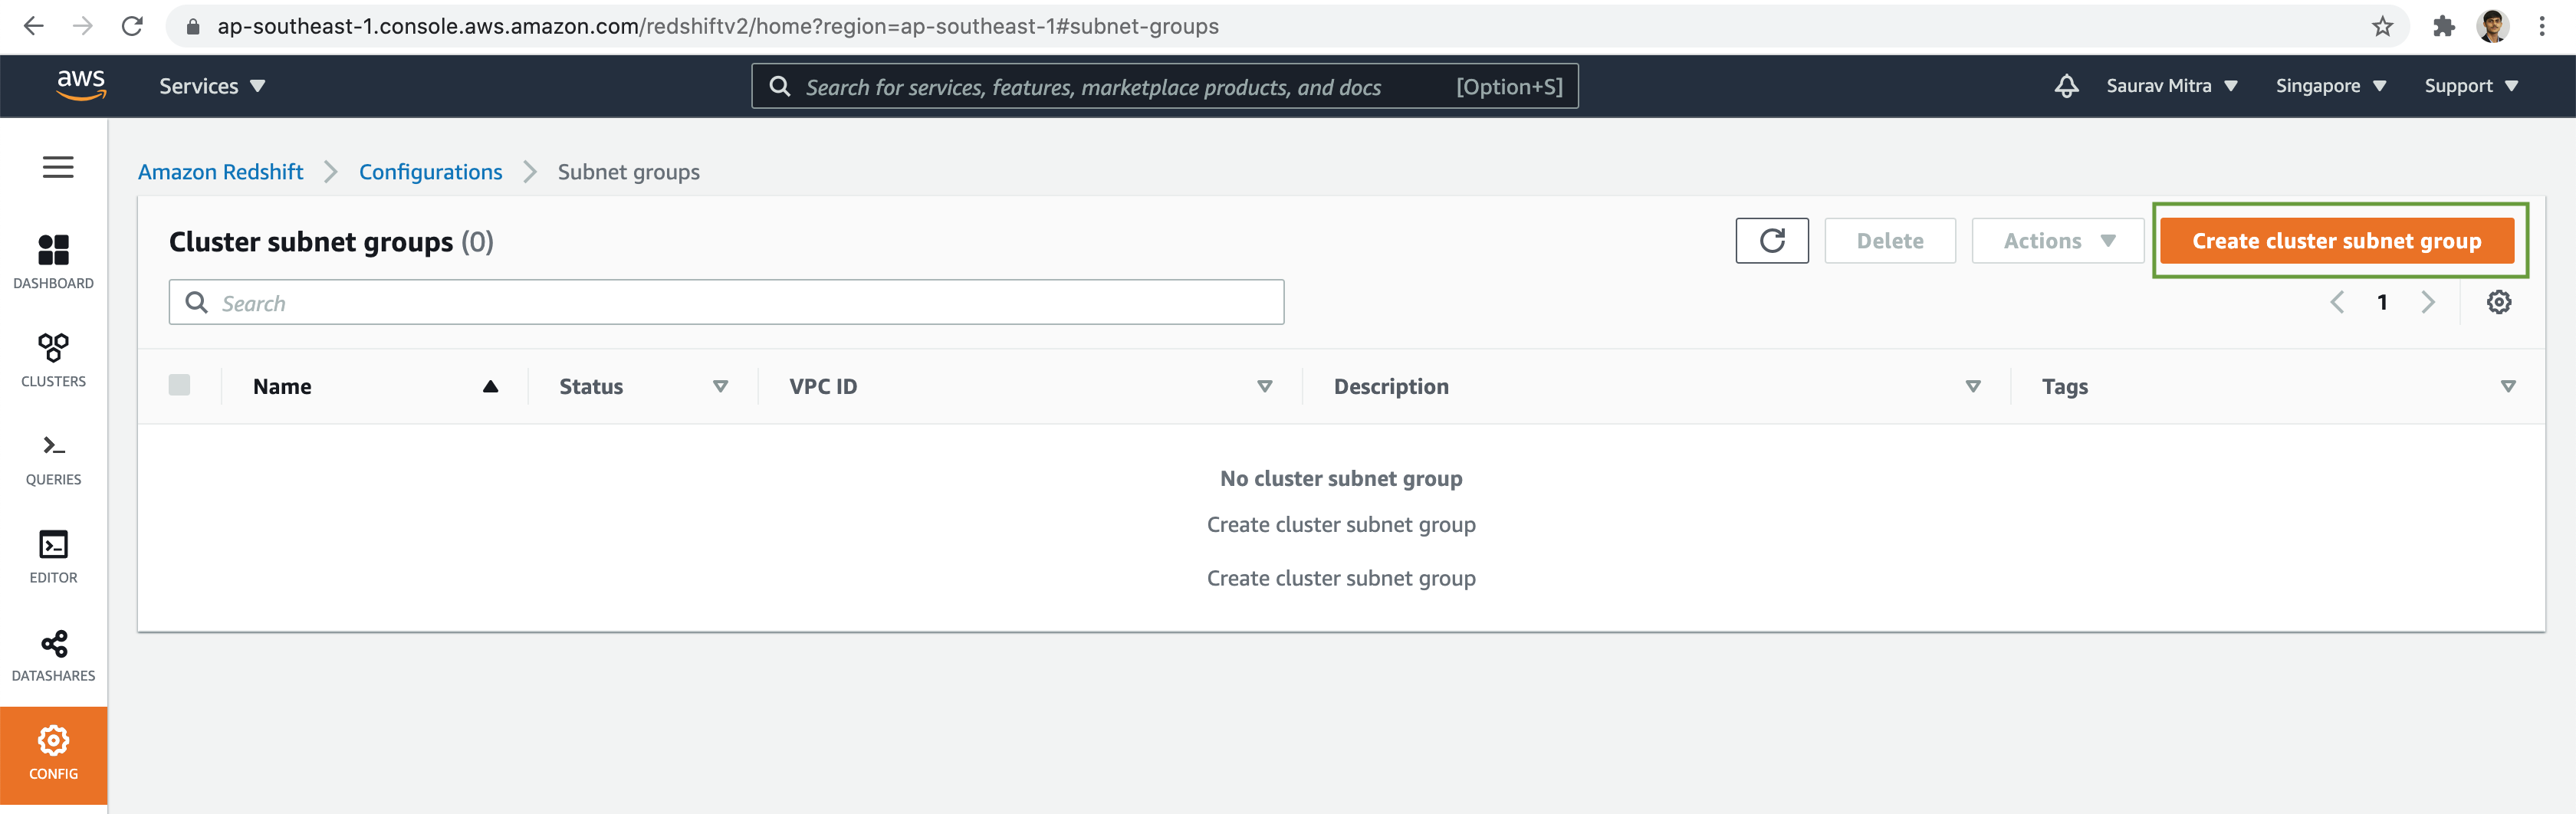
}Next we will set up Redshift Cluster Subnet Groups & Parameter Groups.

Click on the Create subnet group button.
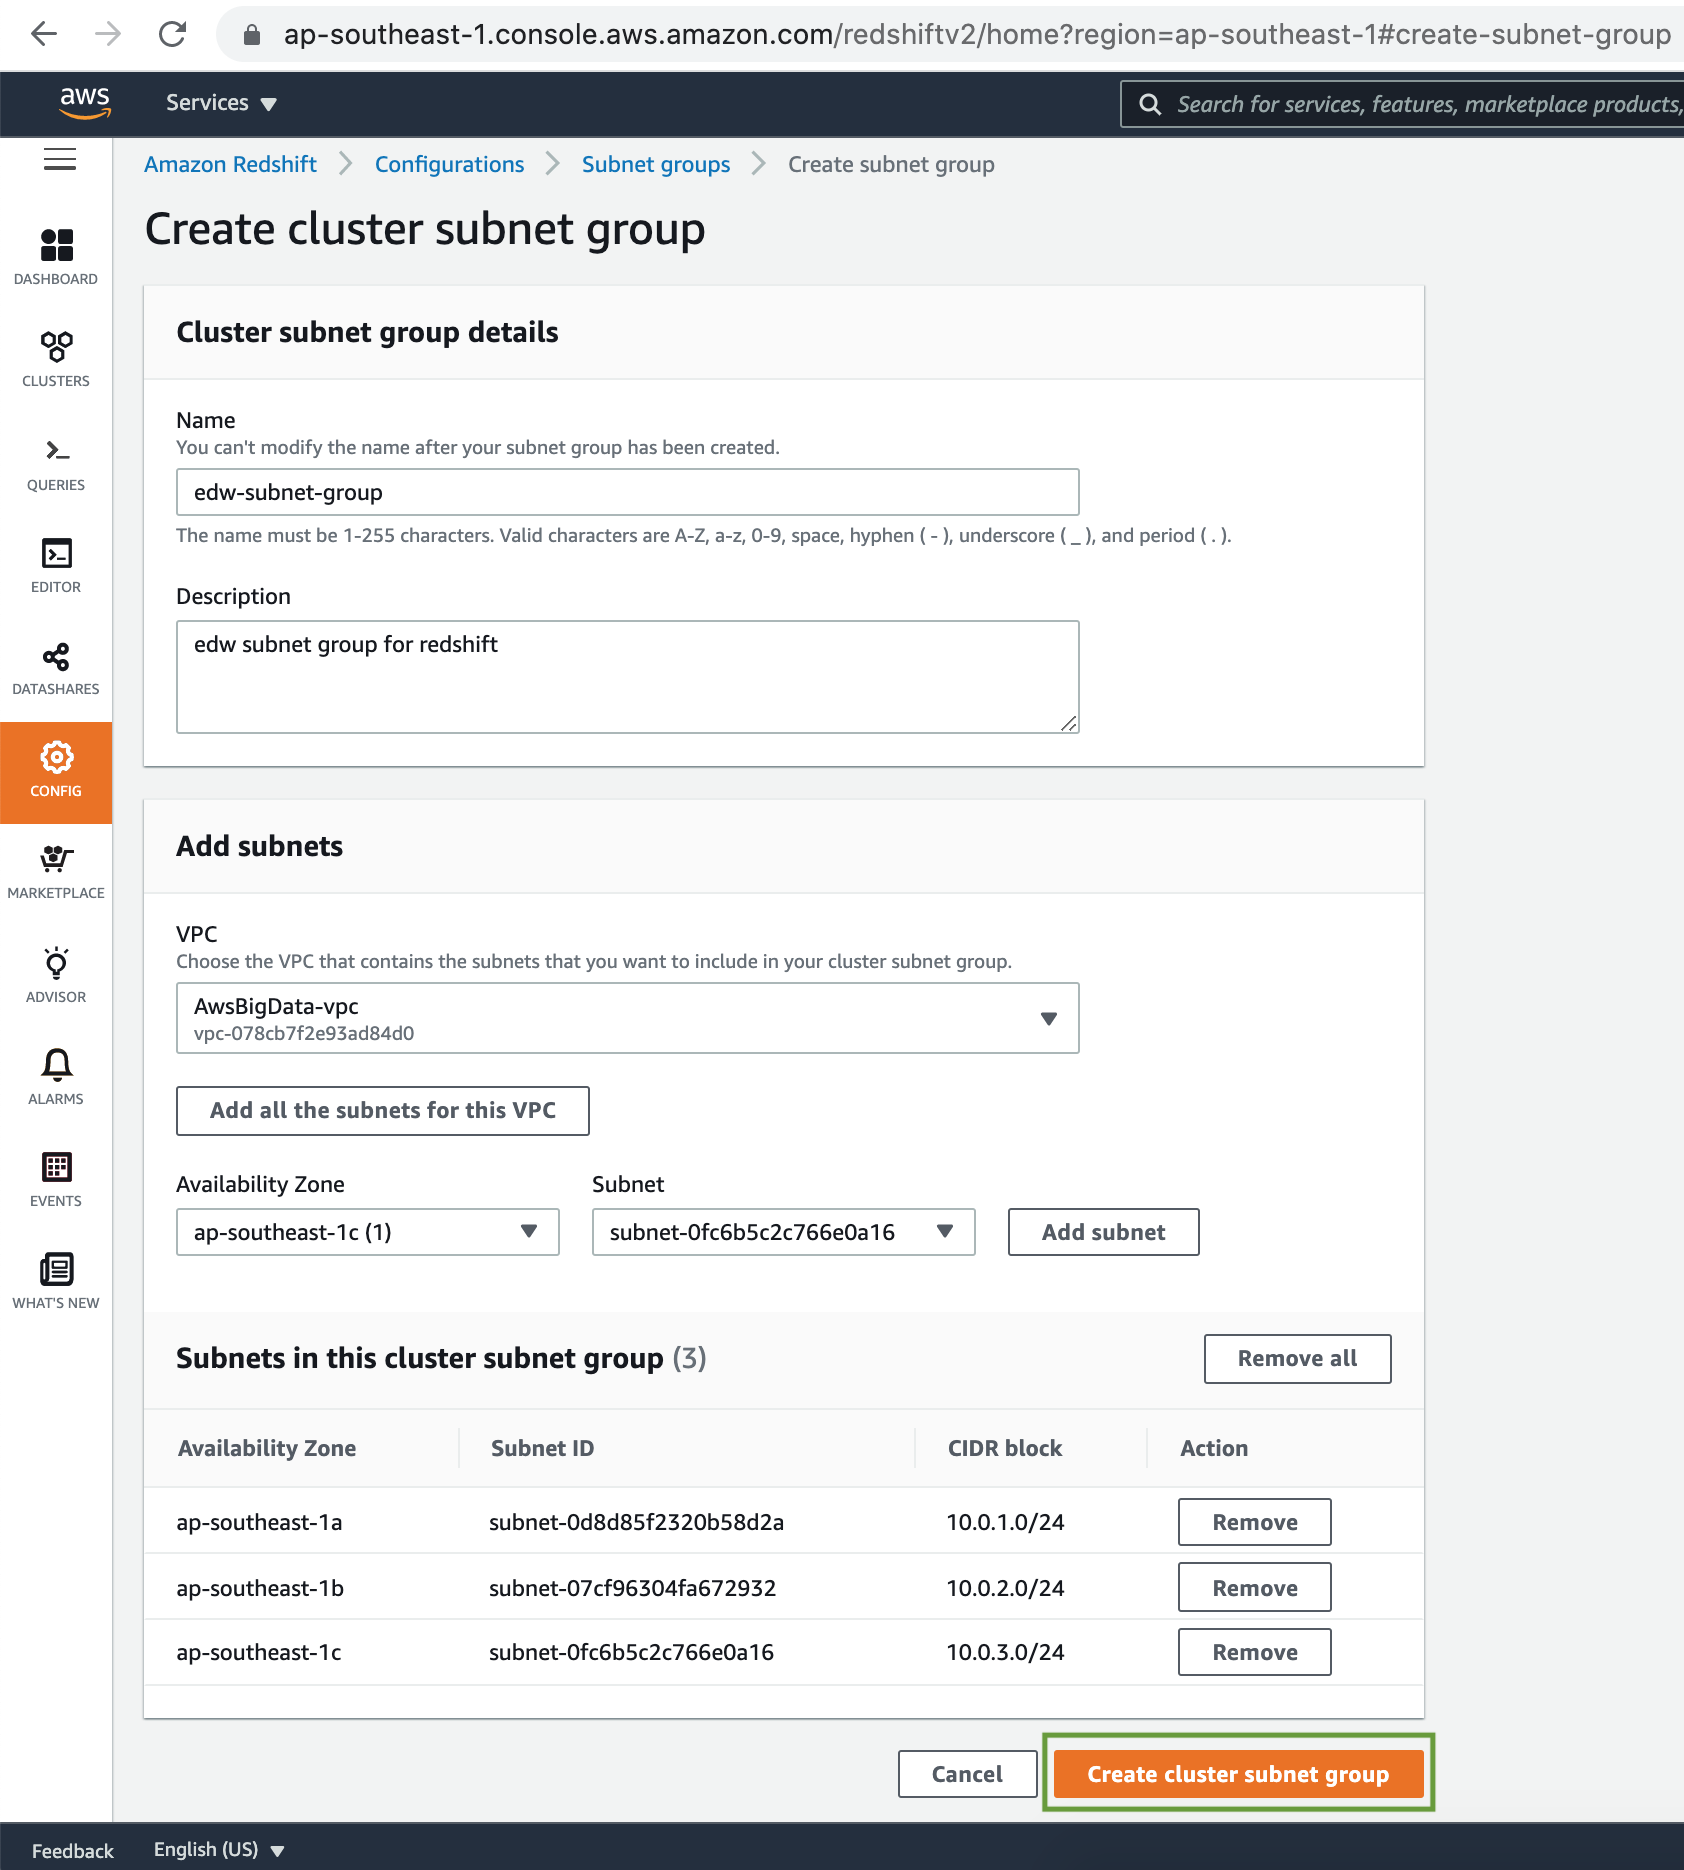
Add a name & description to the Cluster subnet group.
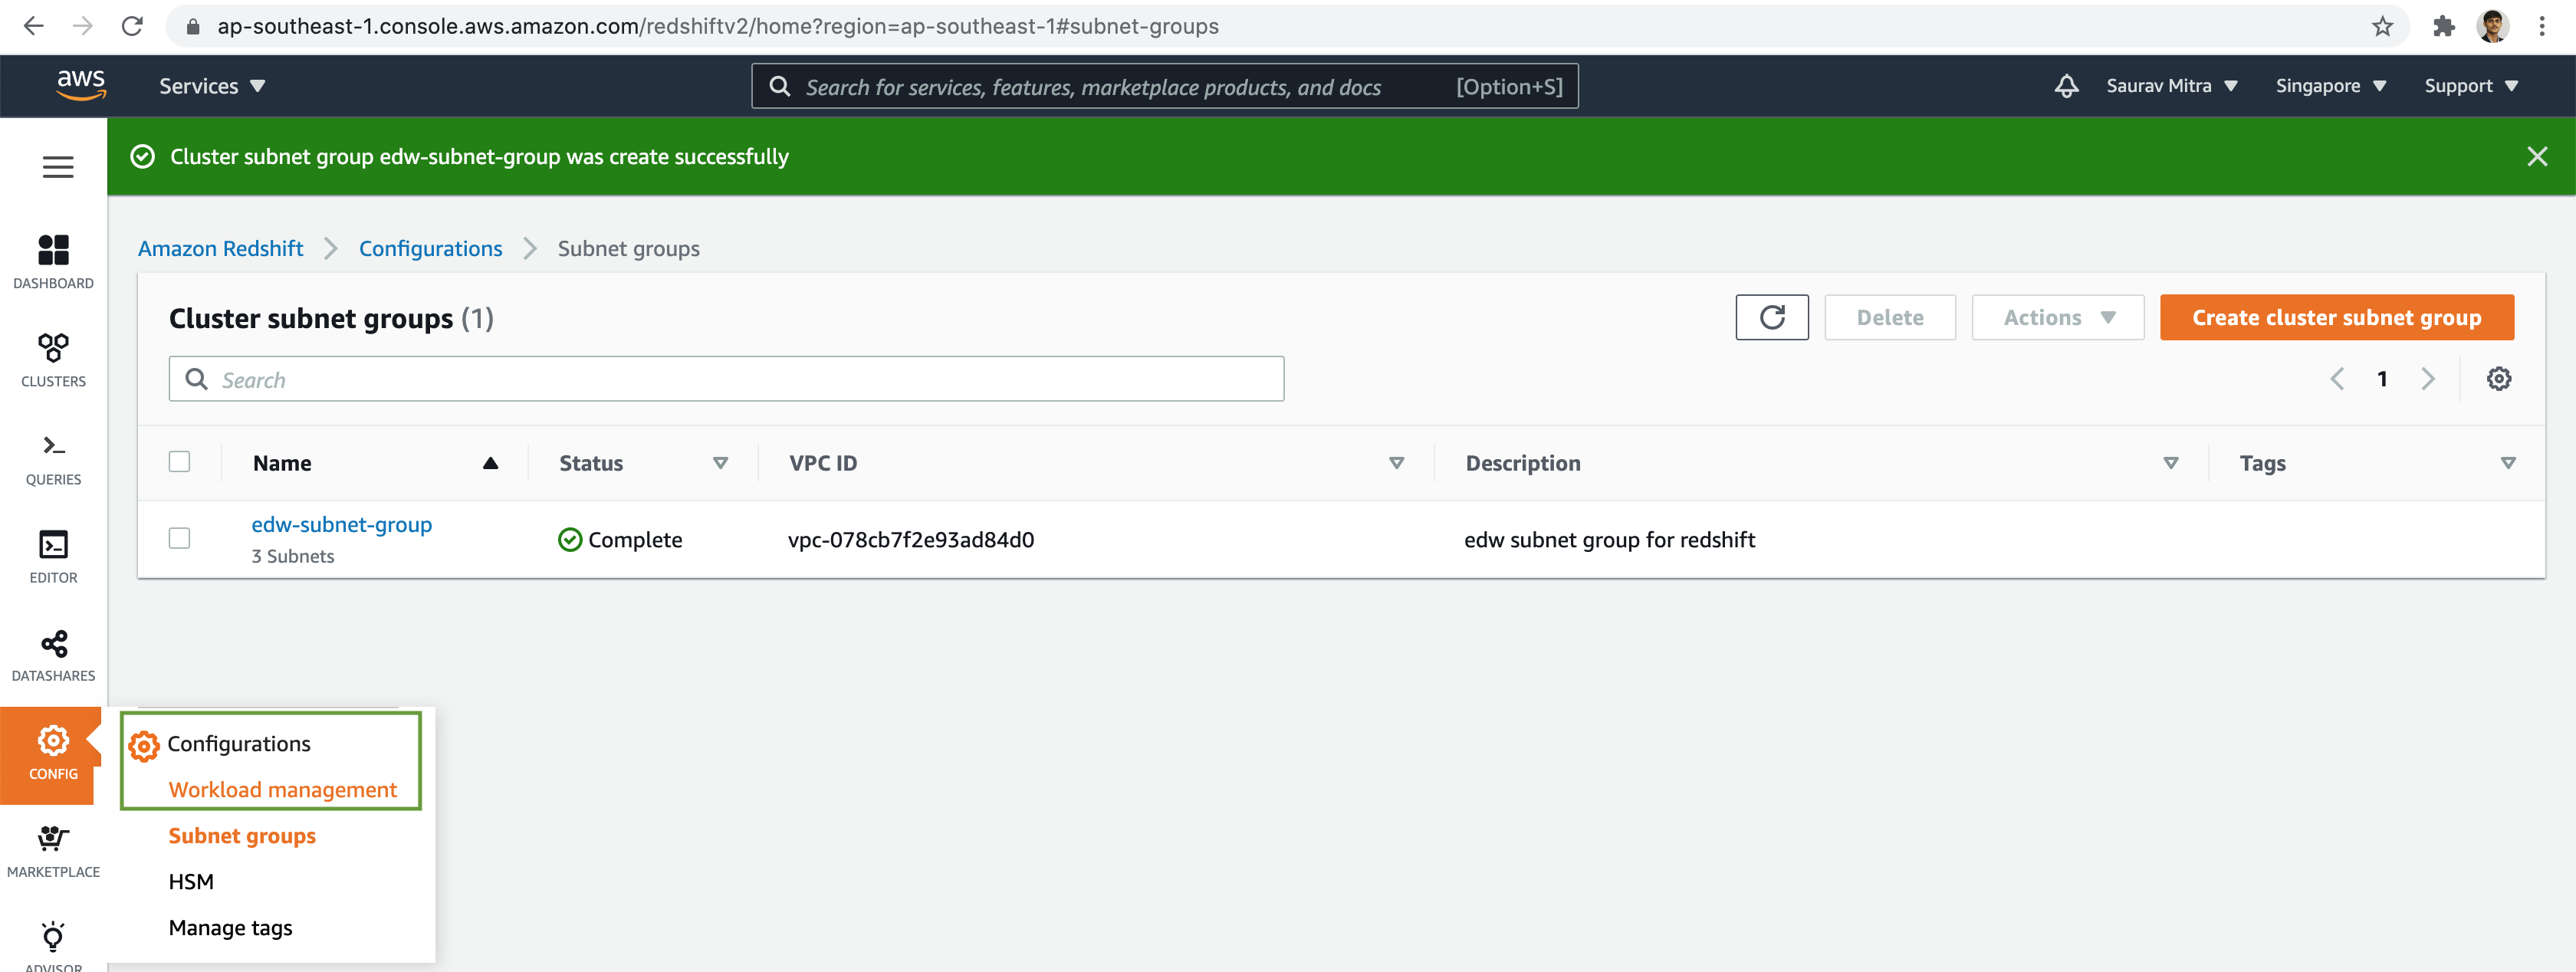
Next, we will select our VPC & choose the Private subnets across the various Availability zones. Finally click the Create cluster subnet group button.
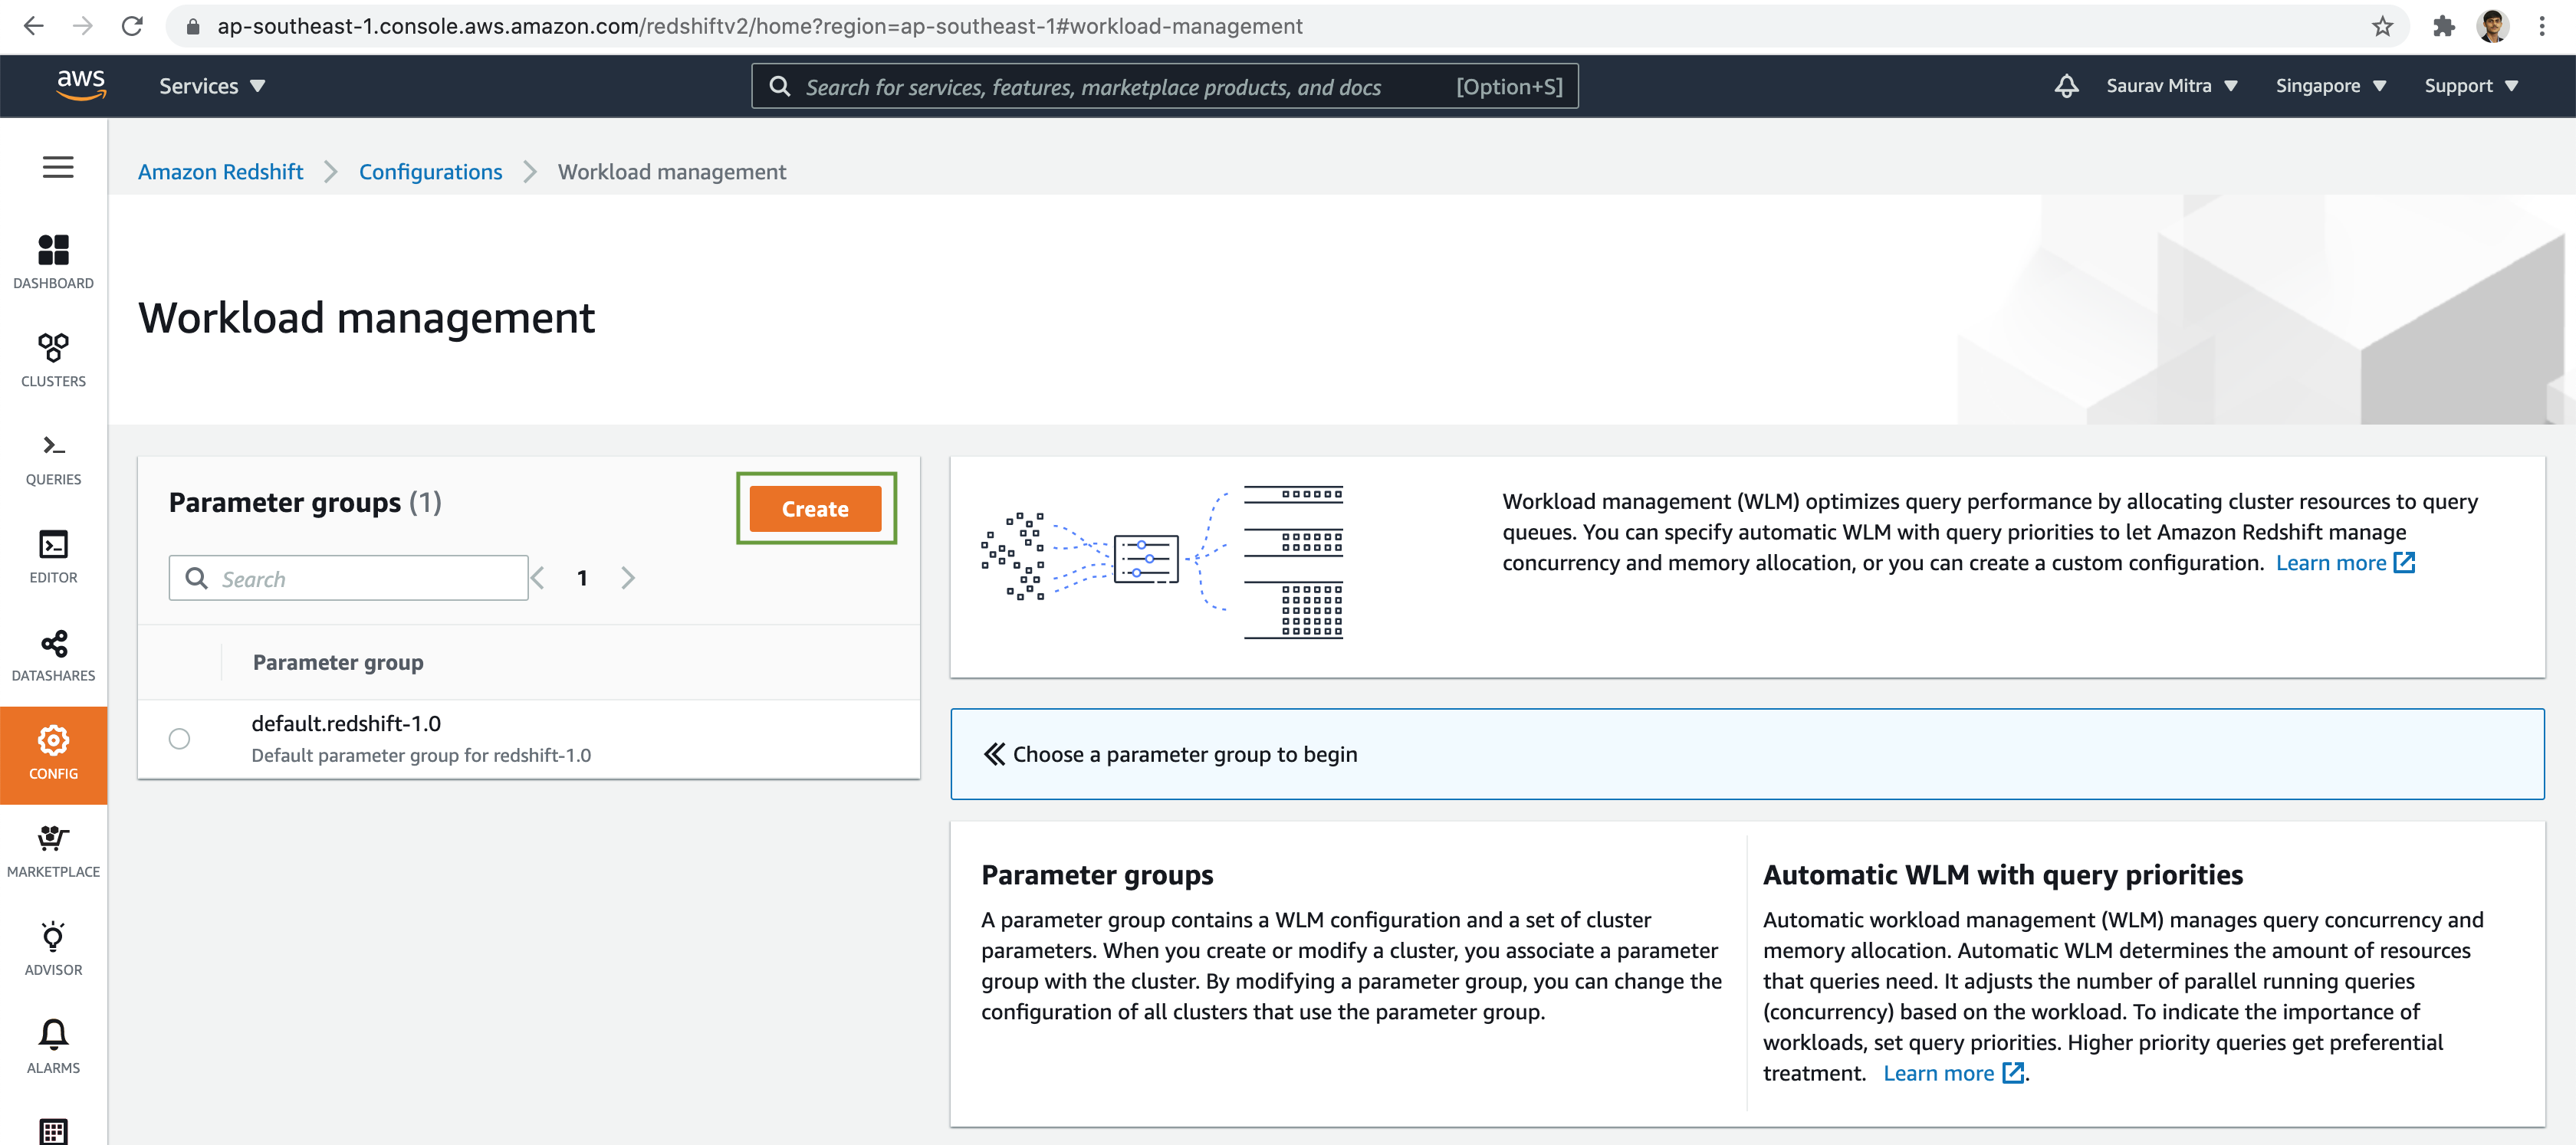
Next from the Configurations menu, click on the Workload management link.
Now let us create a new Parameter group.
Enter the Parameter Group name and a description.
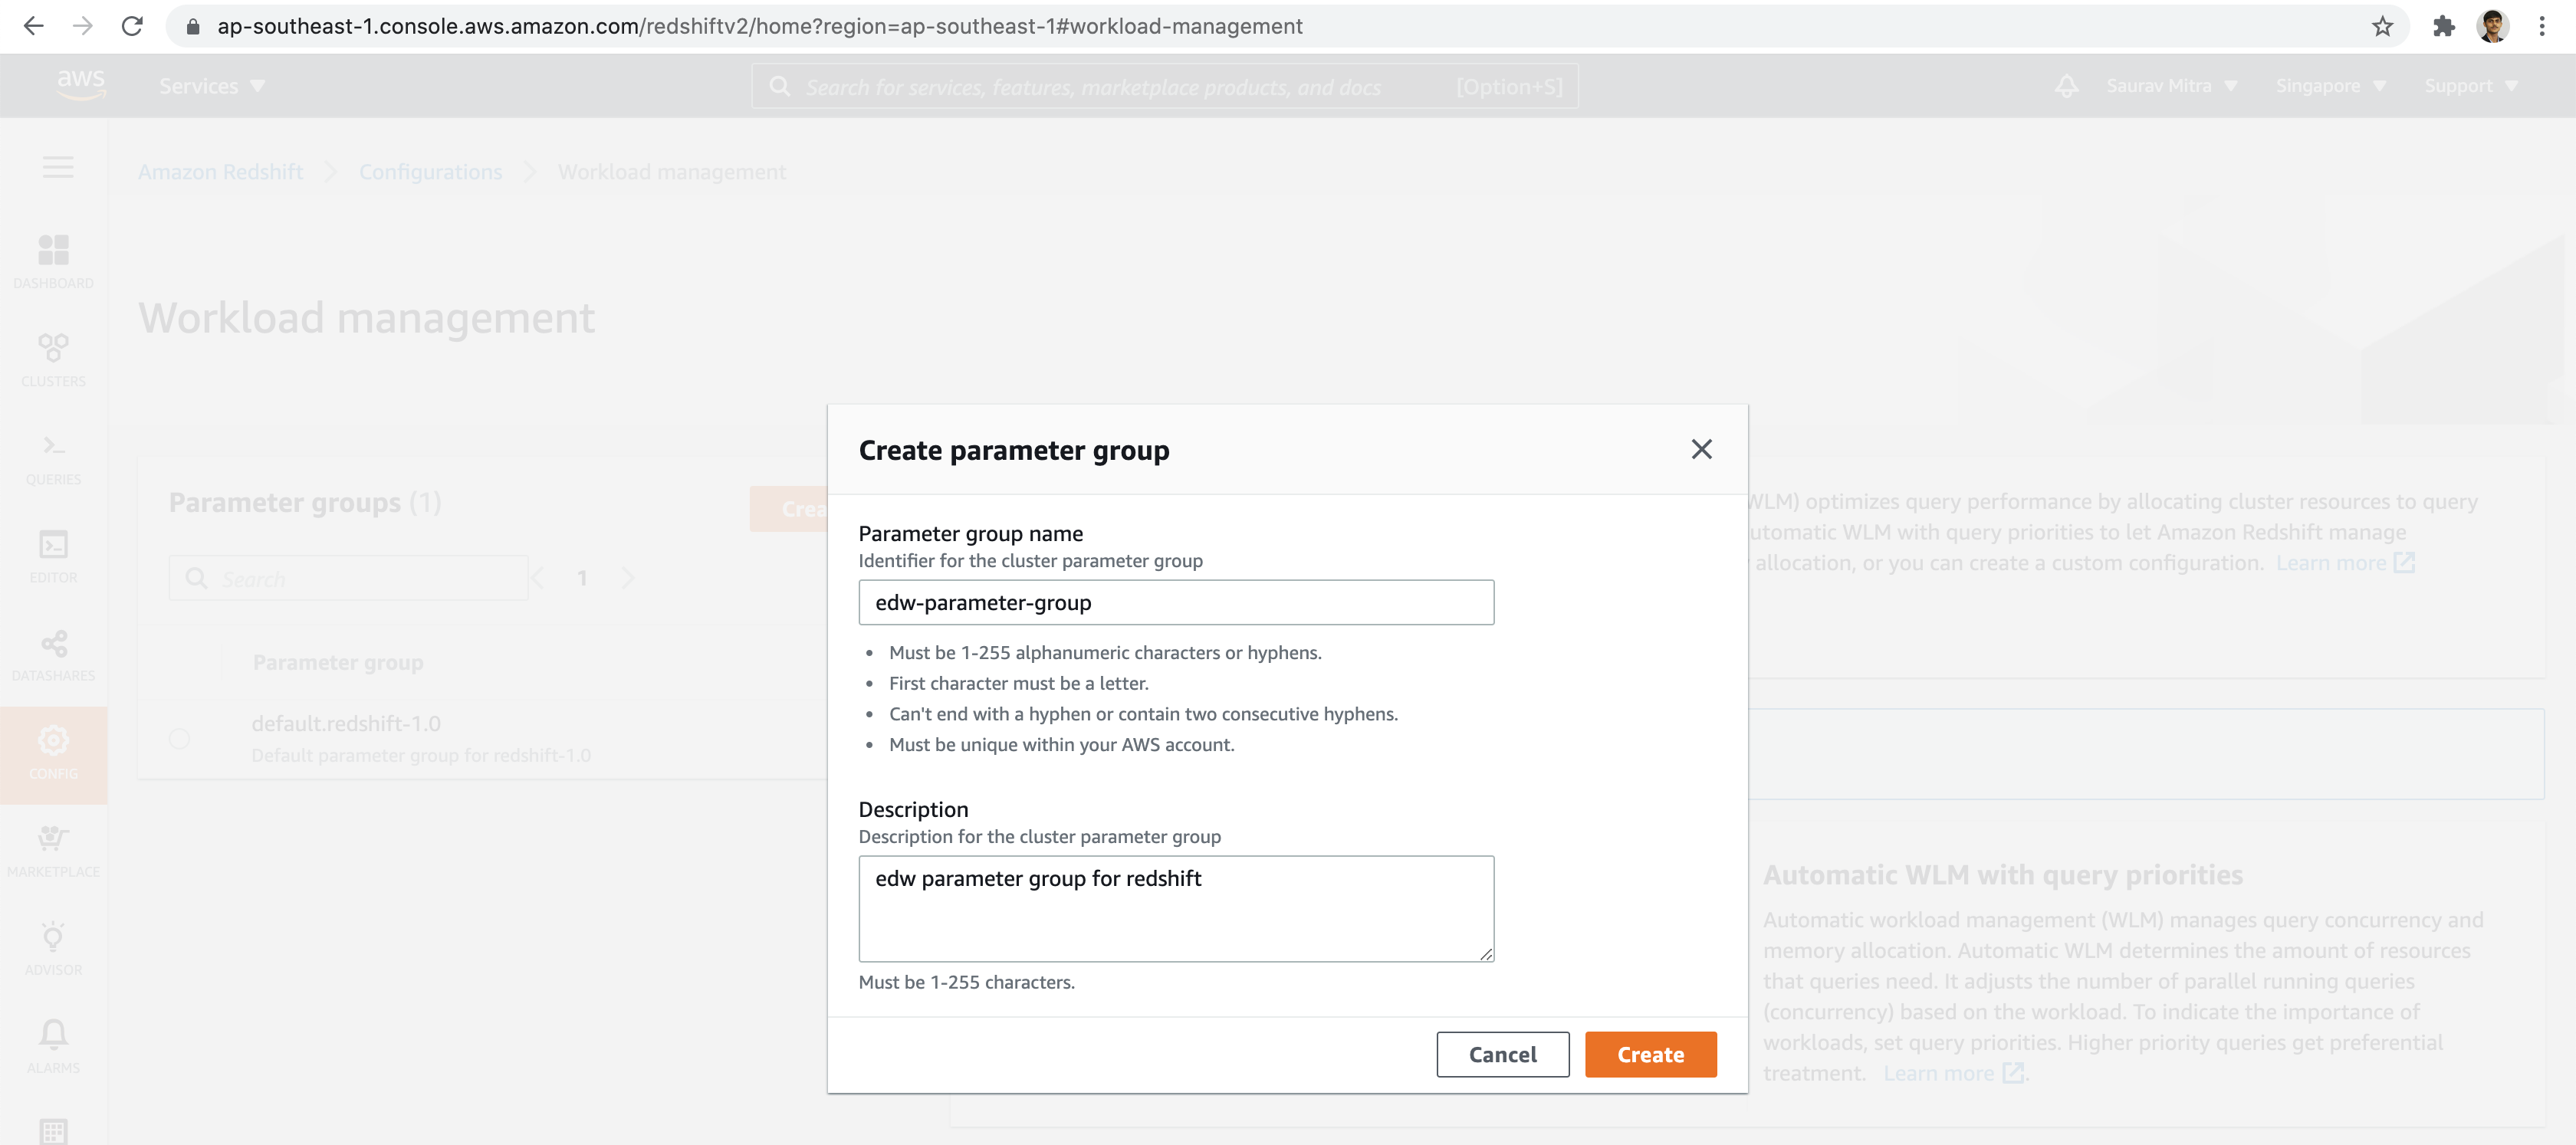
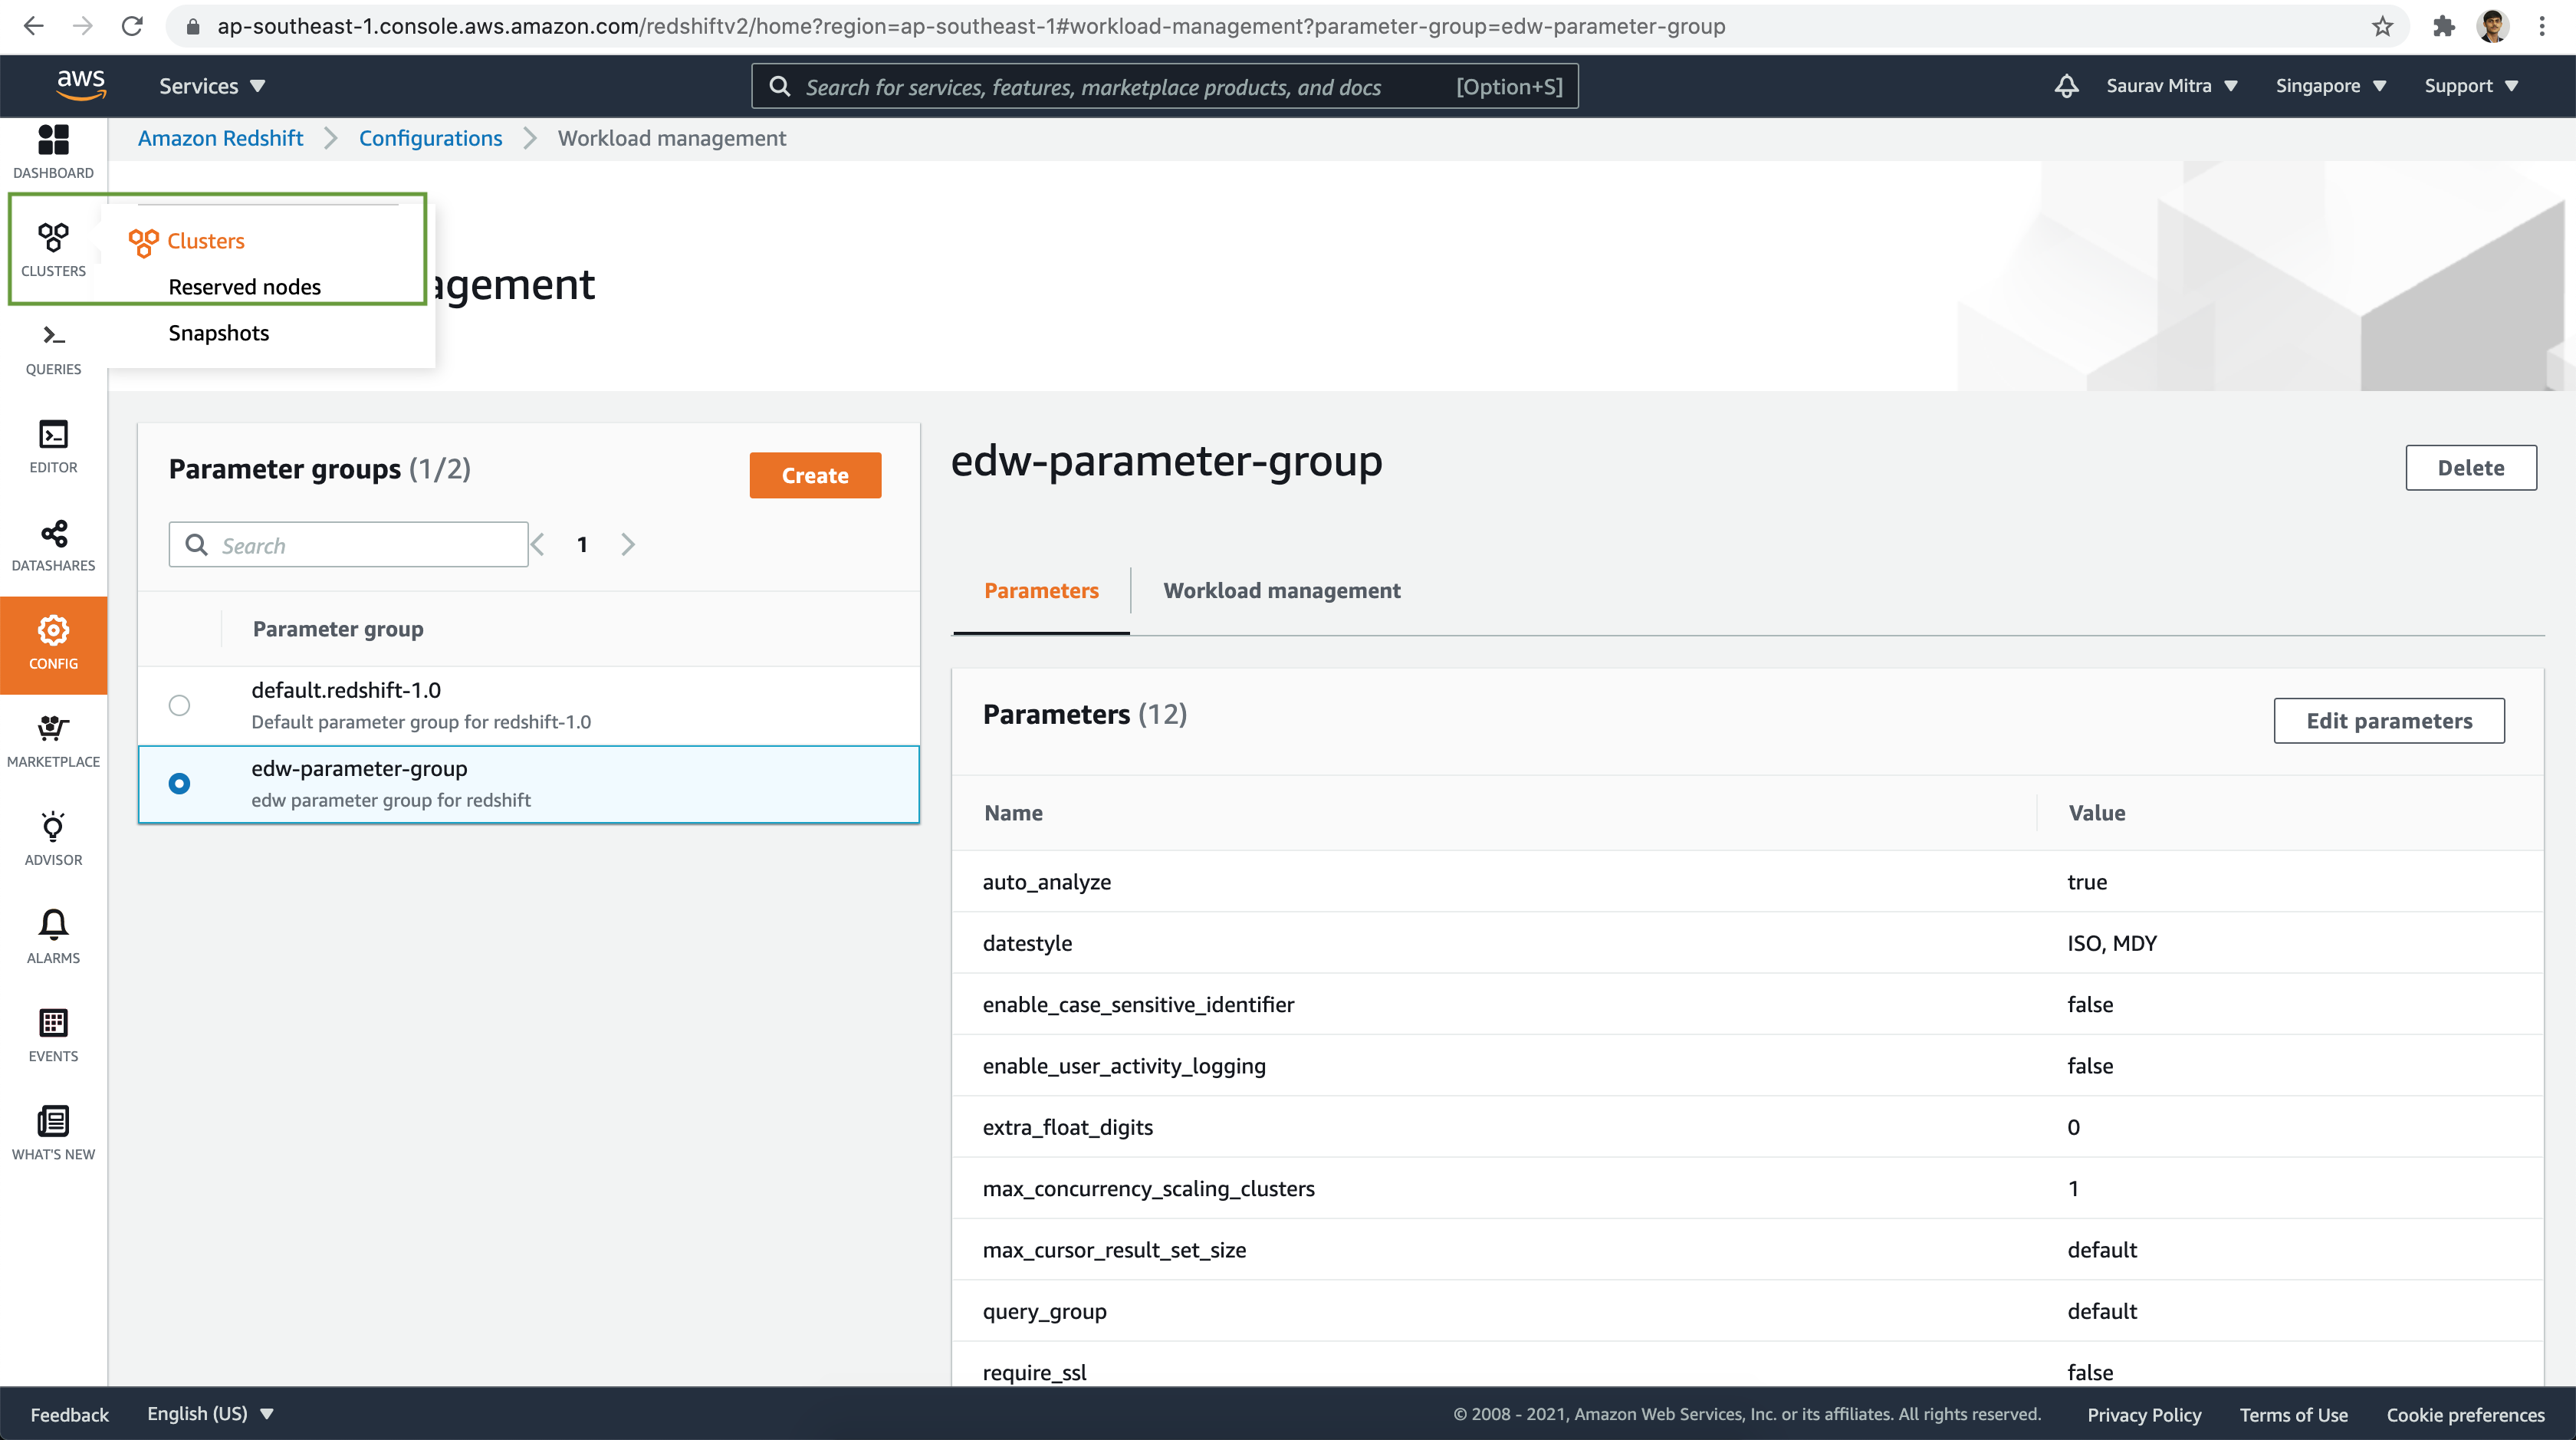
Modify the cluster parameters as needed. For the demo, let's keep it AS-IS.
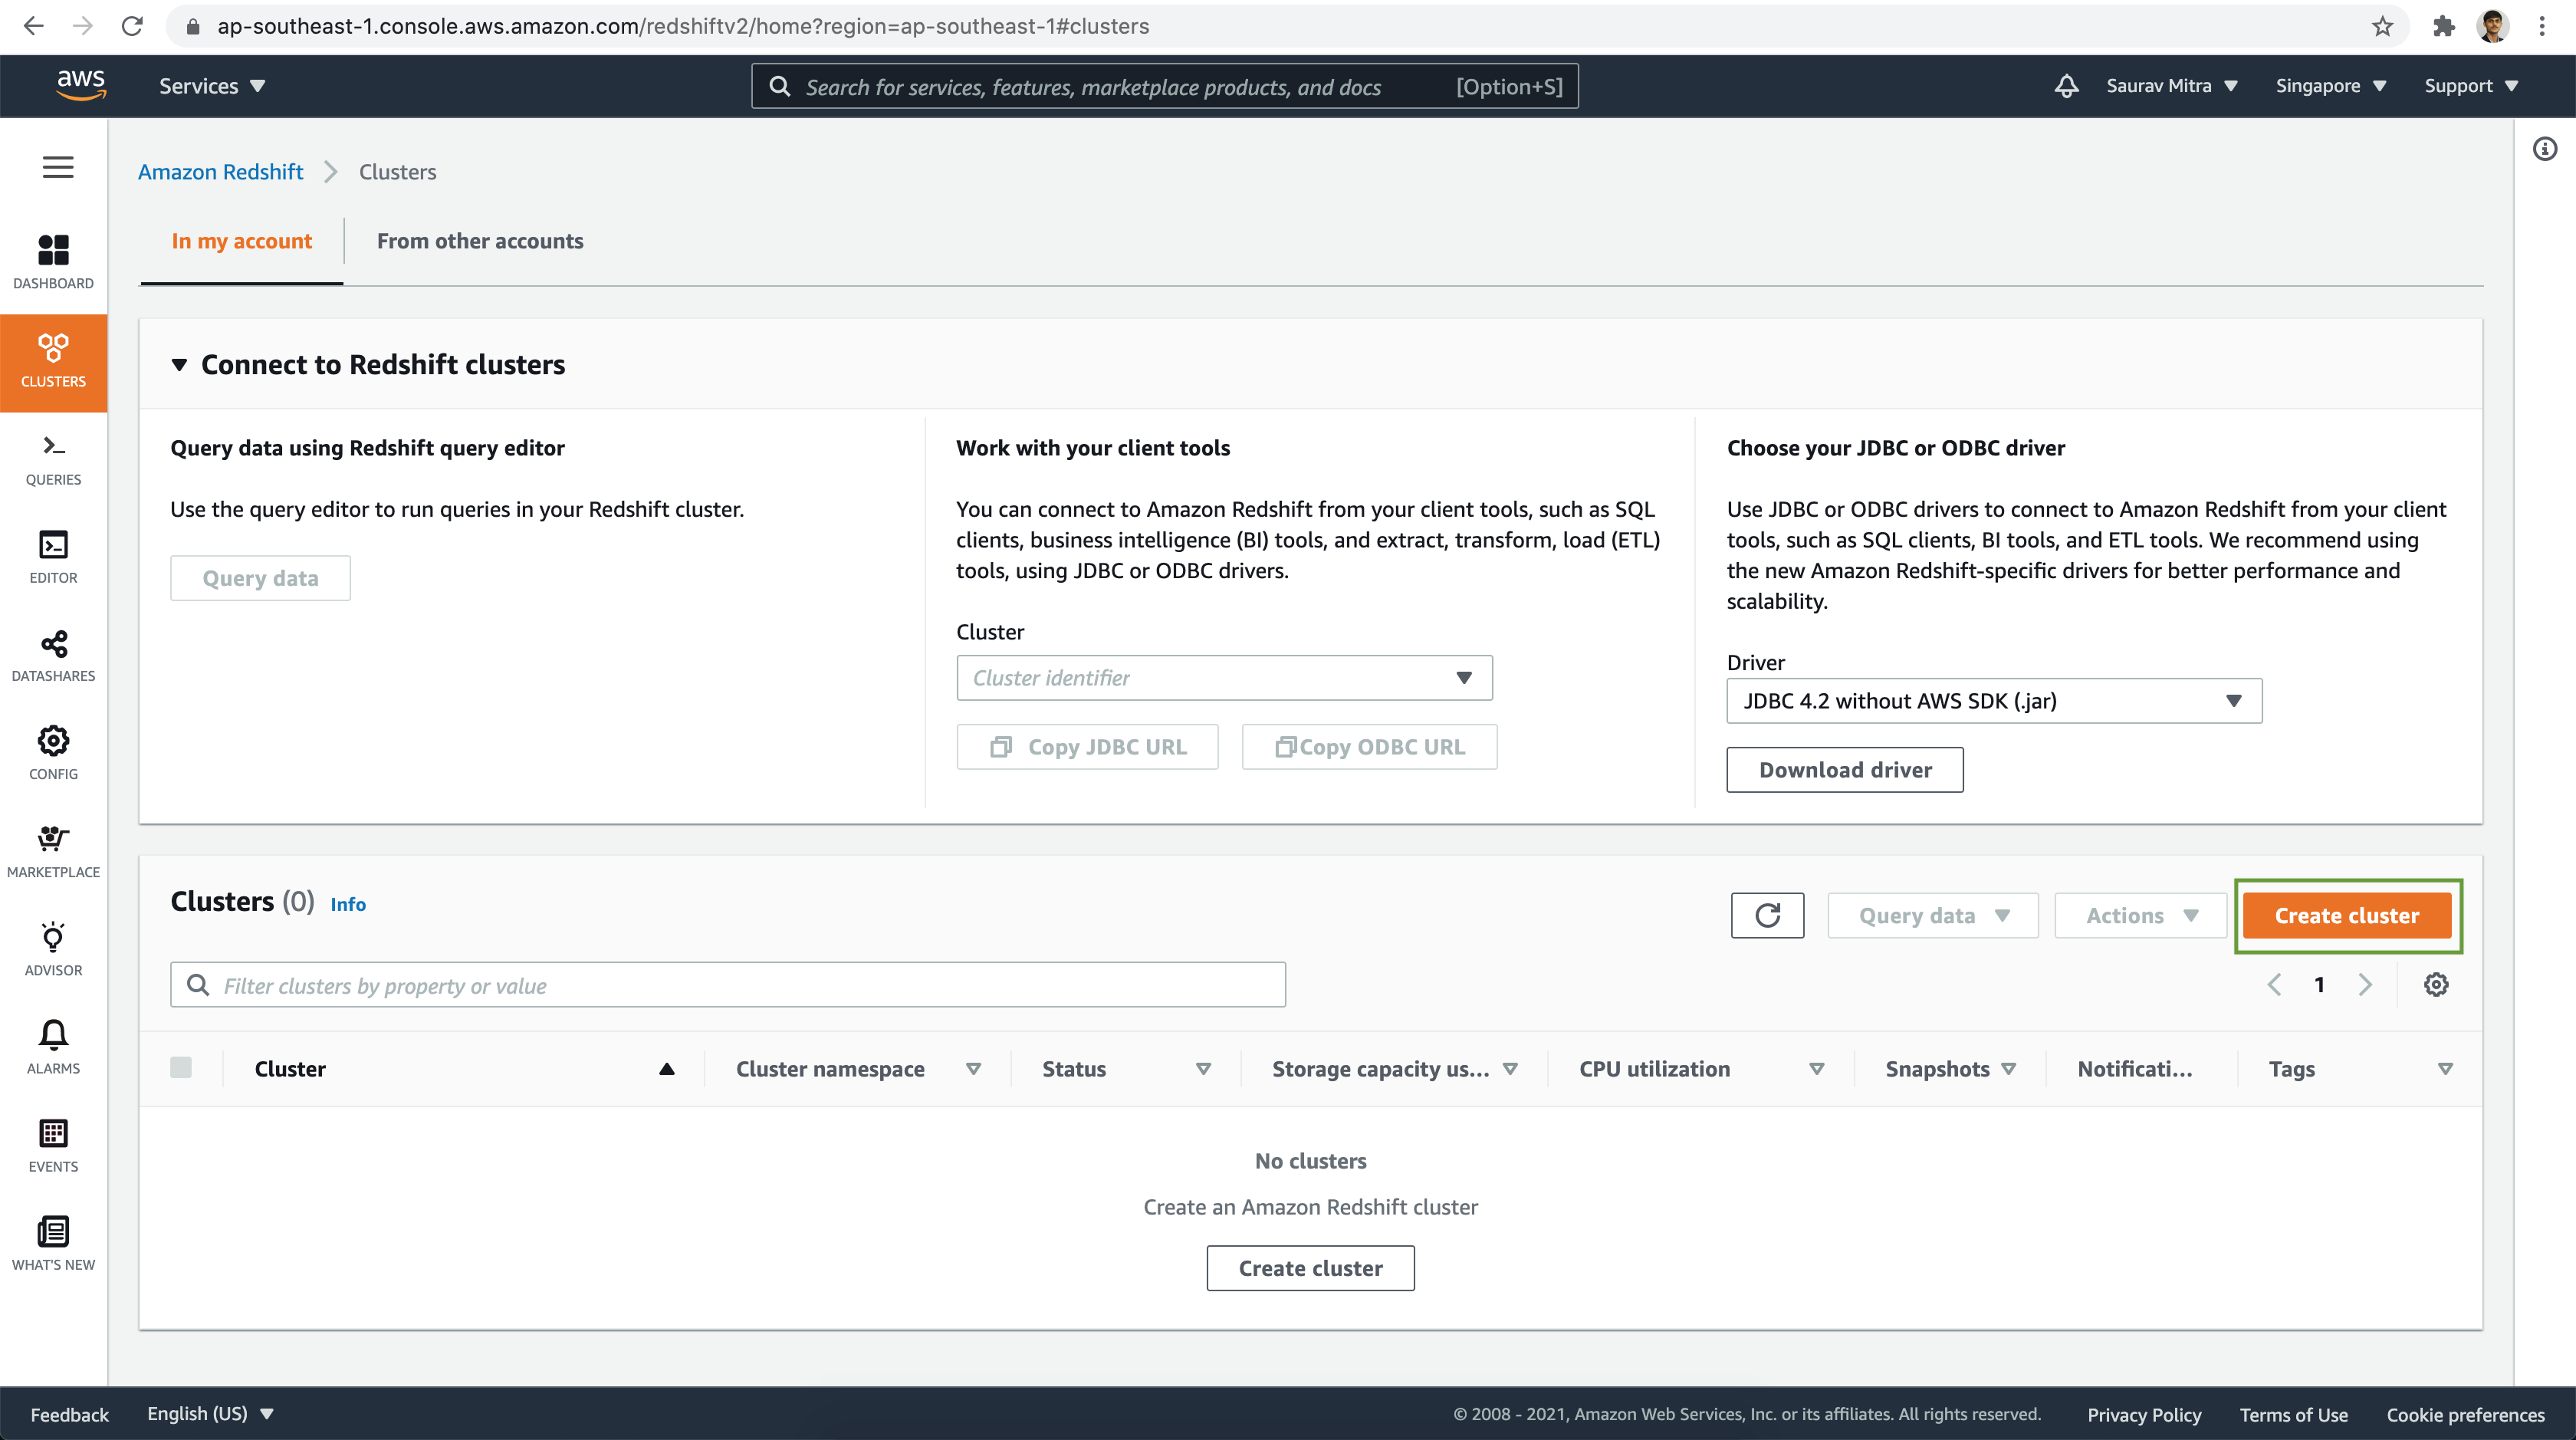
Next, click on the Clusters menu link. Now we are ready to setup our first Redshift cluster. Click on Create cluster button.
Let's name the cluster & select the Node type as dc2.large. For our demo it is good to start with 1 node in the cluster.
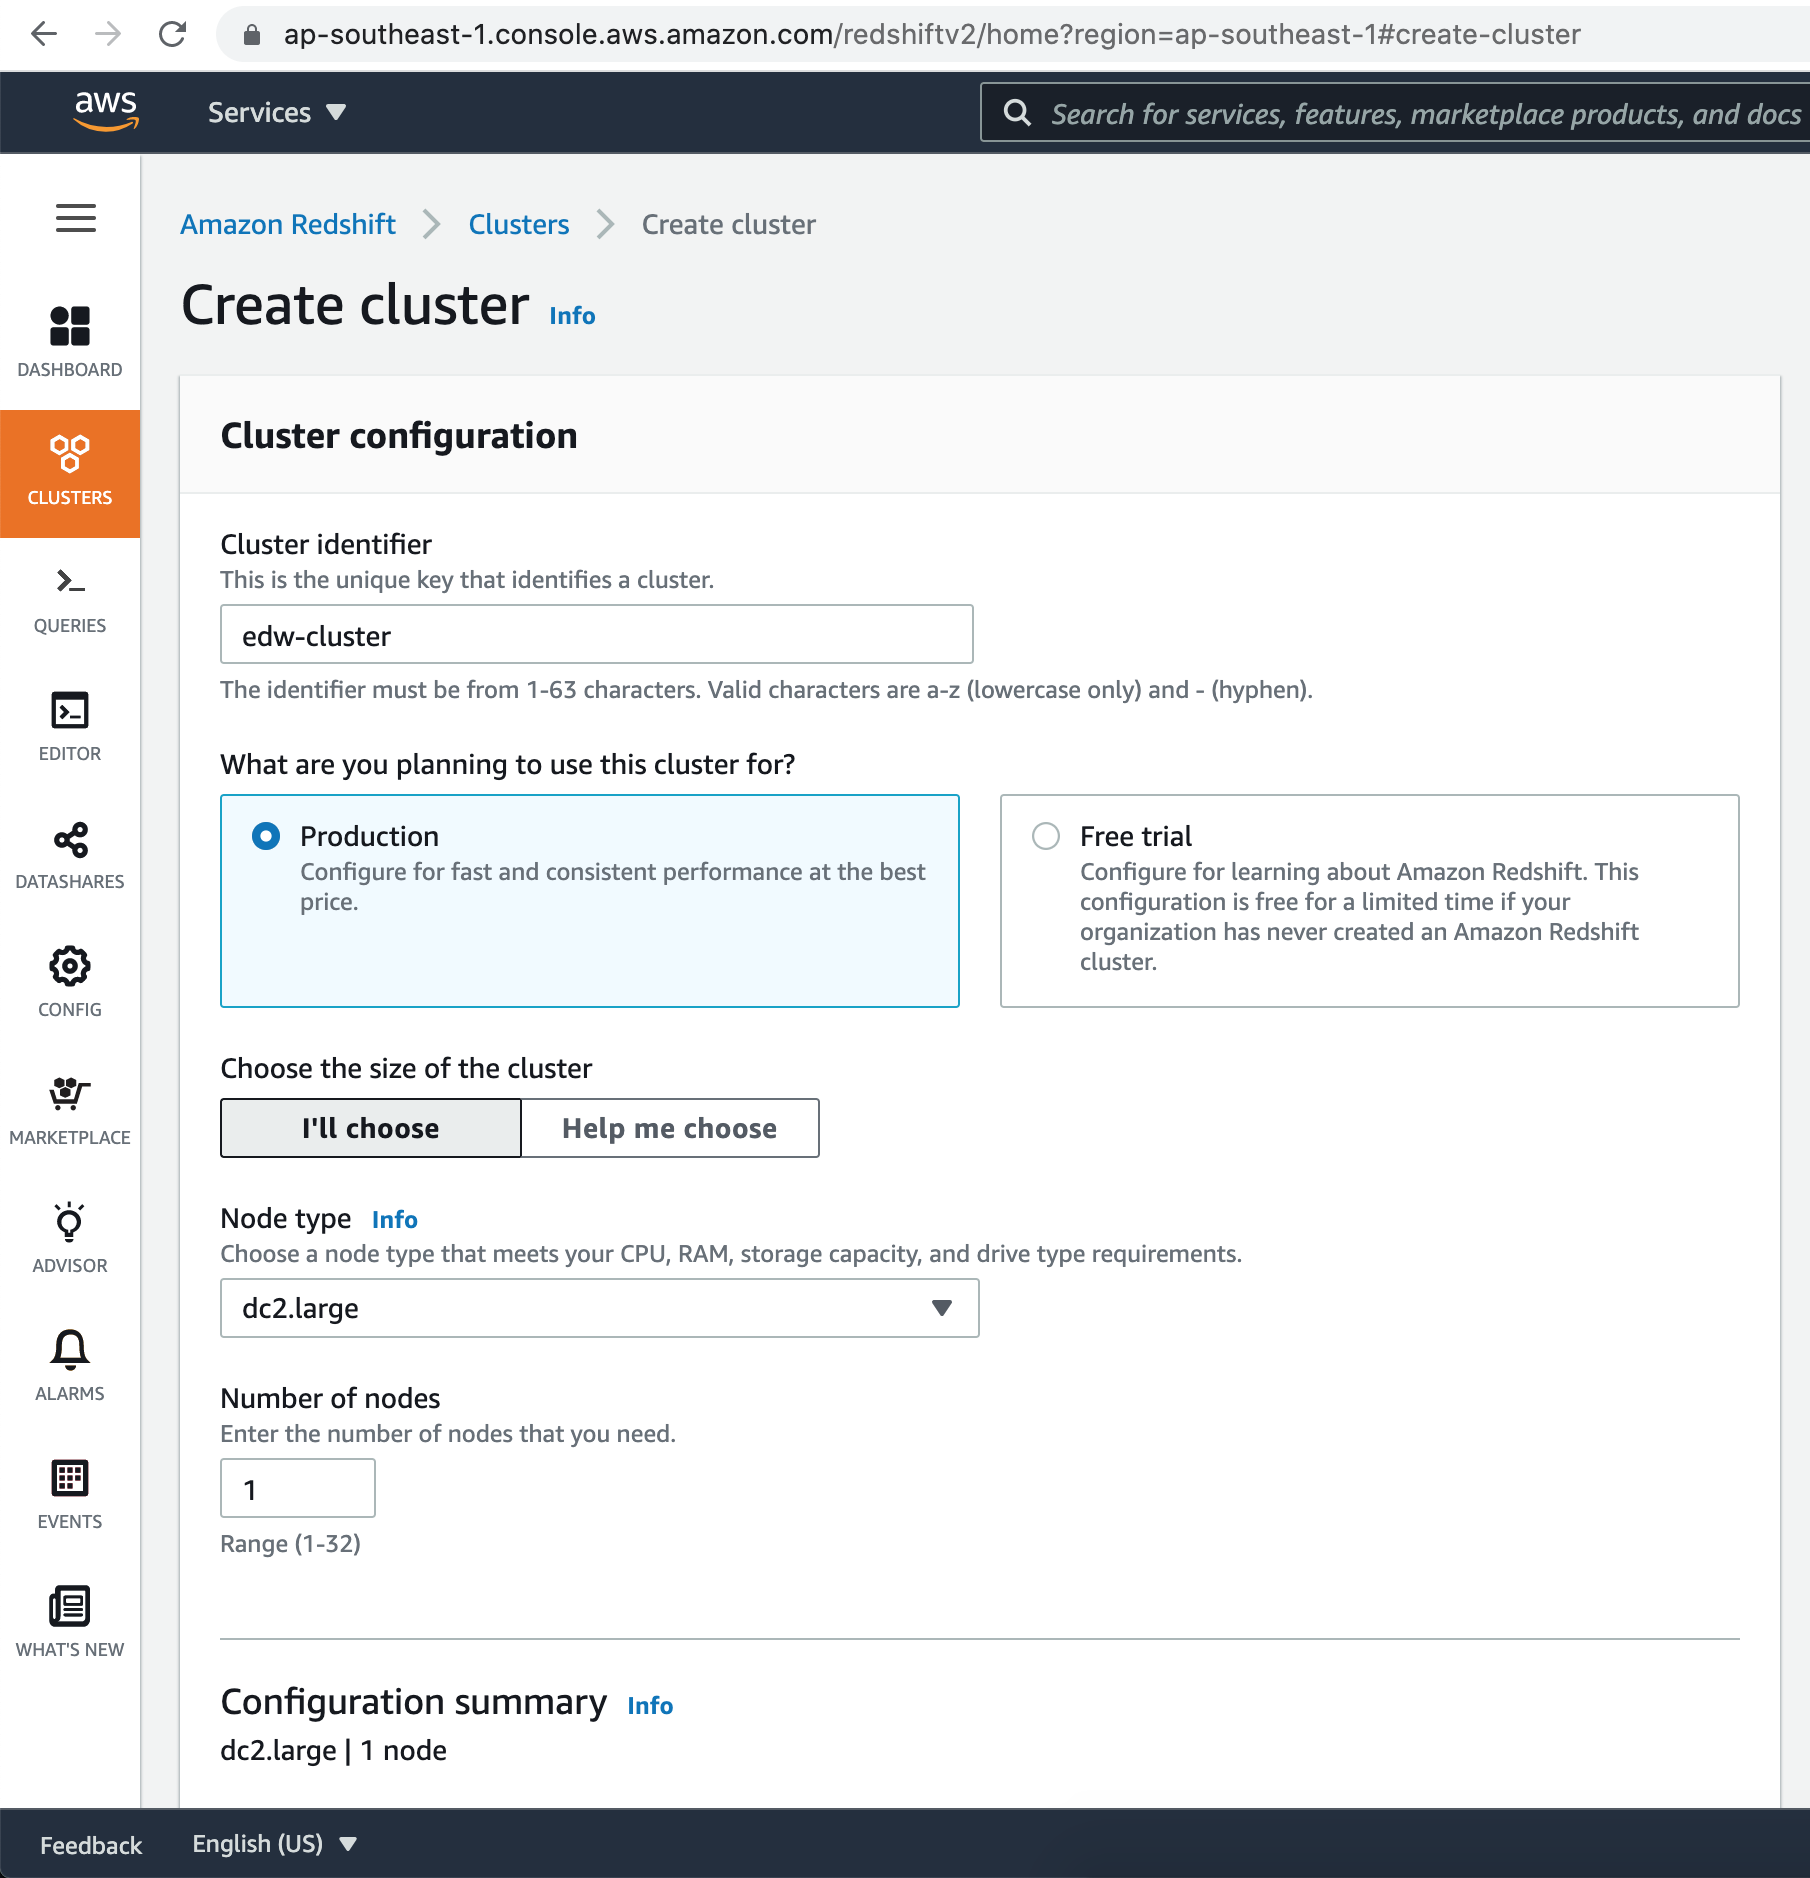
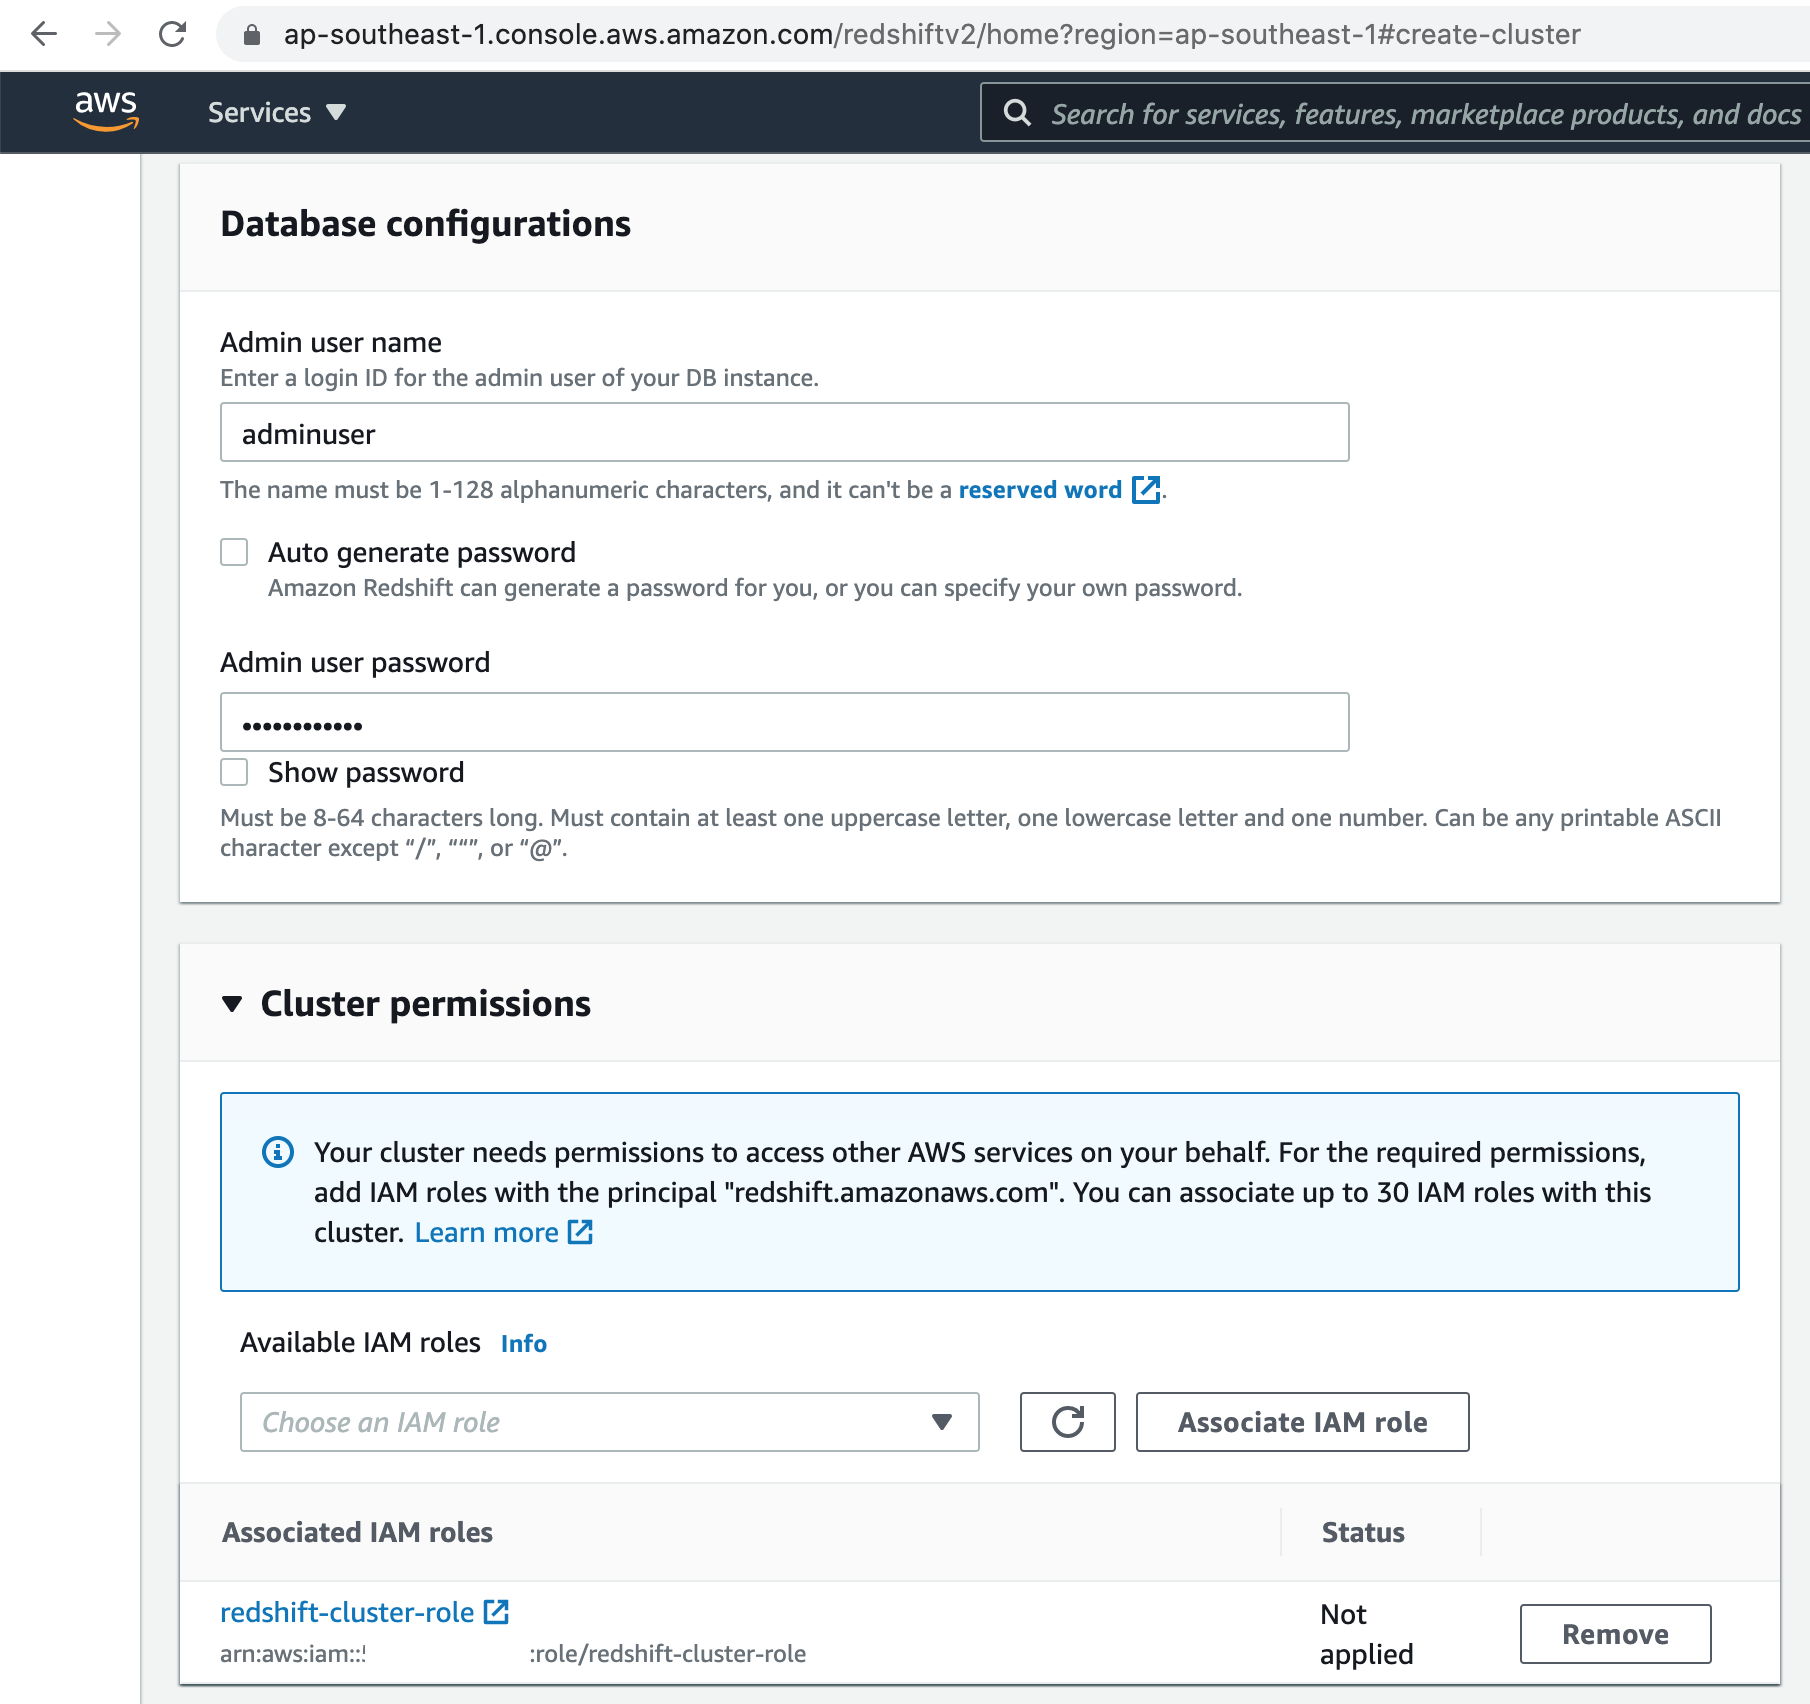
Choose a database username & password for the login credentials.
Next, select the IAM role we created earlier, from the dropdown menu & associate it with the Redshift cluster.
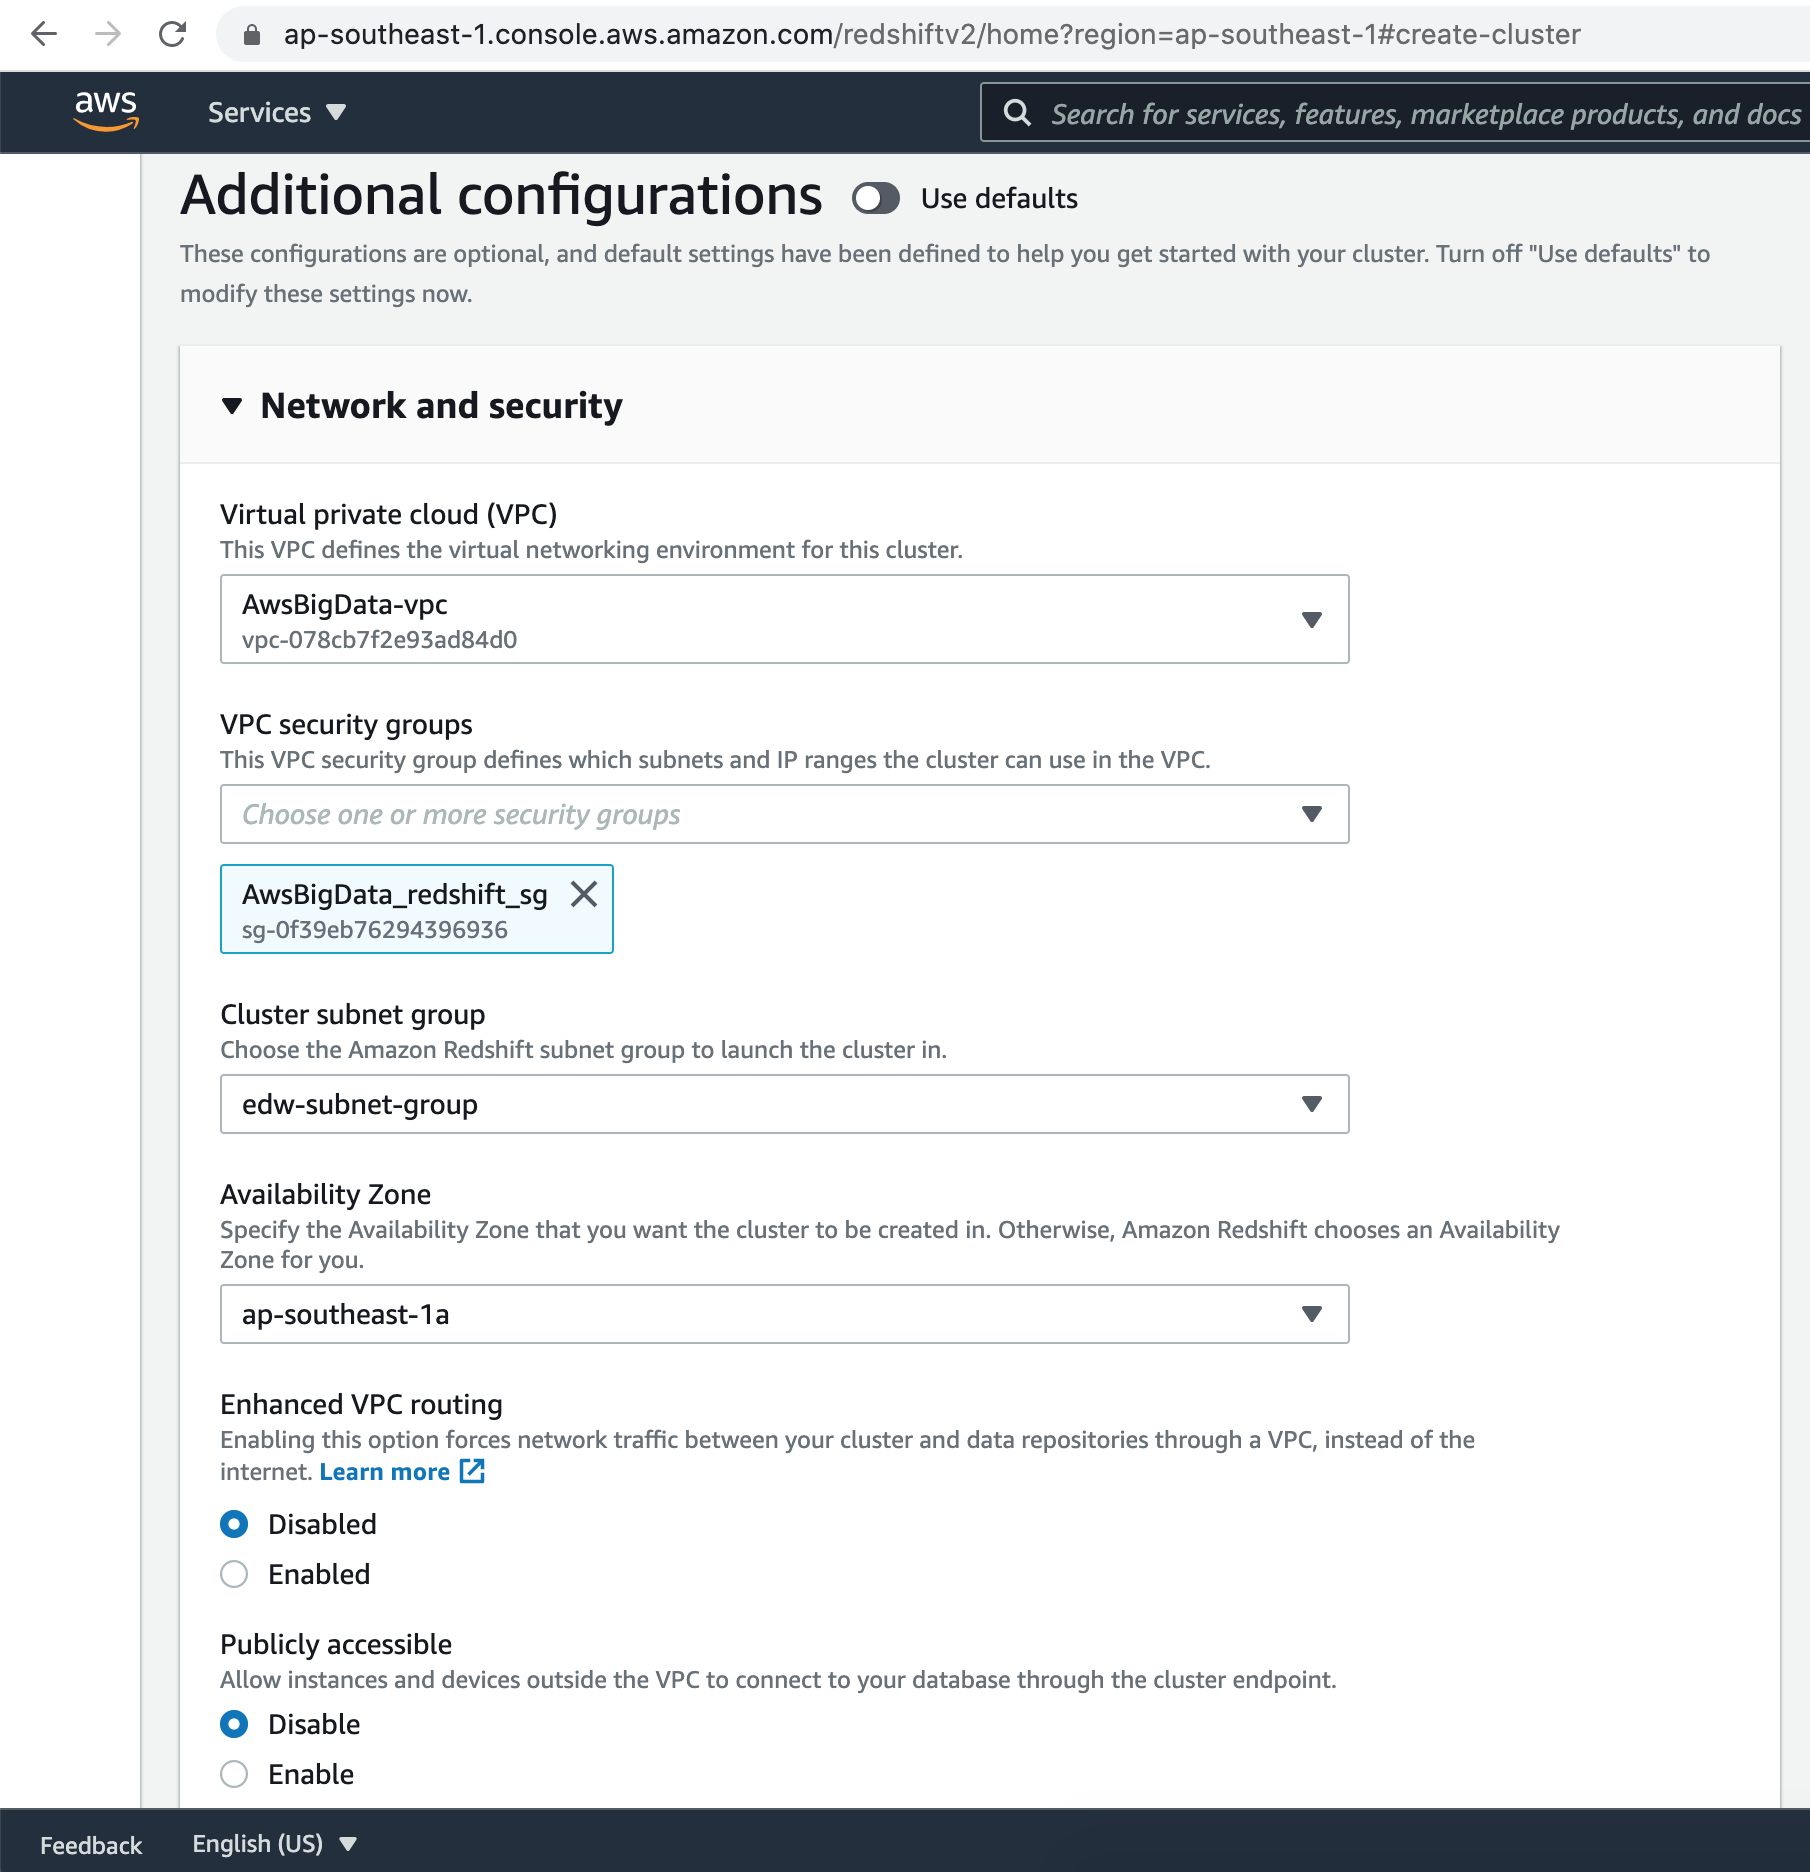
Let's select our VPC & Security group for the Redshift cluster.
Next, select the Subnet group we created earlier, from the dropdown menu & choose one of the availability zone.
Let us also disable, the public access to our Redshift cluster.
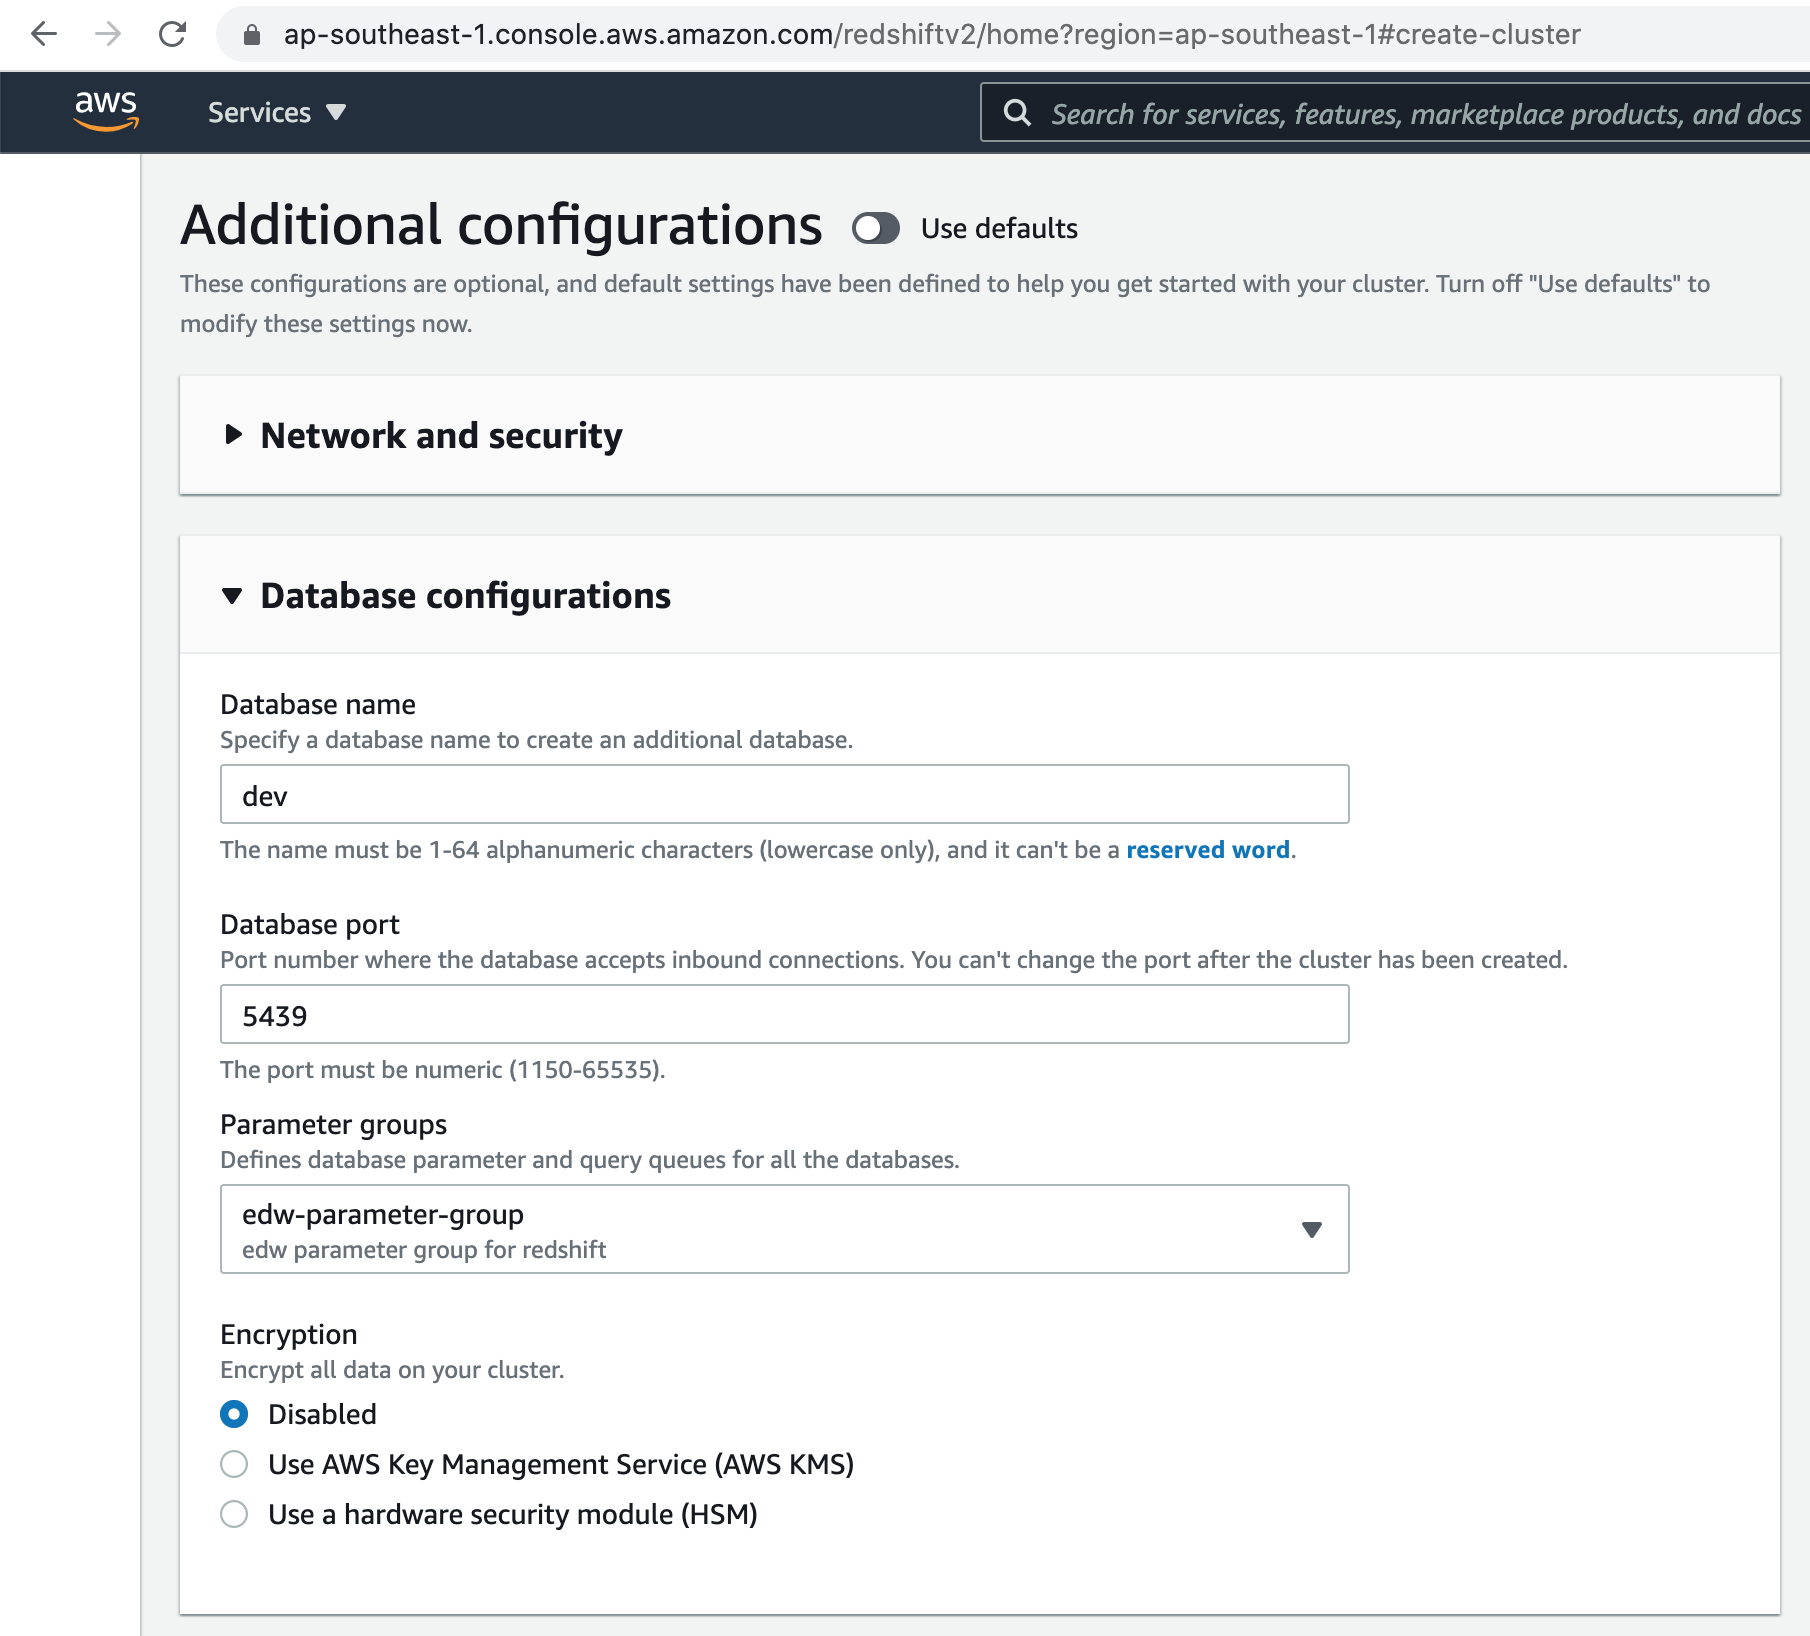
Let's add an initial database to the Redshift cluster. The default Redshift cluster port is 5439.
Next, select the Parameter group we created earlier, from the dropdown menu.
For the demo, lets keep the Default Maintenance window settings.
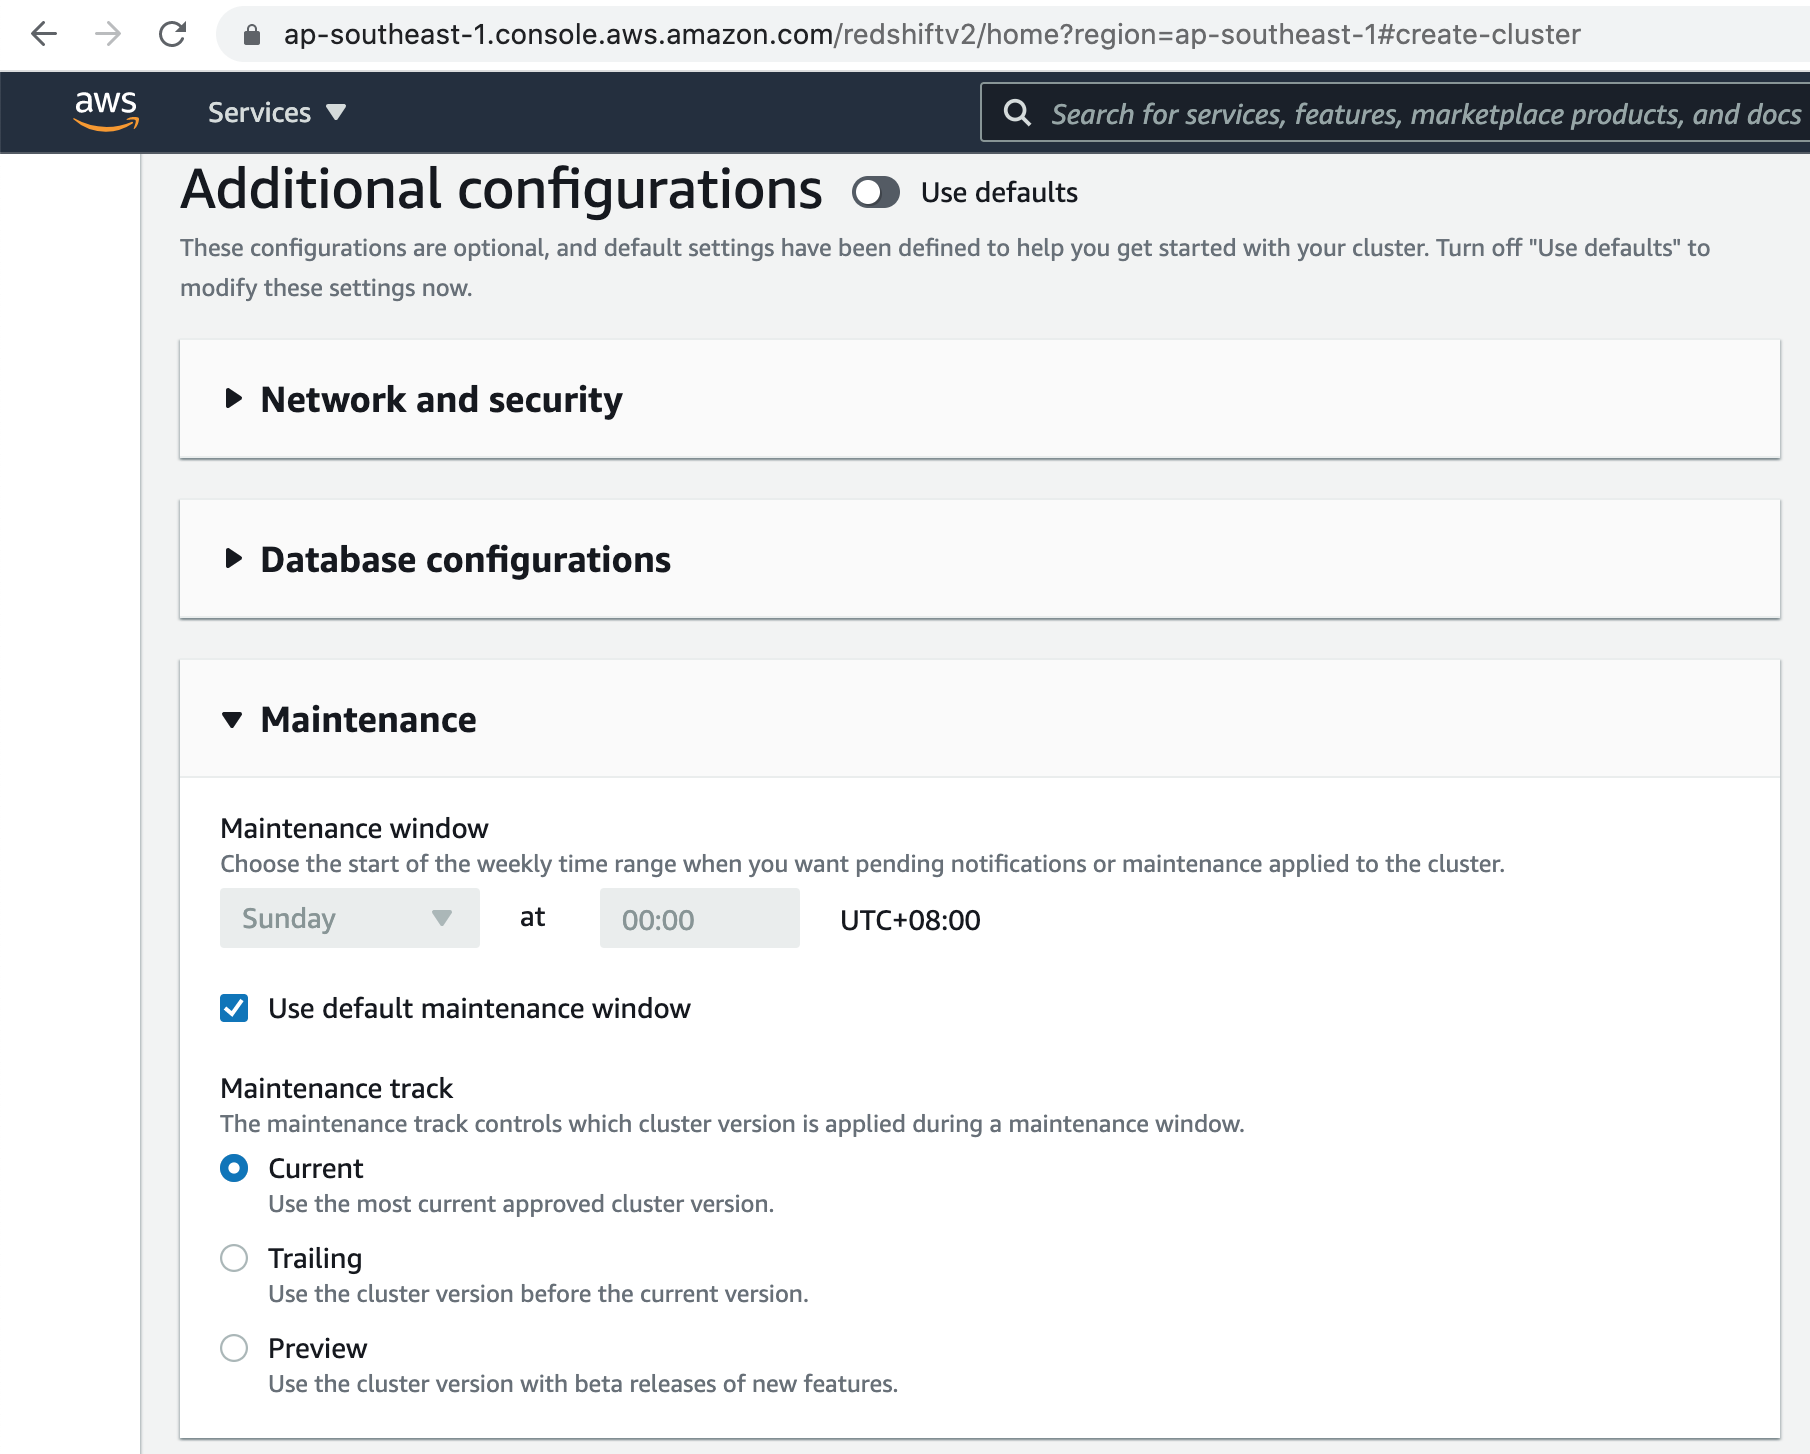
For the demo, lets keep the Default Snapshot retention as 1 day.
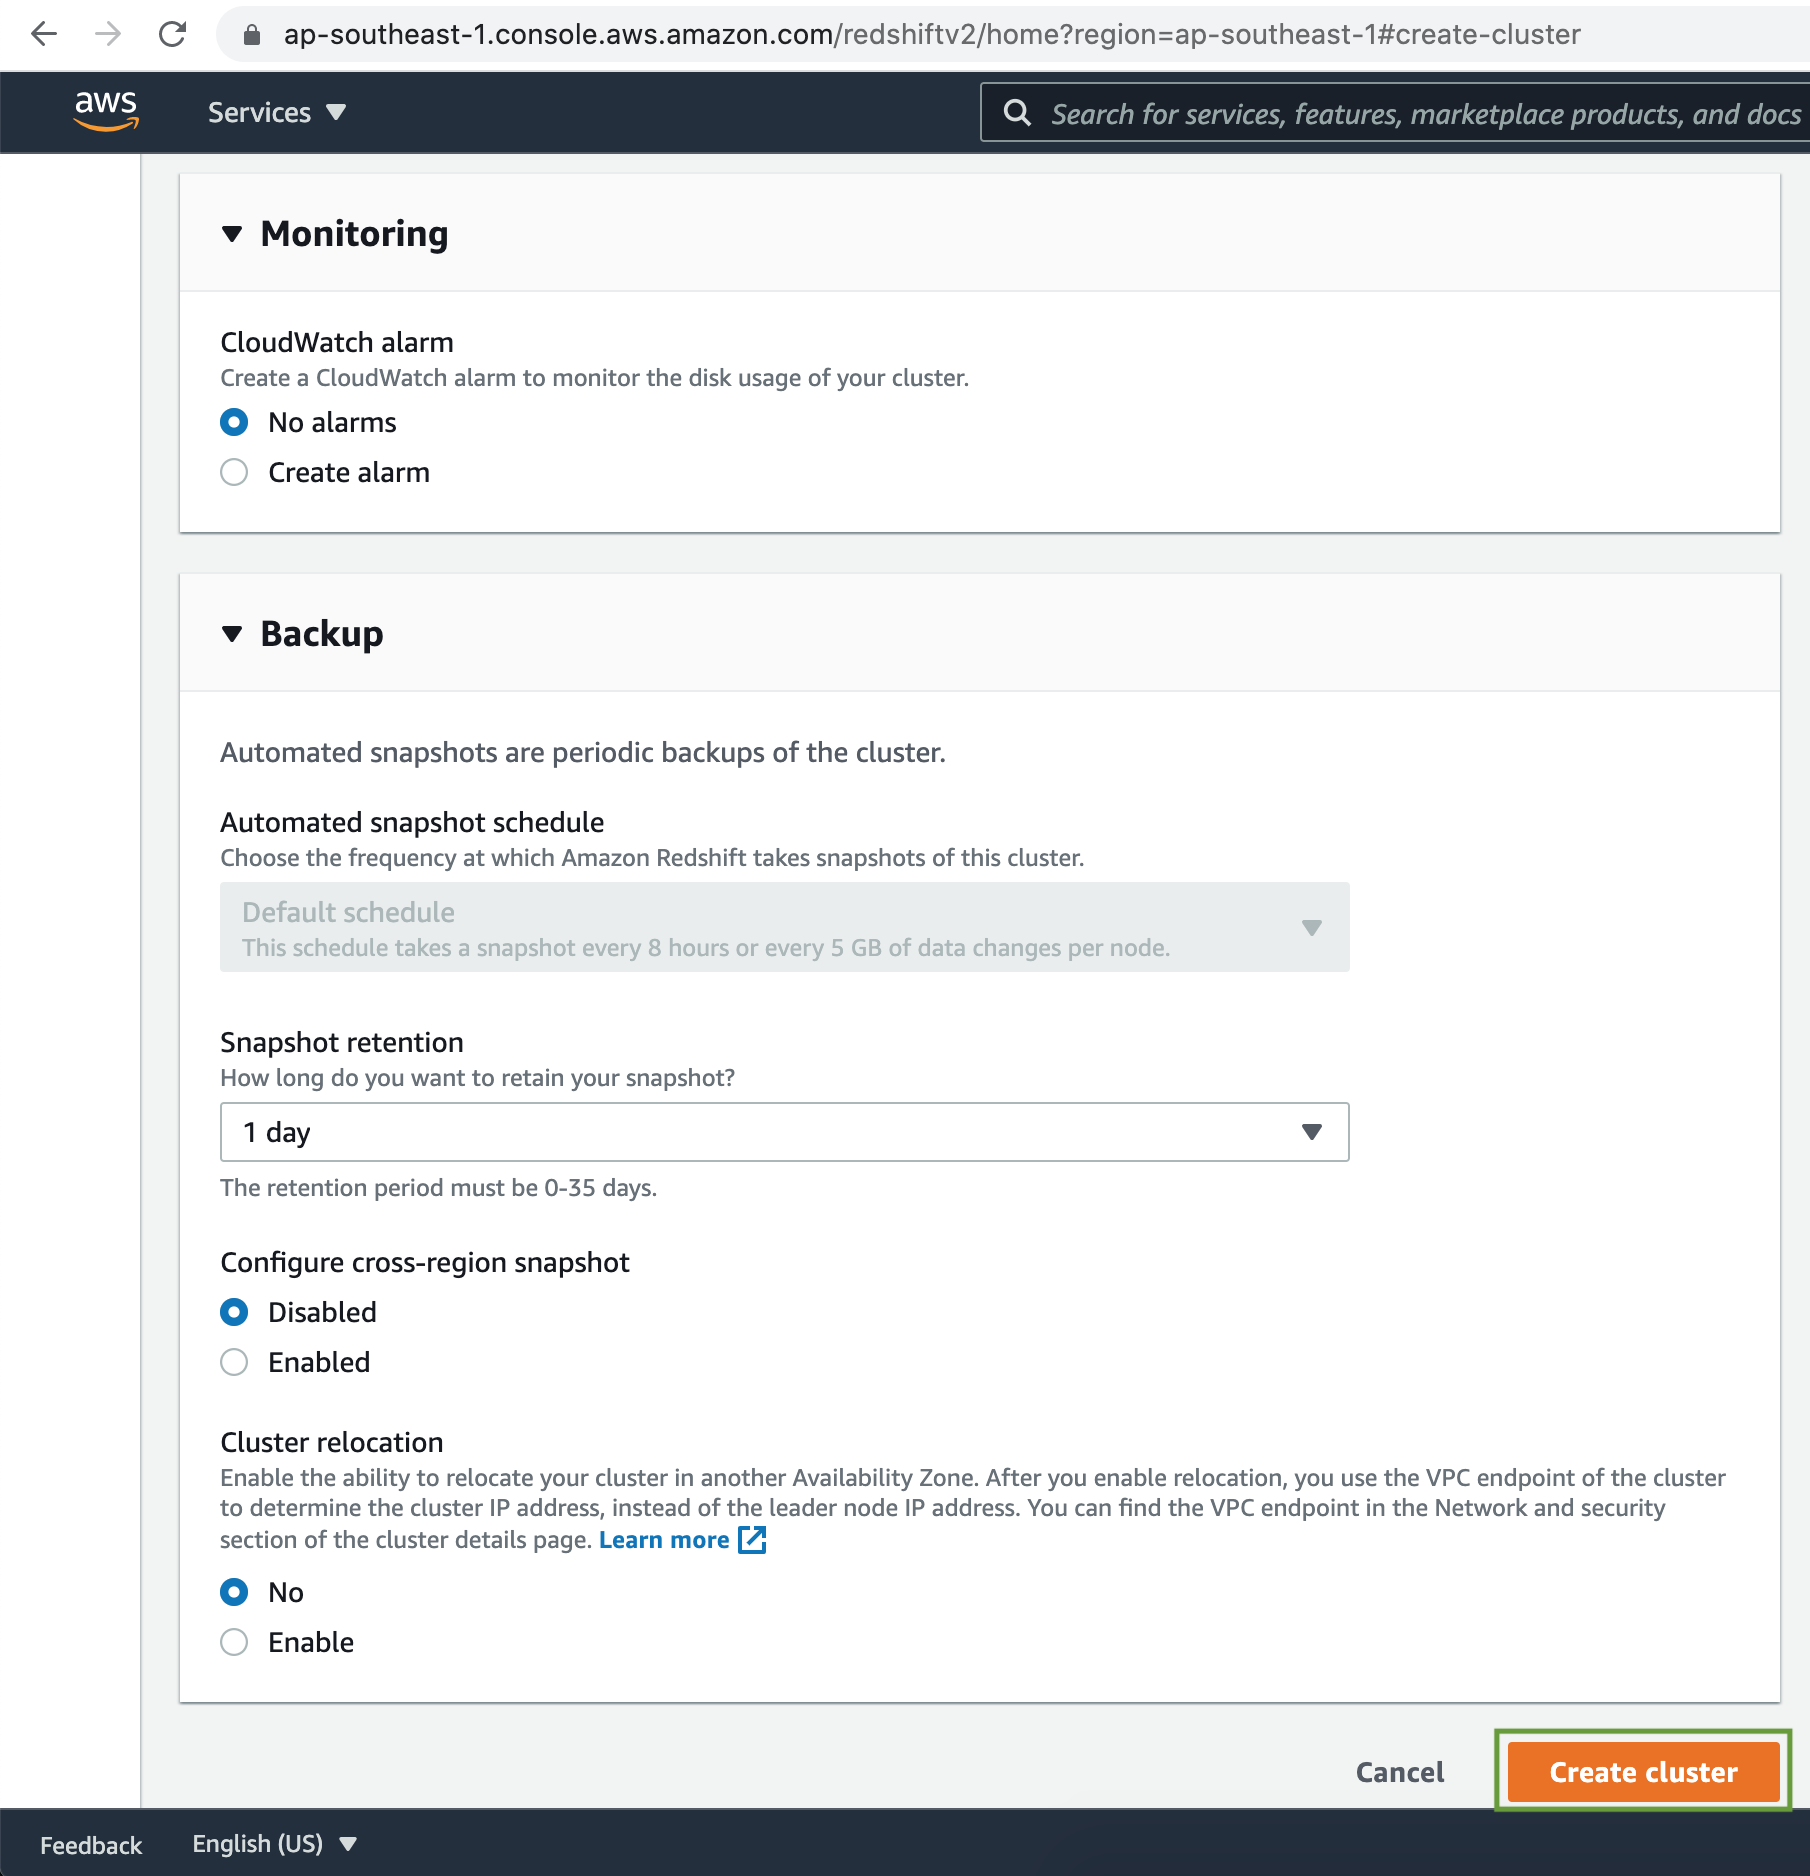
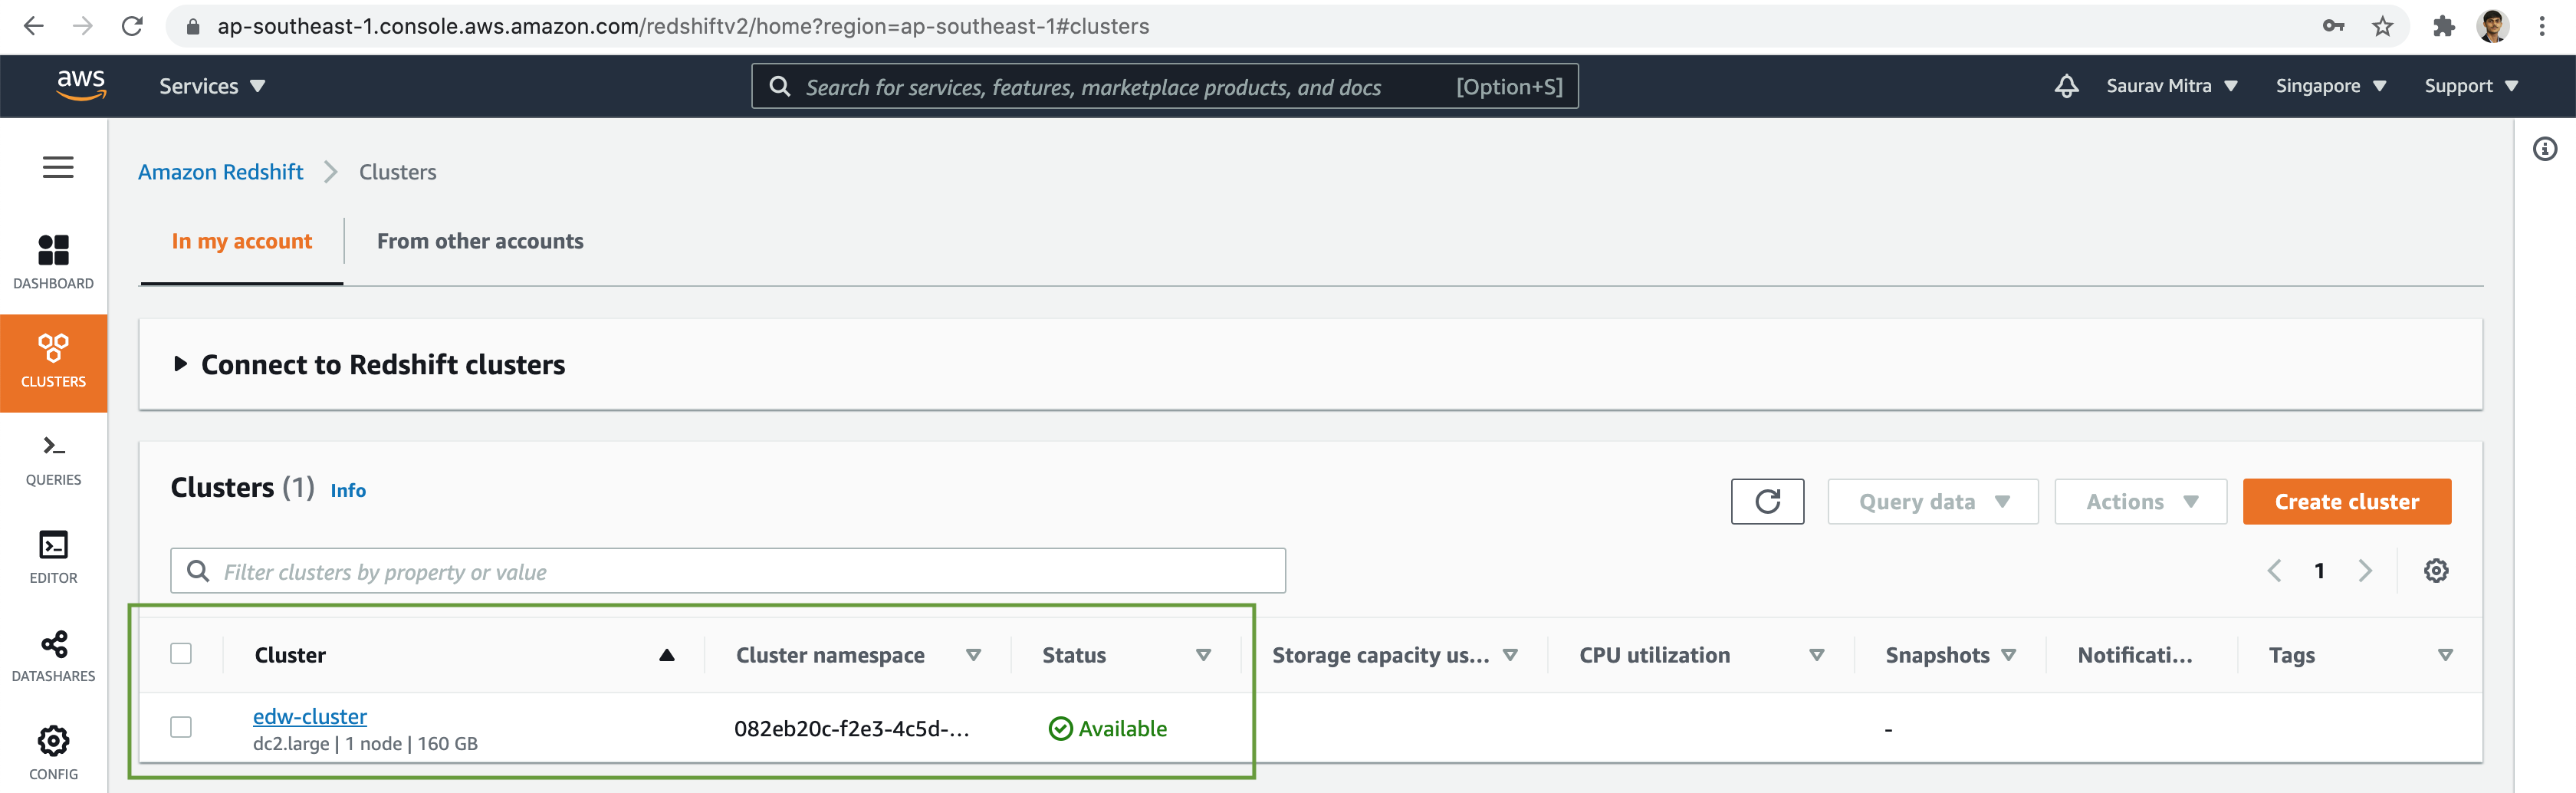
Now that all the configuration setup is done let's click on the Create cluster button. After a few minutes our Redshift cluster will be available.
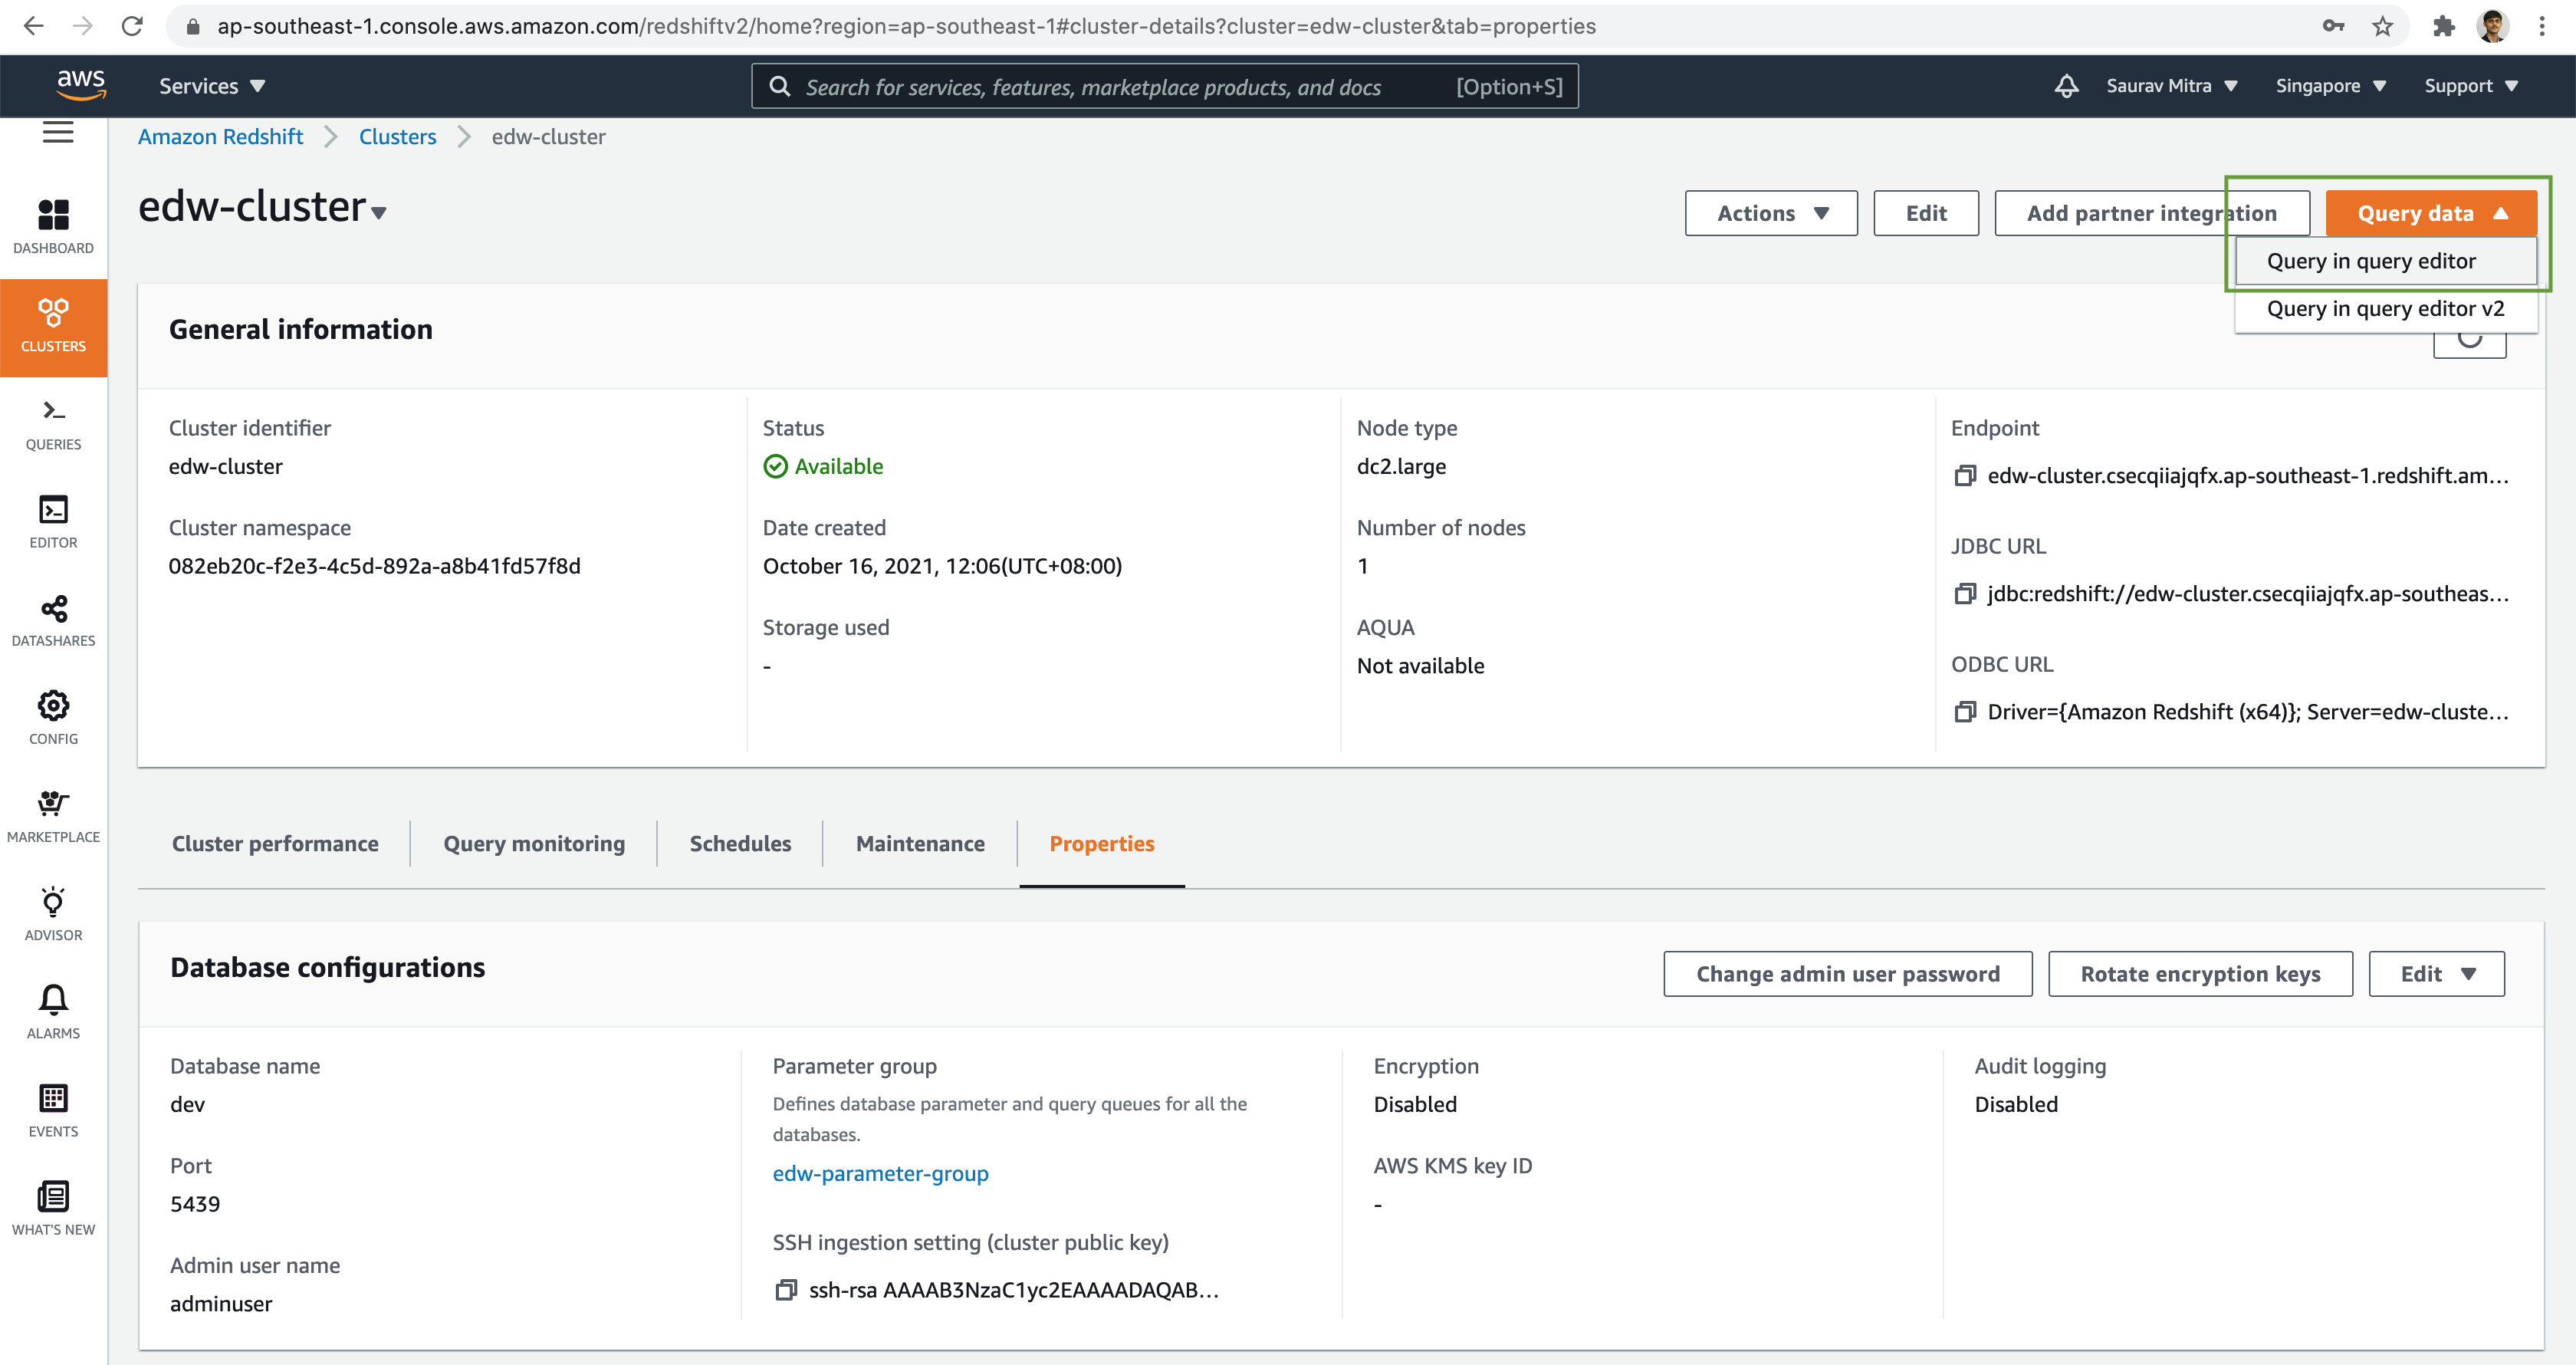
Verify the configuration & properties of the Redshift cluster. New let go ahead and do some data analysis using Redshift. Click on the Query data button followed by Query in query editor link.
In our next article we will perform data analysis using Redshift & visualization on top of it using Metabase.