Fools Guide to BODS - Repository Creation

In the first chapter of this article we have learnt the very basic of BODS. In this part of the article we will begin with BODS Repository creation process
Before launching the BODS application and starting actual BODS programming there are three mandatory activities which needs to completed they are –
- Repository Creation
- JobServer Configuration
- Registering Repository with CMC.
Creating a Repository
The first and foremost activity one has to do after installing BODS and database is, creating a local repository. The below mentioned are the step by step process to create it-
1. Log on to your Database (SQL server 2008 Express in this case)
2. Create a new database (Example - DS_LOCAL_TEST).This database would be used for Local repository. (This article does not explain how to create database and tables outside BODS.)
3. Go to Start menu open SAP BusinessObjects Data Services 4.0 SP1 -> Data Services Repository Manager
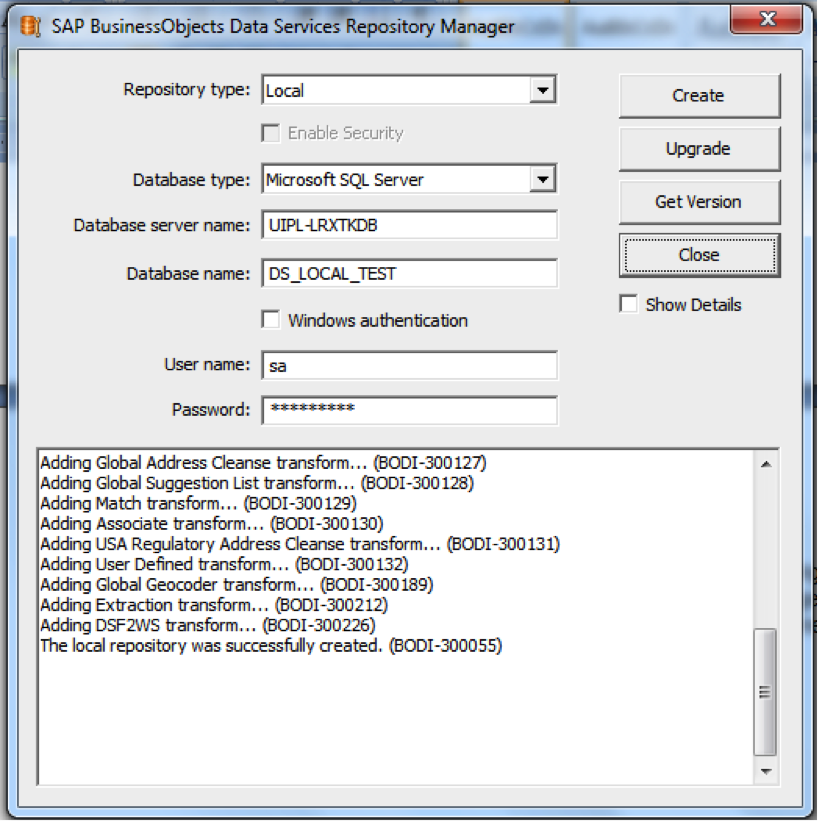
4. A screen as shown in the below diagram (Figure 2.2) would popup. Enter the required parameters into the text boxes as stated below -

Below are the credentials one would need to fill in the Repository Manager.
Repository type – Local
Database Type – Microsoft SQL Server (in this case)
Database Sever name – This should be the machine/server name where the database is residing. If you have installed database in your local machine the machine name or machine IP has to be provided.
Windows authentication – DONOT check this option .It is always recommended to use password authentication.
User name – The login name of that is used to login to the above mentioned Database residing in the Database server mentioned.
Password - The same password used to login to the above mentioned Database residing in the Database server mentioned for the login id specified.
5. Click on create. The below displayed message could been seen(Figure 2.3), indicating “The local repository was created successfully”. (If you do not get the success message, then, any one of the credentials is incorrect like the database server name or the database name or user id password)
6. Close the window
Attaching repository to JobServer
The next step following the creation of repository is attaching the repository to a Jobserver. Only once it is attached to a job server, it can be opened using designer. Below are the steps to associate a repository to Jobserver-
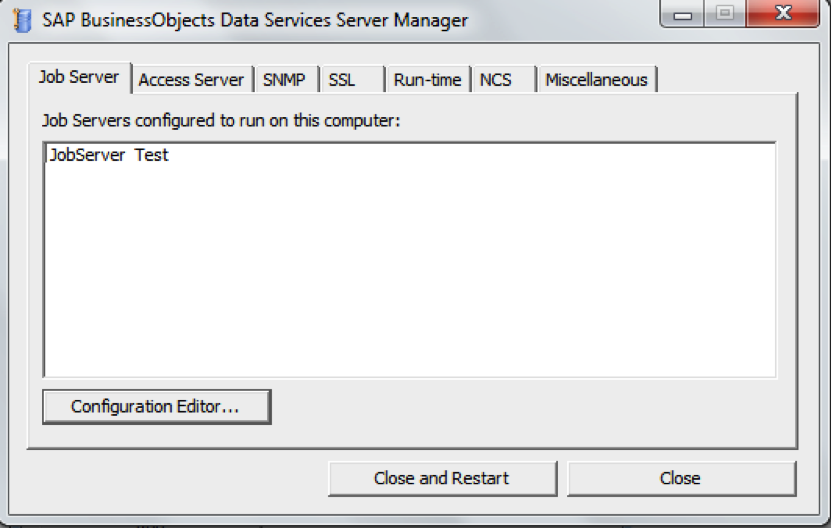
1. Go to Start Menu -> SAP BusinessObjects Data Services 4.0 SP1->Data Services Server Manager. A screen as shown below would be displayed (Figure 2.4)–
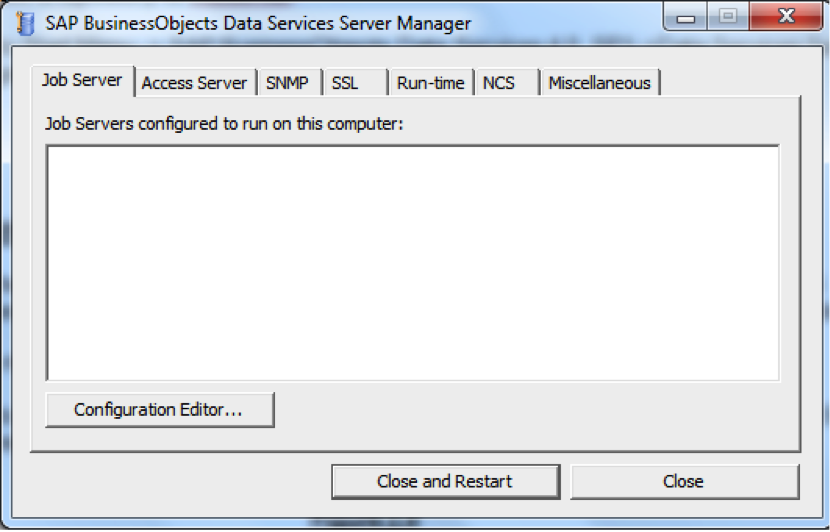
2. Click on “Configuration Editor” and the screen Figure 2.5 would be displayed.
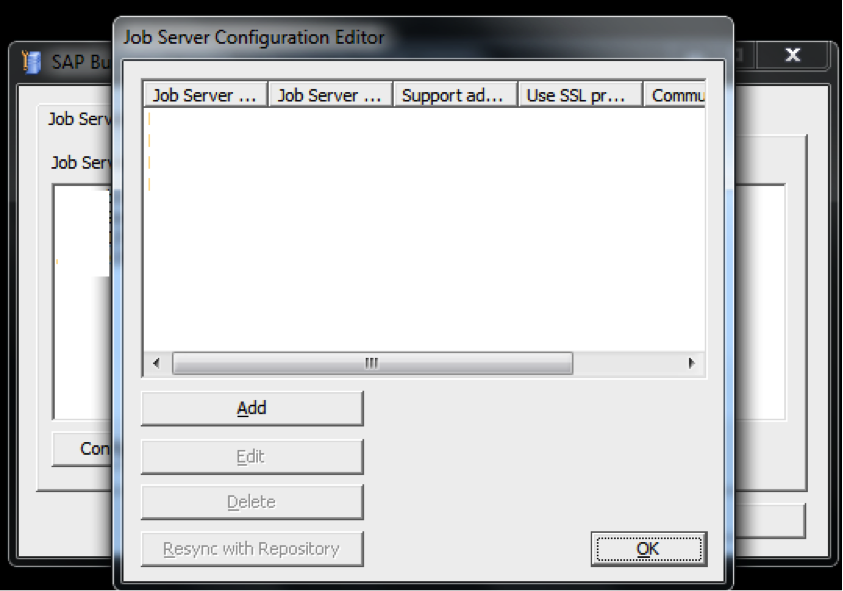
3. Next click on “Add” button and below screen would be displayed (Figure 2.6)
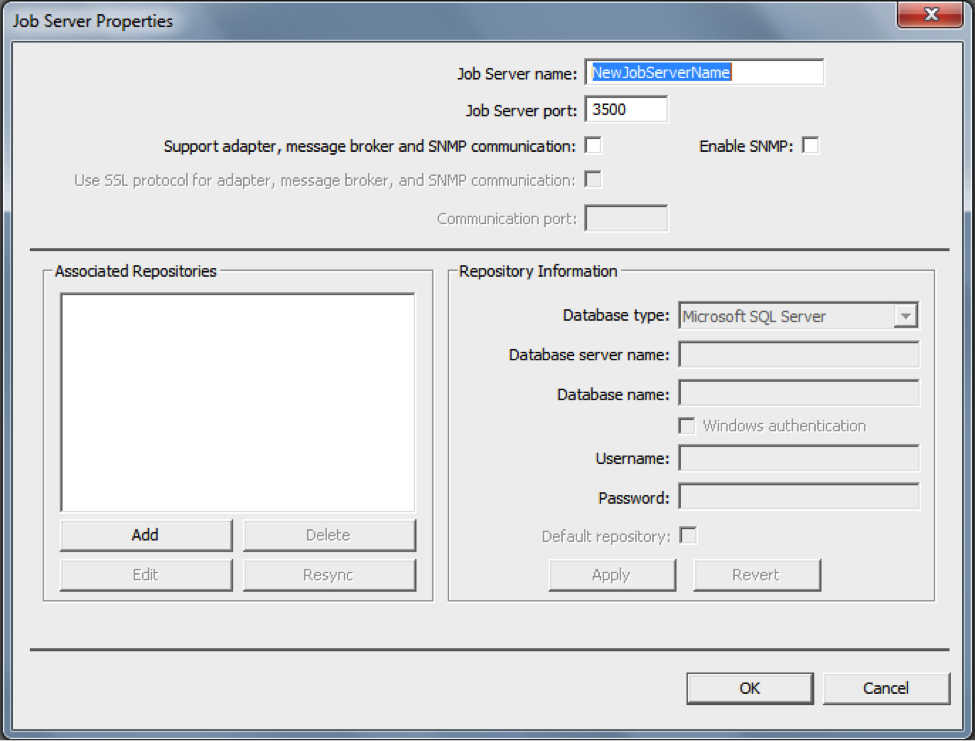
4. Click on “Add” button on the “Associated Repositories” label to enable the options in the “Repository Information” label.
5. Enter the credentials as shown in Figure 2.7 and click “OK”.
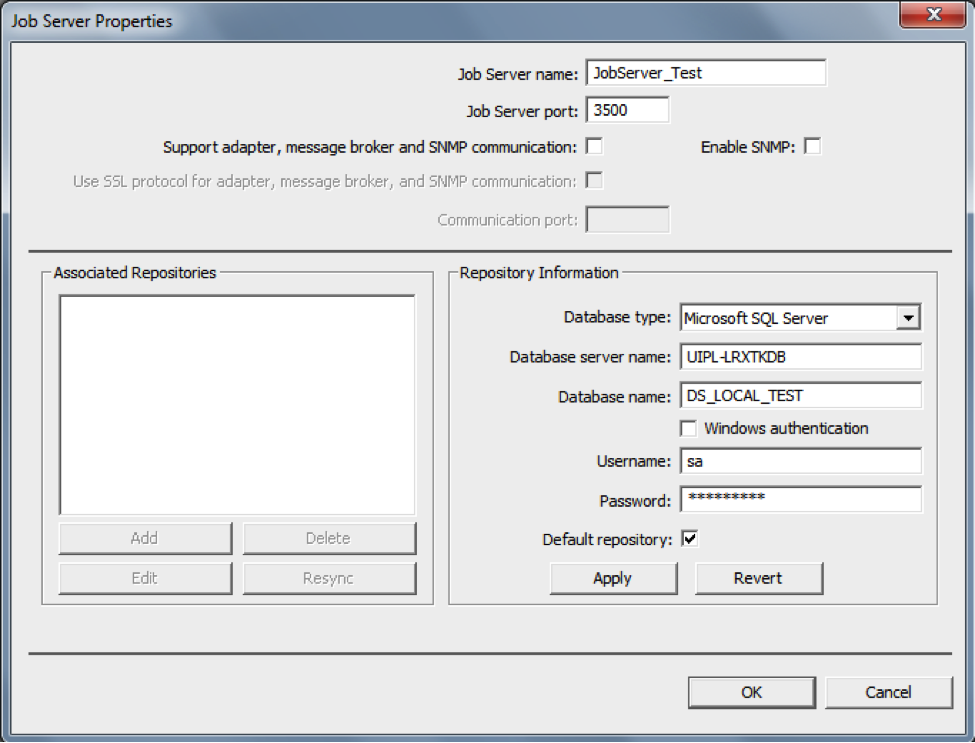
- Job Server name – Enter any name that you wish to assign for the Jobserver. Example in the above figure JobServer_Test in this case.
- Job Server port – By default it is 3500.If there occurs any error assigning the port as 3500, then try to increment the value like 3501 or 3502 or higher.
- Ignore the Check boxes and go to the label “Repository Information”.
- Database type – Select the database in which you created the repository. Microsoft SQL Server in this case.
- Database Server name – Name of the machine/server where database resides.
- Database name – Name of the database which was created for local repository.
- Username and Password – Same user name and password used to log in to SQL Server database in which the local repository database resides.
- Leave the “Default repository” check box as is.
6. Click on “Apply”.
7. The “Associated Repositories” box would be automatically populated with the concerned repository name.
8. Click on OK.
9. Click on OK and we get a screen as shown in figure 2.10
10. Click "Close and Restart” to finish the JobServer configuration for the repository created. This will restart the BODS Engine and dialog box may be popped confirming it would restart the engine.
Please ignore all the other Tabs and buttons for now. Those would be a part of Advanced BODS tutorial
In the next part of the article, we will learn how to register the repository with CMC.