Working with Informatica Flatfiles

In this article series we will try to cover all the possible scenarios related to flatfiles in Informatica.
Let us look into the first requirement
Requirement 1:
Generate respective flatfiles containing employee information for each department. That is, for each and every department we will generate flatfiles in a dynamic manner from our employee database table (we won't have to know how many departments we have beforehand).
- Select Source Analyzer and Import the Relational database table emp.
- Next open the Target Designer.Select the EMP table, from the Sources of your Informatica folder found on the Repository Navigator.Just drag and drop the EMP table to the Target Designer. Next Edit the target definition as follows.
- Rename the Select table to FF_EMP_DEPTNO.
- Change the Database type to Flat File.
- Change the desired Flat file information fields. In this case we set it to Delimited.
- Click on Advanced Flat file information and set the Column Delimiters as ,
- Next select the Columns tab. On the right-hand corner click the icon Add FileName column to this table. A new port or column FileName with string datatype is created.
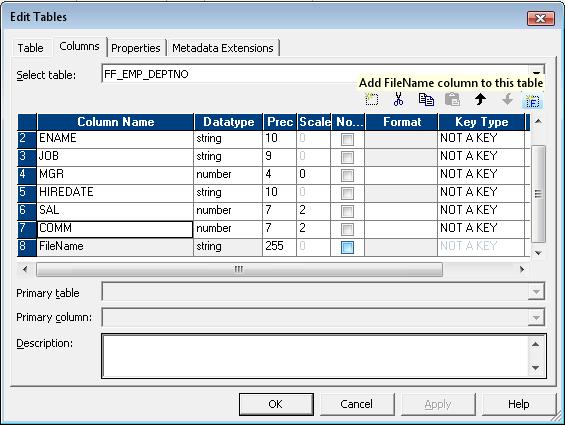
- Apply the above target definition changes.
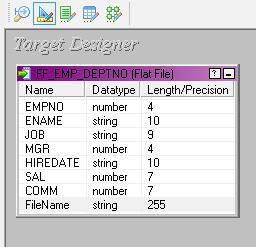
So our source table EMP and target flatfile instance FF_EMP_DEPTNO are now ready, so we are good to go to set the mapping logic to generate dynamic flatfiles per department.
Check the Informatica mapping screenshot as below:
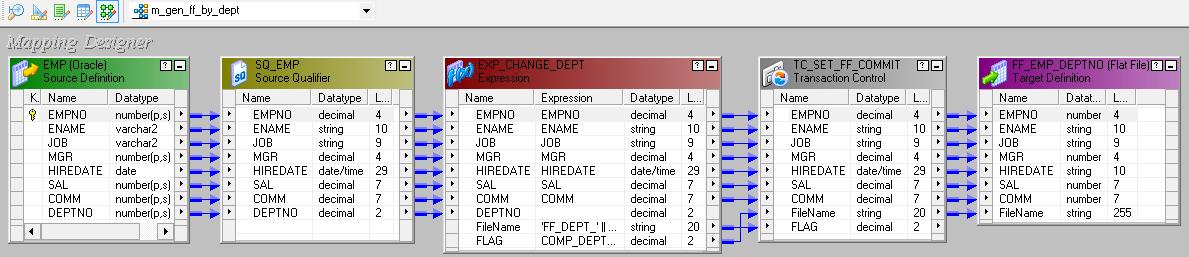
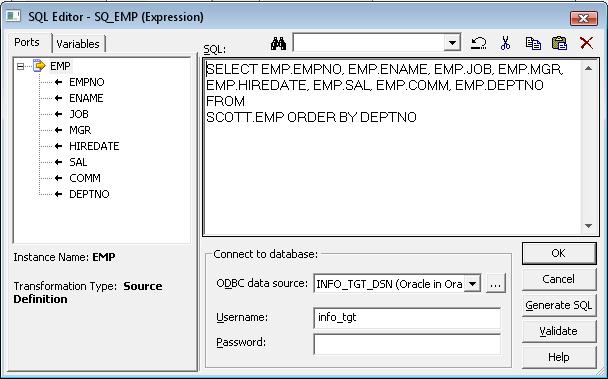
- First of all sort the employee records based on the deptno in the source qualifier.
- Next in the expression transformation we need to flag records based on the change in deptno. In the expression transformation add the following ports:
- FileName as Output Port
- COMP_DEPTNO as Variable Port
- FLAG as Output Port
- PREV_DEPTNO as Variable Port
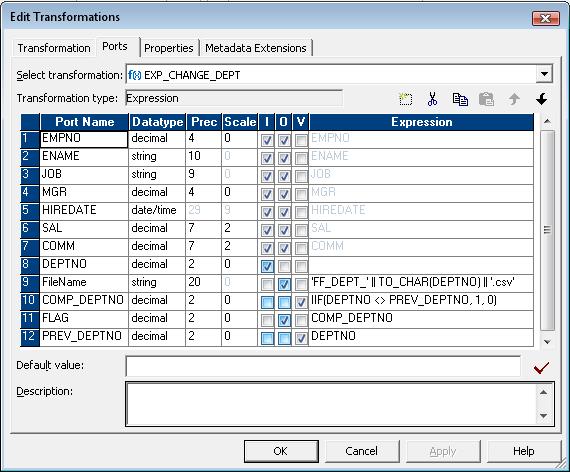
Now find the expressions for all the above ports of the expression transformation.
FileName:-
'FF_DEPT_' || TO_CHAR(DEPTNO) || '.csv'

COMP_DEPTNO:-
IIF(DEPTNO  PREV_DEPTNO, 1, 0)

FLAG:-
COMP_DEPTNO

PREV_DEPTNO:-
DEPTNO- Now find the Transaction Control Condition, based on which the commit is issued to place the end of file for one dept and opens to write new file.
IIF(FLAG = 1, TC_COMMIT_BEFORE, TC_CONTINUE_TRANSACTION)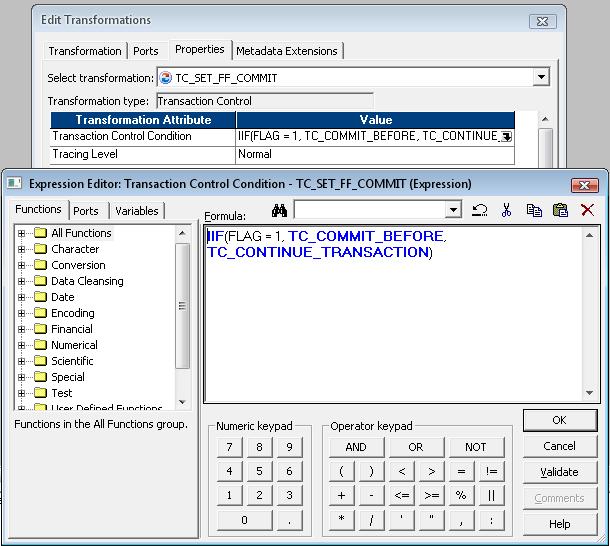
So when there is change in the deptno, then the commit is issued to end the current file and a new file is open to write emp information of new deptno.
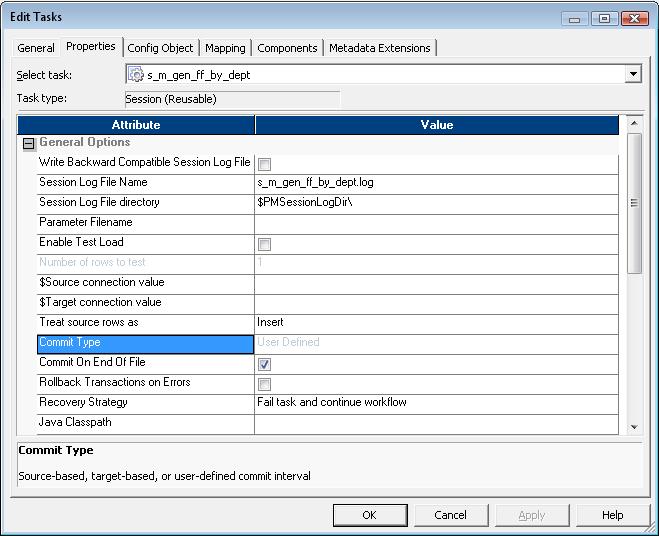
Also note that with the introduction of Transaction Control Transformation the Commit Type is set to User Defined.
We are done with our first requirement.
Requirement 2:
Now we try the reverse scenario i.e. load the database employee table with the information in the form of flatfiles received from source systems. These flatfiles have employee information based on each department; Also the number of files or departments is not know in Advance. Note, that the part of the flatfile name bears the dept information that also need to be mapped to deptno column of the employee table.
Here we go:
- Select Source Analyzer to Import FlatFile definition.
- Select the option Import from File.
- Next select the file FF_DEPT_10.csv in TgtFiles directory, considering that the file we generated from our previous example will be the source definition in this case.
- Next select Flat File Type as Delimited.
- Enter FF_EMP_DEPTNO as the name of this source definition.
- Select start import at row 1, since we don't have any header record.
- Next select the delimiter as Comma.
- Next modify the field names and corresponding datatypes accordingly.
- Next in the Properties tab check the option Add Currently Processed Flat File Name Port. When this option is selected, a port specifying currently processed file name gets added to the source definition.
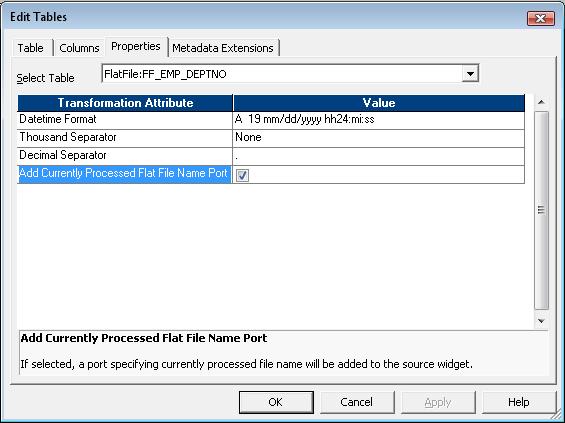
- Apply the above source definition changes.
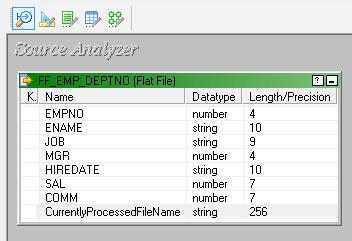
Our Source flat file definition is ready. There are also other easy ways to create this source file definition like export/import and modify emp table or create flatfile option.
- Next import the EMP table in the Target Designer. Alternatively you can drag and drop the source definition of EMP imported in the earlier example.
So our source flatfile definition FF_EMP_DEPTNO and target table instance EMP are now ready, so we are good to go to set the mapping logic to extract employee information from different department specific flatfiles.
Check the Informatica mapping screenshot as below:
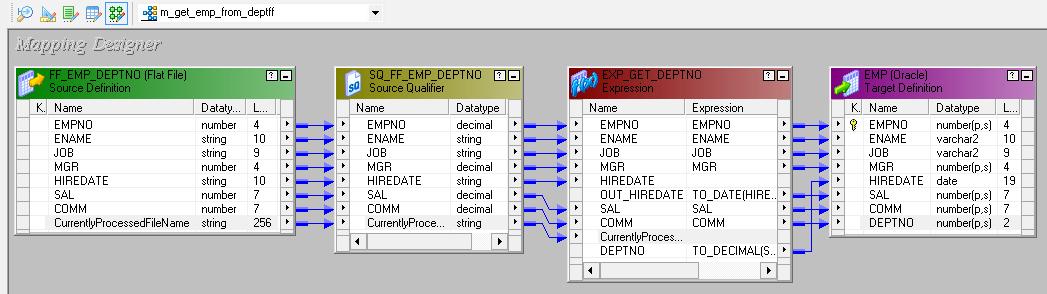
- Next in the expression transformation we will extract the deptno information contained in the filename. Also note we have treated hiredate as varchar2(10) in source flatfile definition. Hence we need to convert it to date before loading to EMP target table. In the expression transformation add the following ports:
- OUT_HIREDATE as Date/Time Output Port
- DEPTNO as Output Port
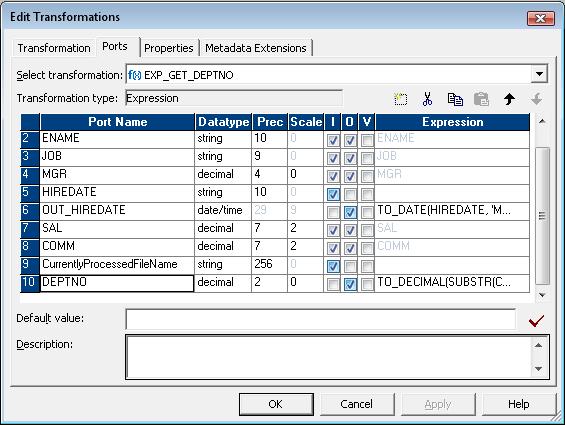
Now find the expressions for all the above ports of the expression transformation.
OUT_HIREDATE:-
TO_DATE(HIREDATE, 'MM/DD/YYYY')
DEPTNO:-
TO_DECIMAL(
SUBSTR(CurrentlyProcessedFileName,
INSTR(CurrentlyProcessedFileName, 'FF_DEPT_', 1)
)
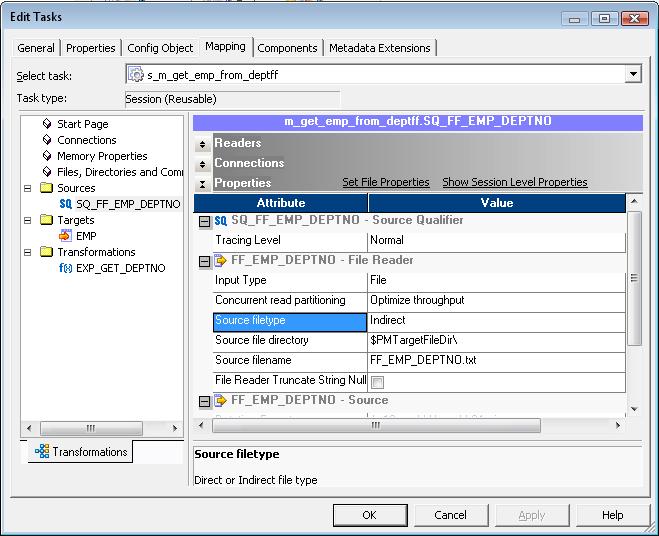
)Next let us look at Mapping tab of the Session property.
- Set Source filetype as Indirect.
- Set Source file directory as $PMTargetFileDir\, as this is currently where our file resides.
- Set Source filename as FF_EMP_DEPTNO.txt
Next comes the question of setting the filelist in the Indirect file, from where Integration service will read the files. We can use pre-session command to write the list of files present in the directory in the indirect file.
- Use a Pre-Session Command to generate the Indirect file with the list of files at runtime.
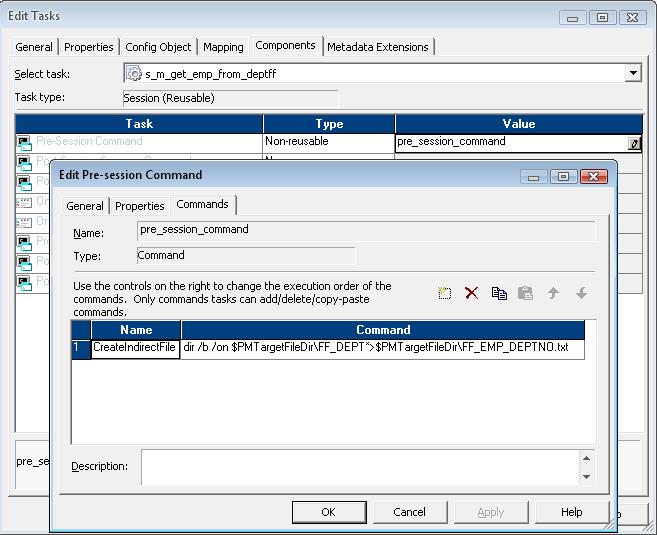
Find below a sample Windows command to do the same
dir /b /on $PMTargetFileDir\FF_DEPT*>$PMTargetFileDir\FF_EMP_DEPTNO.txtHence our second requirement is also done.